Archive for the ‘art shows’ Category
Work in Progress Wednesday
 I am making a serious effort to finish any new piece I start – and that includes backing, signature, binding, hanging system, and anything else – oh, pictures. I started three smaller pieces since retiring the end of May, and I am happy to report that as of yesterday each one is complete. Absolutely positively complete. I still have a huge cubby filled with UFOs, but I am certainly making progress. In fact, I spent last night working on the start of thread painting for the newest piece for my Quilt University class. More pics on that later – it’s looking pretty cool….but I need to buy more thread…oh the problems we have….
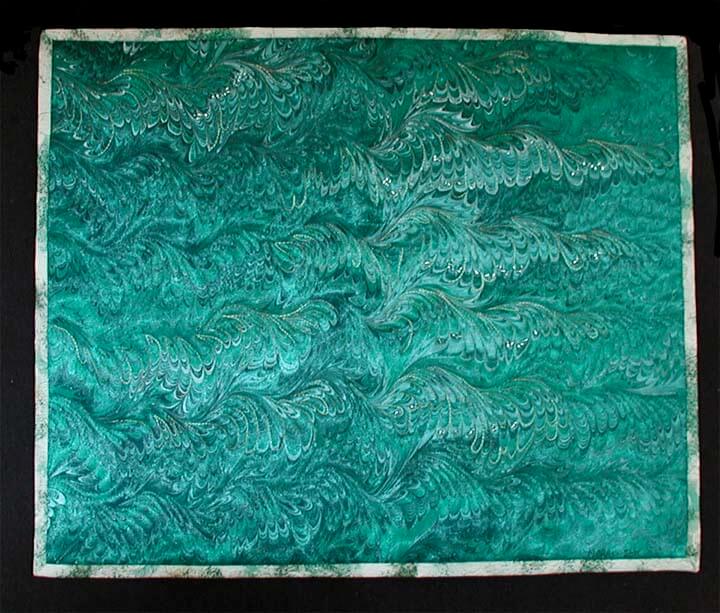
In the meantime, here’s the finished version of my rhythm piece. This started as a piece of hand-marbled green silk that I attempted to quilt about eight years ago. It wasn’t working. But my skills are improving tremendously, and as a result of one earlier class, I wanted to see if I could accept the movement in the piece with the wave design. Here’s “Rhythm of the Wave,” complete with a few added seed beads.
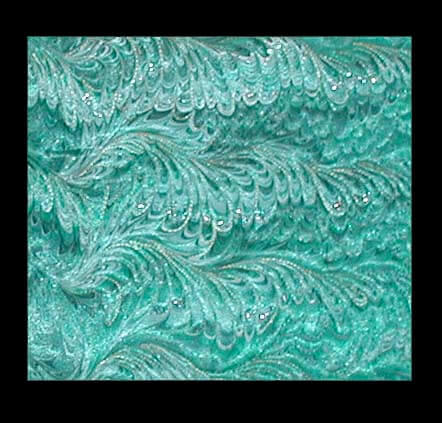 Overall I accomplished what I wanted to with this piece. It will go up in the Etsy shop in the next few days.
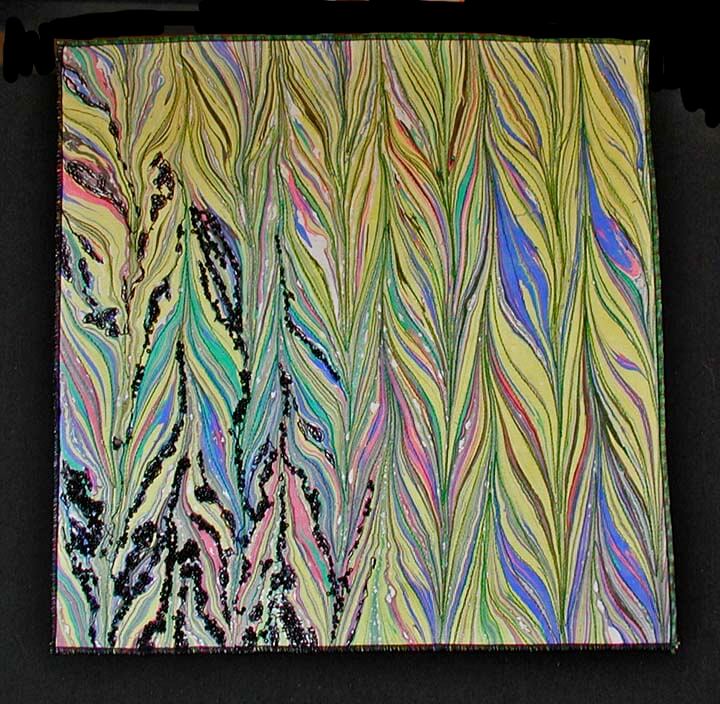
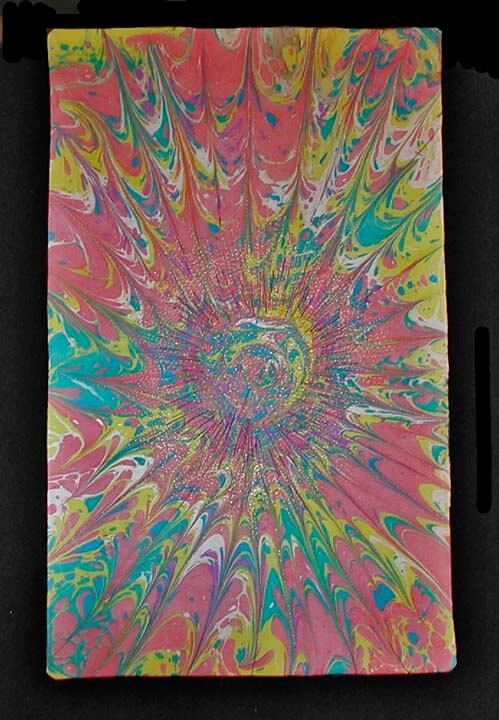
Also completed is my “Explosion” piece, based on a new marbling pattern we tried. My goal here was to accent the movement from the center of the piece outward, which I did with lots of diagonal stitching. Again, I’m pleased with the results. This wil also go up in my Etsy store.
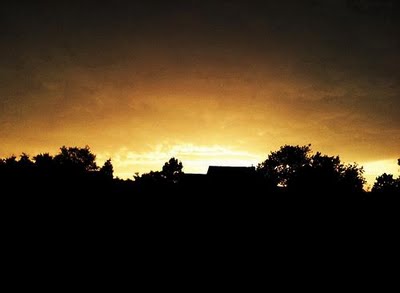
 And finally, a piece I completed for a show coming up in Tucson – there will be more details on the show once it opens. This piece is a look at the devastation of oil spills. What starts as a beautiful garden is stlowly destroyed by the effects of oil – called “Insidious Oil.”
As a trained historian, I always see the past and the future in environmental events. As a fiber artist, I feel challenged to take an ancient medium and create a piece that speaks to the environment.
Oil is an insidious liquid. We need it for so much of our daily lives, and yet it can be so destructive. The discovery of oil in our past has enabled us to have the current future. But an oil spill destroys for decades, from wildlife to the water table. This piece of fabric has been marbled, using a centuries-old process of floating paint on water. The beauty of the design reflects the joy we find in a garden, a flower bed, a landscape, or the wildlife that calls a piece of land home. But oil can run away and destroy that which is so beautiful. In a spill the oil creeps through the cracks, crevices, the waterways, looking for a new resting place. It works into the land or water and remains for decades, fouling the life around it, destroying the very fabric or life, much as the black threads do to this marbled garden.
As always, I am interested in your comments. I’ll post more on the art show once it opens and I have pictures from the reception.
Top Ten Tuesday
 Welcome to another edition of Top Ten Tuesday….never know what you’re going to find! Plus I love reading about what people are doing. And blogs about history – but I’m staying away from current politics – makes me too angry and depressed, and I just don’t need that! So here’s just the cool stuff….
Speaking of politics (and this will be the last time, I promise), when I do look at headlines, I scan Al Jazeera in English. If you depended on just the US media, you wouldn’t know nearly 75% of what is actually going on around the world. Forget your previous conceptions of Al Jazeera – this is good all-round news.
From Cool Hunting – a really interesting take on working with crystal – including rings and weapons….
 From Cool Hunting this week also comes where to play on Bora Bora. I REALLY want to go on vacation now!!
From the JPG Blog, a new contest – photos are FABULOUS!!
Antelope Canyon, Abstract #1 by Linda Clifford
Also from Cool Hunting, a short video of an art show in Mexico:
Cool Hunting Capsule Video: Liquid Sculptures from Cool Hunting on Vimeo.
From MAD Magazine, a look at the class of 2015 (hey, it’s the teacher in me…..).
Seven Steps that May Dramatically Boost Your Happiness from Dumb Little Man – some good ideas here. One step? Follow your bliss.
If you have not discovered fractals yet (and forget about all the math involved – just go for the beauty), you need to look at Fractal World. Here’s their fractal of the week:
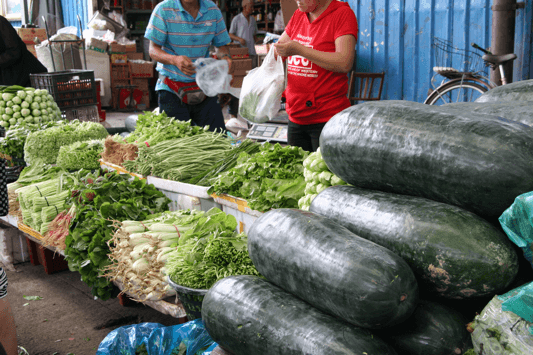
Shopping more at Farmer’s Markets more? If you follow Summer Tomato, you will be able to tour farmers’ markets around the world. Here’s Shanghai….
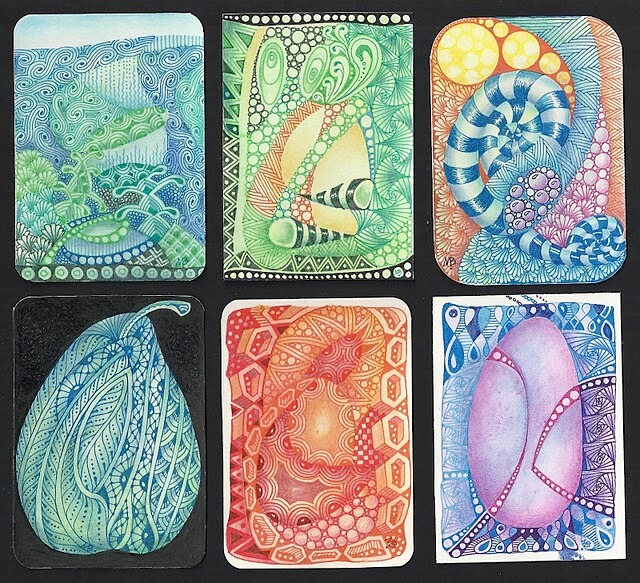
Mix zentangles, ATC’s and color, and you get Enthusiastic Artist‘s gorgeous work!
 Have a great week – send me cool stuff you find online!
An Important Call for Art Work
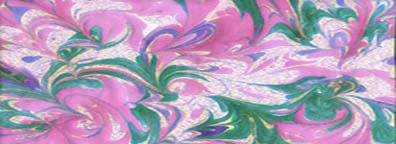 Since I updated my profile on Linked In, I have joined a couple of discussion groups through Linked In and have made some interesting contacts and done some very good networking. As a result, here is a call for work that looks very intriguing, as well as meaningful. I’m planning to do a piece that looks at oil spills. Join in and become part of the group. Feel free to share this post – let’s see if we can get a lot of artists involved. Let’s get the fiber into this show.
TIKKUN OLAM: A Restoration Project
Artists Respond to Earth’s Crises Past & Present
Presented by Alta Contemporary Art, Tubac AZ in alliance with Industria Studios in Tucson.
The Jewish Community Center Tucson, Arizona
September 15 thru October 25, 2011
Opening Reception: Sunday, September 18th 1-4 PM
In the wake of recent natural and human-made crises artists often feel compelled to respond in a tangible and productive way. Here’s your chance to be part of a group project raising money to replenish the earth. Alta Contemporary Art invites you to submit a 12 x 12 inch work of art for a collaborative grid presentation. All media welcome. Work must be exactly 12 x 12 inches, appropriate for the JCC venue and ready to hang on the wall. Work must be received no later than September 10, 2011 (see art delivery details below). Participation is free, but artists must willingly donate 30% of sales to the non-profit charitable organization selected by the group as a whole.
TIKKUN OLAM Collaborative Grid Presentation
Entry Form
Name:
Address:
E-Mail: Website:
Phone:
Title: Price:
Media:
Artist’s reflection on their submission and earth’s crises past & present (250 words or less):
Nominate 1- 3 non-profit charitable organizations you would like TIKKUN OLAM to support.
E-mail completed entry form and a JPG of your work (1MB large) to mickeybond505@aol.com
Hand Deliver Your Work:
Tucson Artists: Deliver work to Marc Leviton at Industria Studios, Saturday, September 10, 2011 between 10 AM – 3 PM or contact Marc to make other arrangements 520- 235- 0797. INDUSTRIA STUDIOS, 1441 E. 17th Street Tucson, AZ 85719 industriastudios.org
Santa Fe Artists: Deliver work to Mickey Bond by Friday September 9, 2011.E-mail:
mickeybond505 or call 505-660-4085 to schedule delivery.
All Other Artists: Deliver work to Rebecca O’Day at Alta Contemporary Art, Friday, September 9th between 3-8 PM or contact Rebecca to make other arrangements 520-869-8626. Alta Contemporary Art, 8 Calle Inglesia (across from St. Anne’s Church), Tubac, AZ.
Mail Your Work:
Mail work to Rebecca O’Day, PO Box 252, Tumacacori, AZ 85640
Work must arrive no later than September 10, 2011 to be included in the show.
Artwork shipped via mail carrier must be accompanied with a pre-paid return.
Unsold work will be available for pick up on October 29th & 30th. in the location it was hand- delivered from 10 AM – 3 PM. Shipped artwork will be returned if accompanied by a pre-paid return label.
Agreement of Entry & Liability:
Great care and respect will be given to all artwork submitted. The Tucson JCC, Alta Contemporary Art & Industria Studios and its agents do not assume liability for any loss or damage of any artwork submitted while in its possession. Your entry constitutes acceptance of all conditions and terms in this prospectus. Artists desiring coverage can do so privately through their agent or one offering short-term “show” coverage such as Artists, Craftsman and Tradesmen Insurance Program: http://www.actinspro.com.
Monday Marketing – Creating a Schedule
It’s Monday again….and it seems like all I did was read, look at emails, and set up buttons and the like. This is the “time-sucker.” So my goal for this blog post is to try and identify what needs to be done each week for marketing and set up a kind of calendar to work with.
This is what I’m dealing with: Ebay, Etsy, LinkedIn, Facebook, Twitter, Cafe Press, Zazzle, newsletters, a website, lynda.com, flickr, and a blog. I am trying to avoid doing all of this every day, because nothing else seems to get done. I’m brainstorming as I write, with the hope that by the time this post is done, I will have a plan.
Ebay: hubby handles almost all of this, including postal trips. But…if we are going to increase sales, we need more product, and I would like to help with the actual marbling. So…..marbling weekly. I do need to update the About Me page…..
Etsy: the bulk of the organization is done. But…I need to be adding product on a regular basis, which means I need to keep making things. It would be nice to have one new product up each week, if not more often. One of the goals this week is to add some of the major artwork (even though I don’t expect to sell it on Etsy, it is more exposure) on the site, as the pictures are redone. I want to continue with the circles marketing, which, if I have enough products, could be done every day – 15 minutes for this. Plus, I need to keep working…….
LinkedIn: profile is done, and I have registered for several groups for business. I have found already difficulty in keeping up with reading emails each day from the groups and have already deleted one group. This week I will determine which groups look to be the most advantageous. I also need to complete the setting up of a profile of artwork.
Facebook: I read this several times a day. I have a fan page which needs serious work, as well as Art From The Heart, which is to support healing art after the Tucson shootings in January. I have added FB buttons to my blog and this week to my website. I have read the Terms and looked at all the privacy settings. I also went through the photo stream stuff for FB and fixed photos for both the personal and fan page. I need to really think through what is going to happen with the Fan Page.
Twitter: I am finishing a class from lynda.com on using Facebook and Twitter for business, and I highly recommend the site. For #25 you can choose different trainings all available for a month at your schedule. I picked up all kinds of little tips, most of which have already been implemented. But….and this is a BIG but….the time for tweets and what to tweet. By syncing a lot of the programs, my blog appears on Twitter, FB, LinkedIn, my tweets appear in a couple of places. I don’t think I can go further with this – the tweet button is on the blog and soon to be on the website. This is one area that needs some serious scheduling. Since I use TweetDeck (which is free…), I can schedule and keep track of who’s following and what is getting retweeted. So…I’m going to use Sundays for scheduling business tweets for the week, and I will look through the twitter feed once a day to see if there’s some good stuff to retweet.
Cafe Press: I have a site, a free one, so I am limited as to the number of products I can put up. I haven’t looked at this in several months and it needs serious work. To have a store isn’t much money each month, and I could have a lot more products available, but the issue is marketing and driving people to the site. I have some great digital stuff already to go, and I need to start planning around the holidays, reading about marketing through Cafe Press, and so on.
Zazzle: Ditto for Cafe Press……both are not a high priority right now.
Newsletters: oy, it’s been months since a newsletter went out, and I have all these contacts where nothing is happening. I used Constant Contact last year for a few months, until I couldn’t keep up with the demands and school at the same time. I was happy with it, but disappointed that not many people actually read it. I need to go back to a newsletter and offerings at least once every three weeks, and more during the holiday seasons. I need to check out Mail Chimp, which is free, and I have heard people have good luck with it. I’ll try and make this a priority this week.
Website: Most of the changes to the website have been made by my wonderful web lady Suzan. I need to get a couple of buttons set up, and then do something about newsletters and contacts. I also have some pages to add on Digital Marbling (TN), and I need to evaluate “print on demand” for artwork. This is a “need to think about” topic…..
lynda.com: I have until Friday to finish my month of training. I still need to finish Twitter, and I want to get the html newsletter course done. I am not going to continue with Dreamweaver because it isn’t a priority.
Flickr: I have photos up, not all of them with copyrights, and there is a class on lynda.com if I have time. I’m not really sure what I want to do here….
And finally, my blog, Marbled Musings. I went a bunch of months with no new writing, and I’m at maybe three times a week. I need to get back to at least four times a week, and eventually every day. I have plenty to write about…and I need to stay up with my Google reader – as well as comment more on some of the posts. This is probably the biggest area for marketing that I have to schedule.
Weekly:
* Marbling fabric
* Work on Etsy products
* Sewing and other design
Mondays:
* Add Etsy product
* Add Etsy circle information
* Read newsletters from LinkedIn groups
* Read Twitter feed
* Blog post Monday Marketing
* Google reader and at least three comments
Tuesdays:
* Add Etsy circle information
* Read Twitter feed
* Blog post Top Ten Tuesday
* Google reader and at least three comments
Wednesdays:
* Add Etsy circle information
* Read newsletters from LinkedIn groups
* Read Twitter feed
* Blog Work in progress Wednesday
* Google reader and at least three comments
Thursday:
* Add Etsy circle information
* Read Twitter feed
* Blog – Thursday Thoughts
* Google reader and at least three comments
Fridays:
* Add Etsy circle information
* Read newsletters from LinkedIn groups
* Read Twitter feed
* Blog Photoshop Friday
* Google reader and at least three comments
Saturdays:
* Read Twitter feed
* Blog posting on Specials
* Google reader and at least three comments
Sundays:
* Read Twitter feed
* Schedule Tweets for the week (i.e. Etsy, Ebay…)
* Blog Sunday Stories
* Google reader and at least three comments
Goals for next week:
* FINISH LYNDA.COM
*Update “About Me” page on Ebay
* Update Etsy products, especially note cards
* Evaluate how calendar is working
* See if buttons are added to the website
* Decisions on what will happen with the Facebook Fan page
* Long-term thoughts – what to do with CafePress and Zazzle
* Read and decide about Mail Chimp for a newsletter
* Spend some time thinking about what the website still needs….
Okay, I think I have a handle on this…we’ll see next week as I evaluate how the week goes. And…I’m taking some online classes!
Thoughts??
Monday Marketing – Packaging, Part 2
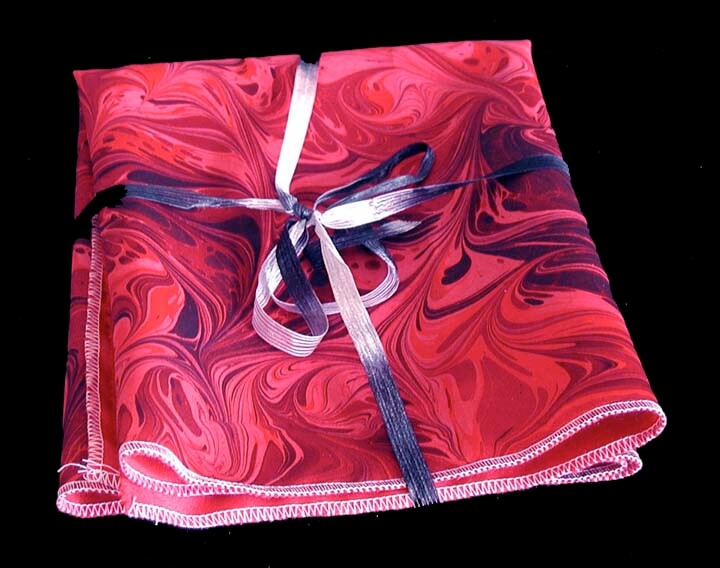
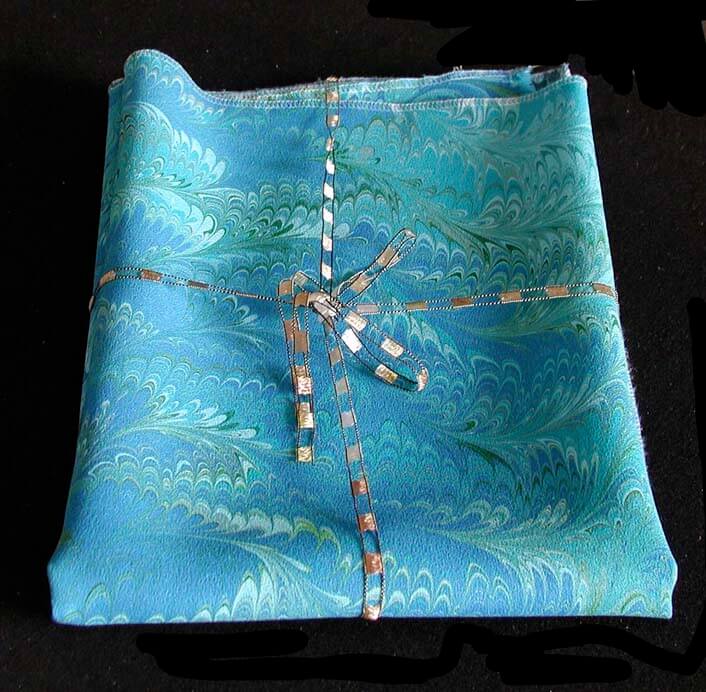
Since my post on the packaging two weeks ago, I have sold a couple more pieces of the new fabrics I listed, along with how they would be sent, like in the photo above. I also have started looking a lot more closely in the stores at packaging for different items. Now money is an issue, so there isn’t a lot to purchase “extras,” but that doesn’t mean you can ignore the packaging.
For our upcoming show on November 20, all our fabric is wrapped with ribbon, and we purchased colored tissue paper to wrap purchases – not a great as a box, but better than a plastic recycled bag. Because we deal with fabric, I looked into how my local quilt shop packages – and believe me, they do a great job! Lots of rolled fabrics by colors, which makes a great small package. For large fabric purchases they have special white bags with “ribbons” at the top, made from strips of recycled colored papers. You walk out of that store feeling special.
Moda Fabrics started the trend for “jelly rolls” of fabrics, and they have their own “Bake Shop” to capitalize on this idea.
Robert Kaufman fabrics has a great idea for packaging – certainly an eye-catcher:
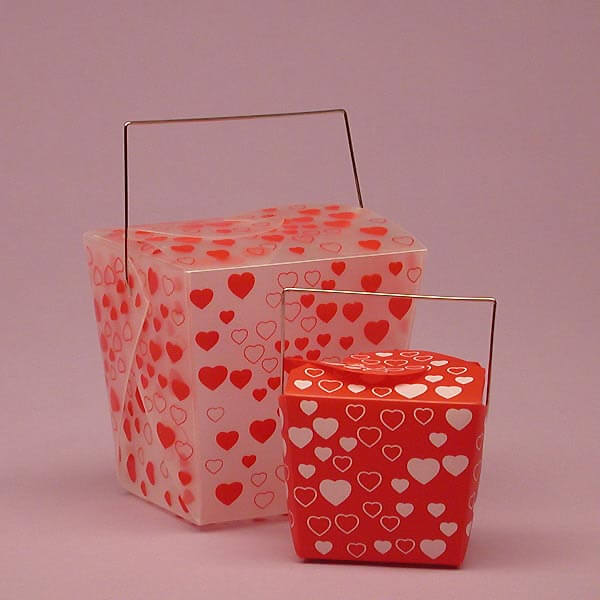
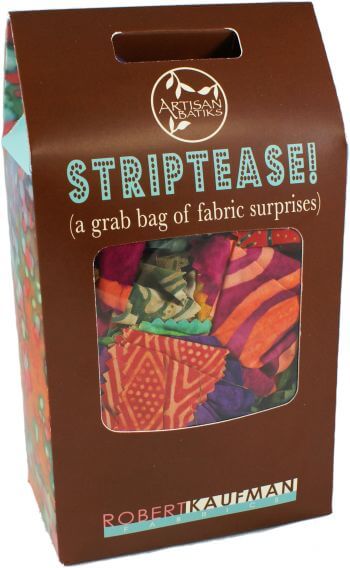 Further exploration gets us to the gift boxes from PaperMart. Loads to choose from, but I think the key is to be classy and as original as possible. I do like the “take-out” boxes.
Also from PaperMart – I like these because I could roll fabrics and stand them on end in these.
 I still have a lot of thinking to do concerning the whole subject of packaging, with less than 2 weeks to go to the show. I’ll do what I can for now, but I’m looking ahead to other shows, plus our Etsy and Ebay sales to make sure our customers get really attractive packaging with their purchases.
How do you package? Any interesting ideas or materials that you use?
You might also be interested in these posts:
Monday Marketing: It’s the Packaging, Stupid!
So Many Outlets, So Little Time!
Monday Marketing – It’s the Packaging, Stupid….
 You would think, based on a hubby in retail for so many years, that I would have given packaging more of a priority. Well, no…seems like I’m always rushing to get items ready for shows, and I neglect the packaging. That’s not to say I don’t give a lot of thought to the overall set-up of the art space…just not the packaging.
I had a bit of an epiphany with this upcoming show. I’m sitting in the meeting about the show, listening to explanations of selling, how good a show it is, and the great location. When suddenly I hear “People are gift-buying. They’ll splurge for folks back home with gifts for the holidays.”
Okay, seems obvious. Then hubby says, “Well, they’re not going to buy pieces of fabric, so I’m not sure just what we’ll bring.” That made me fairly depressed. Fabric is what we do: fabric for quilts, wearables, framing – we’ve spent a lot of time brainstorming how folks could use our marbled fabric.
Then it hit. Buy fabric as gifts for the folks in your life who do fiber-related arts. Just package it so it looks like a gift from the heart, not just a piece of fabric in a plastic bag.
Duh. Why did this take so long? We have done so many small shows over the years, including demonstrations, and not once have we packaged ourselves for gift sales. This was definitely something to think about. How could we take a gorgeous piece of fabric that to a non-fiber person just looks like extra pieces of cloth on the table? I started thinking about how I buy small pieces of art, as well as how my local quilt shop packages your purchases. I love having the “back story” or a piece of artwork. In my hutch sits a container of all the small papers of stories collected over the years.
Okay, put together the story of the fabric, the care of the fabric, and ways to contact us (hard to believe we haven’t done all of that in the past). Wrap the fabric piece with a bow so that it looks special, with the “story” tucked into a fold of the fabric. When purchased, wrap in tissue paper before bagging it.
I played on the computer to come up with something that would have contact information as well as a story about the creation and care of the fabric. With aiming at non-fiber purchasers, I need to provide as many reasons as possible while a piece of “art cloth” would be a great gift. Here’s the “story:”
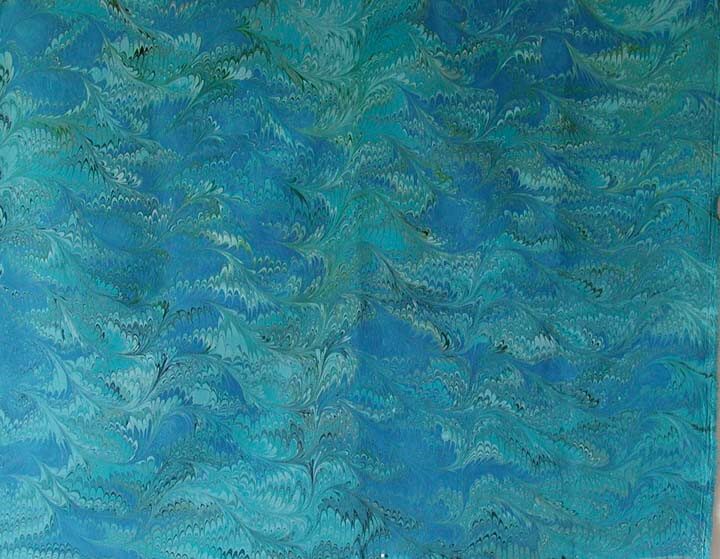
“This art cloth is a blue silk crepe georgette fabric, hand-marbled in a contemporary wave pattern, 19 inches by 21 inches. Edges are serged solely to prevent fraying of the fabric. This material has been pre-treated and heat-set, so it is ready to go for your project. If you need to clean this fabric, use warm water and a gentle soap – no Woolite or harsh cleaners, no dry cleaning. Use a dry iron and some Magic Sizing to eliminate wrinkles. Try this as a table-topper, just the way it is, quilt it, or use it in an art quilt for nature elements– lots of imaginative possibilities! This is a great pattern to quilt by itself with lots of decorative threads.”
Along with this is every contact piece – Twitter, Facebook fan page, blog, email and website. Save everything to your computer, and then all you need do is add the new story for each of your pieces.
Here’s the fabric and its packaging:
I will say the piece was up on Etsy for less than an hour before it sold, and all the new pieces of fabric packaged this way have had more views than previously in the shop.
The proof will be the show on November 20; how will people react, and will they buy?
Thoughts? What have you done to package your items? Have you noticed a difference in sales?
Monday Marketing – Art Display Systems
As promised, here is the third part of Moshe Mikanovsky’s articles on preparing for art fairs. This third part looks at display systems, complete with pictures. This is great stuff! i did the same thing at an art fair – I went around and snapped pictures (with permission) of the hanging systems I saw. This is one of those areas we just don’t pay enough attention to until it is actually time to display our work. I know that as I develop more of my marbled pieces, I am more conscious of how it should and will hang as I construct the piece. So enjoy!
Art Display Systems for Art Festivals
by Moshe Mikanovsky
This article is by Moshe Mikanovsky, Regular contributing writer for FineArtViews. You should submit an article and share your views as a guest author by clicking here.
Last time, in My First Art Fair Checklist – Follow Up, I promised that I would dedicate this post for the display system at the art festival (or art fair, whichever term you prefer). My display system was of the “Made in Home Depot” variety and couple of readers commented that I should really invest in proper, professional display system.
I do agree that professionalism is key and important in displaying yourself as an artist, the respect you give your creations, and the respect you want to get from everyone viewing, and more importantly, buying your art.
But, and here I want to list several reasons, there are quite legitimate reasons why you may want to go a different route, not the most conventional or “academically” professional:
· The budget factor. Not trying to raise the worn mantra that we are starving artists, therefore we can’t afford spending money on a professional system, some of us still have budget constraint. Whether it is your first experience doing an art festival and you want to try it out before you spend into it, or you honestly prefer to spend your budget on quality art materials and framing to create the best art you can possibly do, your budget might be squeezed and not much left for the display system – which is really, just the background for your artwork.
· Do it differently. We like to say that artists can break every rule and still make great art. So why not with how you display your art? I have seen several displays that were just different and unique and that made me want to look at them. But maybe that’s not the best thing since the idea is to focus on the art really…
· Practical means. Some DIY display systems are much easier to carry and transport and therefore could be ideal for artists who travel far, don’t have a car, live in the city and use the subway/taxi/bicycles, or all of the above. Imagine trying to carry around on top of your art also a big display system, professional as it might be.
· Everything works. I have seen it myself, and I am sure many of you can testify, that also without the professional display system, artists sell their art! There are many reasons why art is sold, or not sold, at art fairs and festivals. But not having “the right” display is only one piece of the puzzle.
OK, so with no further due, here are few of the display systems I have seen during my first art show. I was amazed with the varied options I saw with only 90 artists showing in the park! I am sure there are many more excellent ways and when I’ll find more, I will keep you updated. So here we go:
The Double Twines
Couple of simple twines tied to the tent’s frame at the top and to the artwork’s back wire at the bottom. This is the simple version of The Double Chain (see below).
Pros: Very inexpensive and simple.
Cons: Can only carry one painting, which should be fairly light. Paintings sway in the wind.

Julia McNeely www.juliamcneely.com
The Double Chain
Couple of metal chains hang from the top of the tent’s frame. The hanging of the chains can be by cable ties (as seen in the pictures) or by double length of the chain wrapped around the frame. The artwork is hung on S hooks suspended at any of the chain’s links.
Pros: Inexpensive and simple. Can hold more than one painting on long chains.
Cons: I have seen paintings sway in the winds.

|

|
The Clothes-Lines
Two clothes-lines or similar twine is stretched across the width of the tent’s wall. The artwork is hanged off the clothes-lines using clothespins. Suitable for non-framed art on paper.
Pros: Inexpensive and unique look.
Cons: Might look too DIY/crafty. Doesn’t fit for all type of artwork. In this case the artwork are prints on wrinkle-free “peel and stick” cloth, so they are well protected and suited for this hanging system.

|

|
The Leaning Boards 1
Two 1”x2”x8’ wood strips, attached at the top with metal hinge. The top is leaning on the tent’s frame and the bottom is open couple of feet wide. Throughout the entire length of the wood strips, angled grooves were made in order to hang the art from. The wood can be pre-primed with white paint, or you can paint or leave natural. For extra stability, the top is tied to the tent’s frame with some twine.
Pros: Inexpensive and simple look. Can fit several paintings.
Cons: Stability might be an issue, but it seems quite stable. Need some DIY know how to make the grooves properly.

|

|

|
John Visser, http://johnvisserart.com
The Leaning Boards 2
Wide boards, in this case old barn boards (over 100 years old!), leaning on the tent’s frame. To protect the frame, a foam material was used to wrap around the frame where the board is leaning against it, and the board is secured with some twine. For hanging the artwork, wooden pegs were installed in equal intervals.
Pros: Looks really nice! Old barn boards are not a must, although they make the difference, having a very unique look. More than one piece can be hanged on each board, and as extra touch, another board was made into a narrow table.
Cons: I won’t go out of the way to find or purchase these old boards, only if I happen to have them lying around. Stability might be an issue if someone kicks the bottom of the board. Quite bulky to carry and transport. Some DIY know how is required to install wooden pegs.

|

|

|
Jennifer Toliver, www.jennifertoliver.ca
The Leaning Boards 3
This one is made of metal railing that already comes with some holes in them. The railing was tied to the tent’s frame with bungee cords. S hooks are used on the holes to hang the artwork.
Pros: Inexpensive and easy to install. More than one painting can be hanged on each railing.
Cons: The look is quite cold and industrial.

|

|
Nicky Hindmarsh, nickyhindmarsh@hotmail.com
The Fencing 1
A metal fencing stretched across the width of the tent’s wall, attached at the side with some cable ties. In order to make the fence more stable and not buckle in, a long and narrow strip of hard plastic was inserted throughout a section of the fence. S hooks are used to hang the artwork.
Pros: Metal fence is durable and can carry multiple art.
Cons: Also a cold look and a bit industrial.

Scott Brewster
The Fencing 2
Similar to Fencing 1, but using a plastic fencing. I have seen someone using the orange color fencing in the past and it looked terrible. So if you opt to use this option, try black or white.
Pros: simple and inexpensive.
Cons: Wear and tear might be high. Looks like a construction area.

The Framed Fence
In this more elaborate usage of the fencing, they were stretched over wooden frames, stapled all around with a staple gun. The frames are attached to the tent’s frame, and to each other, with cable ties. In this example the frames are quite tall – taller than the lower portion of the tent’s roof structure. The frame panels had to be separated with a gap in the middle to fit in.
Note the special feature of this setup – the noodles. In each wall mid-section, a twisted noodle in inverted U shape is attached to the fence with cable ties. The purpose of the noodles is to stretch the tent’s roof outward, so that any rain falling on the tent will immediately spill over and not remain on the roof. I believe this can be achieved with other systems as well.
Pros: Can hang many paintings in many configurations. Not too expensive to setup.
Cons: Seems bulky to carry and transport. Require DIY know-how.

Steven Crainford, www.stevencrainford.com
The Fencing Rollup
I personally loved this system! In this display the 3’x15’ plastic fencing roll was cut to 5’ lengths. Each length of 3’x5’ was attached to a 1”x2”x3’ wooden strip on each side using washers and screws. Couple of eyelet screws were attached to one of these wooden strips. These were used to hang the fence from the tent’s frame, using a couple of large size S hooks. Similarly it can be hanged with cable ties or bungee cords. The nice thing about this system is that each fence is rolled up nicely around the wooden strip for carry and transport.
Pros: Light and easy to carry. Inexpensive and fairly simple to assemble. Can hold several paintings, depends on the size.
Cons: Need to make quite a few of these to cover all three walls, which might defer the size advantage. If it is not required (as in the picture), then it’s less bulky.

Jon Muldoon, www.jonmuldoon.ca
The Concrete Wire Mesh
Concrete enforcement wire mesh size 4’x8’, hanged from the tent’s frame with twine. The artwork is hanged using S hooks.
Pros: Inexpensive and light weight. Can hold many paintings, depends on the size.
Cons: the wire mesh rusts very easily, so it must be treated somehow beforehand, either painted over with rust resistance paint, or some anti-rusting spray. Edges can poke and scratch you. Not heavy but still bulky to carry and transport.

Moshe Mikanovsky, www.mikanovsky.com
The Gallery-in-the-Park
A gallery hanging system is attached to a 1”x4” board of similar length. Eyelets screws are attached to the top of the board, which is suspended from the tent’s frame using cable ties.
Pros: Small and simple.
Cons: Depends on the gallery hanging system, only one row of paintings can be hanged. Might be more expensive than the average DYI system, but needed to be compared with other professional systems.

The Coat Hanger
This DIY coat hanger style system is constructed of a 1”x1”x8’ wood strip attached to a small board for a base. The base is held with a small weight and the top of the strip is attached to the tent’s frame with wire. Hooks are attached to the front in intervals.
Pros: Simple and inexpensive.
Cons: Does not look very stable or fit for big and heavy paintings.

|

|
Sheetal Sehgal, www.sheetalsehgal.com
The Stained Glass Window
This system is quite unique. It is constructed of a wooden frame, and metal construction built together especially for this purpose. It’s easier to have a look at the picture and see what I mean. The final look is of a stained-glass window without the glass. The artwork is suspended off the metal-work with S hooks.
Pros: Special look that gave the booth a unique design.
Cons: Need to be very handy to create. Heavy for carry and transport.

Liz Menard, liz.menard@utoronto.ca
As you can see, there are so many creative ways to hang your art in a tent! I didn’t even mention The Easels Field and The Professional Grids. I am sure there are many more ways out there. True, being professional is very important and everyone should strive to present their art in the most professional way possible but if you are on a tight budget, want to try what an art fair is all about, or just want to be a bit different, why not try one of these displays? And if you have more ideas, please share them with us; we would love to hear from you.
Cheers
Moshe
PS Thank you to all the artists who allowed my wife and I to take pictures of their displays and use them in this post.
———————————————-
This article appears courtesy of FineArtViews by Canvoo,
a free email newsletter about art, marketing, inspiration and fine living for artists,
collectors and galleries (and anyone else who loves art).
This article originally appeared at:
http://fineartviews.com/blog/20870/art-display-systems-for-art-festivals
For a complimentary subscription, visit: http://www.fineartviews.com
———————————————–
Monday Marketing – Art Fair Checklist
Two weeks ago I reprinted a post by Moshe Mikanovsky on preparing for an Art Fair. It’s a great post with lots of things to think about if you are new to doing art fairs. Here’s his Follow-Up Checklist. There is great information here based on his personal experiences. Next Monday you’ll read about the hanging systems he is using and is thinking about using. Enjoy!
My First Art Fair Checklist – Follow Up
by Moshe Mikanovsky
This article is by Moshe Mikanovsky, Regular contributing writer for FineArtViews. You should submit an article and share your views as a guest author by clicking here.
Wow! The time I had preparing and doing my first art fair was just amazing!
After writing “My First Art Fair Checklist”, I received many comments with some great tips, encouragements and well wishes. And it was well received. I felt that many of you were there with me, if not in presence, then in mind and spirit. I also had several visitors to my booth who commented on the previous blog post. That was awesome!
Ok, so now let’s get to business. Many of you were waiting patiently for my report about the show and how it went, so with no further due, here it is, my Lessons Learned:
Artwork
- I believe that my artwork spoke for itself. I received many excellent comments, so that was good.
- I didn’t sell anything though. Yes, I am not afraid to admit it, the same as I would not be afraid to tell you how successful I was selling million of dollars worth of paintings… I wish. Trying to understand though why I didn’t sell, I came up with a few ideas:
- My niche art didn’t fit most of the buyers. My art is based on religious subject matter or inspiration from my upbringing in Israel. Although I have paintings of trees and of the Zodiac, the other paintings might be a turn off for some.
- My unique style (which I did receive many comments on it) is still needs to be “understood”. Presenting for the first time, it takes time to build followers who not only like but also buy my art.
- Work on paper. I was told that people buy more art on canvas rather than on paper. All my art is watercolor on paper. I did have 4 small paintings in watercolors mounted on panel and covered with resin, which many people really liked, so I am thinking of creating more of these in the future.
- The show itself. Although the organization of the show was outstanding, I heard comments from other artists that were disappointed with their sales. One even told me that the show attracts many dog-walkers and baby-strollers and not the real art-buyers. But, I did see people buying art. So it might be only personal observation.
- Not enough marketing on my part. As much as I tried to market the show to everyone I know, only a few of my existing contacts showed up. I relied too much on the exposure of the new crowds that had never seen me before.
- Attraction of my tent. Although I really liked the end result of my tent, which you can see in some of the pictures I took, I did get some feedback from my mentor that my tent was “too clean” and not strong enough in a way of attracting people in. Maybe it’s true, I still have to think about it a bit more…
- People like to “find hidden treasures”. I saw how everyone loved sifting through boxes of matted artwork. The art that they didn’t see on the walls but had to go through in the box was hidden from them and attracted them. I will definitely try to have some in the future.
Tent
My tent worked out really nice! We did have prediction for rain, so I sealed the seams of my roof several days beforehand. I was very anxious about it, because I didn’t know if I did it right or not, but in the end, it was great. We only had rain at night between the two days of the show and water did not leak through, so I was very happy. One of my neighbors though had water leaking into her tent and she realized that the tent was not water resistant.
Putting up the tent and taking it apart was not too bad, although in hot and humid weather it was quite steamy inside. I kind of envied the artists who came to a ready tent that they rented. On the other hand, I saved few hundred dollars by borrowing mine and putting it up myself.
Although the organizers asked everyone to bring a white tent, several artists opted for other colors. Either they had the tents already or borrowed them. I still think white is the way to go.
Very important – before going home, always make sure that not only your tent is secure with weights in all 4 corners, but also all your neighbors on ALL sides are secure. And if they are not, insist that they don’t leave before they make sure it’s secure. Otherwise you might come the next day and see that your tent is standing nicely but the tent next door just moved a bit and maybe even collapsed on yours… So do yourself a favor, don’t be shy, befriend your neighbors, and insist that they do their job to make everything safe.
Display system
Hmmm, well, what can I say? As this was my most challenging item before the show, it was also most challenging during the show… Let me tell you why. The wire mesh I used was easy to install and looked quite nice. The problems started with the overnight rains and humidity in the air. The iron mesh rusted very quickly. At the morning of the second day I had to wipe all three meshes and the rust stains on the wall of my friend’s tent will never come off (we tried CLR but it didn’t work… maybe washing it somehow?)
I still got poked and scratched by the pointed edges of the wires.
The S Hooks had a mind of their own and it was sometimes a challenge to straighten the artwork. Drove me a bit crazy all the time, especially when it was windy and each painting was a bit tilted.
I saw many other excellent ways to hang the art. My next article will be dedicated for the other great display systems. It’s a topic that needs its own post.
Marketing
I handed out many business cards and postcards, so I am happy about that. I am sure I will have some returning clients for my paintings and/or my Giclee and licensed products (mainly the Ketubahs).
Many people looked through my portfolio, so I was happy to have it.
My little “marketing surprise” was the shirts my wife and I wore during the show. That goes to one of the discussions in the last article’s comments, regarding what to wear (professionally vs. fitting the crowds). I opted to do it like in trade shows – wear a white shirt with my logo and name, and my website on the back and sleeve. I also had a 3rd shirt on the table, which I put out for a drawing for all the people who signed my guestbook for my newsletter.
And speaking about a logo – the image of the Leo from my Zodiac painting was everywhere – my business cards, my tent’s sign, my shirt, the cover of my portfolio, and online it’s on my blog , newsletter and my avatar as well.
Other supplies
In addition to the list I published last time, I got some new items: 4 weights to secure the tent, work or garden gloves, first aid kit with band-aids and Polysporin, business cards’ and fliers’ holder, pouch for money and other valuables, bungee cords, camera, paint-pen to fix scratches on frames, measuring tape…
I want to thank everyone for their support. As a way of appreciation, I put together a checklist form, “My Art Fair Packing List”. Feel free to download it and use it for all your future events. And be nice, play it forward, and share with others.
Cheers
Moshe
———————————————-
This article appears courtesy of FineArtViews by Canvoo,
a free email newsletter about art, marketing, inspiration and fine living for artists,
collectors and galleries (and anyone else who loves art).
This article originally appeared at:
http://fineartviews.com/blog/20487/my-first-art-fair-checklist-follow-up
For a complimentary subscription, visit: http://www.fineartviews.com
———————————————–
Process, Process, Process
“I pledge to talk more about my processes, even when I can’t quite put them in the in words or be sure I’m being totally clear. I’m going to put my thinking and my gut feelings out there.” Check the Process box on the right side of the blog – this is a great idea – while I talk about process a lot, this should really help to keep me focused in the blog.
My Photoshop Fridays are always about process – how I came to what I’m doing with a particular picture. I haven’t talked that much about the process in my quilts, except occasionally on Work-in-Progress Wednesdays. I spent time today on a couple of projects, so I expect to be able to do some show and tell in the next few days. I am particularly happy with my Desert Heat quilt, done now except for the last 12 inches of free-motion quilting and the binding. I am very pleased with how this worked out. You can see its beginnings:
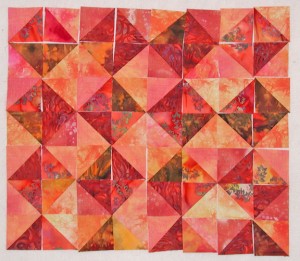 This is where I started last summer when I did my first hand-dyes. Then I started just pulling some stash fabrics to try and create a “hot” quilt to represent the desert. I am pleased to say it is certainly a hot quilt – the quilting lines remind you of the waves of heat off the cement and tarmac.
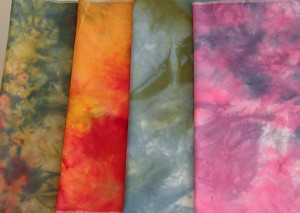 My first attempt at dyeing – in Desert Heat I used the orange-red fat quarter.
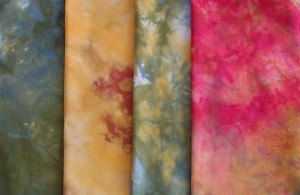 These are a little more pale than in actuality. I used the yellow and reddish one. In fact, I’m going to cut this short and go finish the machine quilting and cut the bias so I can show it tomorrow.
Then I have my lava quilt to finish – I gotta tell ya, sewing on little pieces of lava is tedious and tough! And then I want to get the straps on my purse, becasue after that it is back to the bamboo quilt – I want to enter that into a show whose deadline in September 3. I should have plenty of time…before schools tarts again….and marketing….Linda – go quilt!
The Waiting Game – Part 2
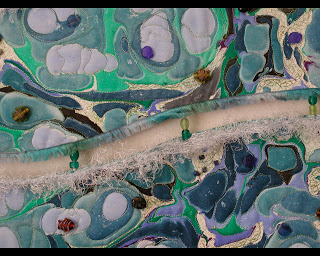
Yes, yes, yes!! The waiting game is worth it, as I got two pieces into the Fish Follies art show at the Cordova Historical Museum in Cordova, Alaska. You can view last year’s entries here. Suzan Drury is my digital partner, and she won (and sold her piece) honorable mention last year. This is my third acceptance (each of the three years I have entered), and my second fiber piece. Last year Suzan and I had two pieces accepted, and this year we just did one joint piece. I do like the fact that they look seriously at fiber entries. This pic at the top of this post is a close-up of Ocean’s Bounty – I’ll get a full-size one posted soon.
So I could say I have a track record at this show – now if I could just sell something….but I am not going to let a heavily quilted and embellished piece sell for peanuts. Plus, I made the marbled fabric to begin with. Now I’m waiting on the Fort Collins show…all fiber – we’ll see if they like “out-of-the-box” fiber!
Anne (see comments) from El Milagro Studio suggested creating a body of work and shopping it to galleries, which is what a lot of the focus will be this year. I do have a track record of getting into shows, including one rather prestigious fiber show. Some of our entries:
* Textures Gallery and Studio, Scottsdale, AZ, Fall, 2003
* “My World in Black and White,” online exhibition, 2003-2004
* “My World in Black and White,” Ontario Museum of Art and History, CA, 2003 – 2004
* Schullenberger Gallery, Jericho, VT. Artists’ Showcase, December 2003
* Leandro Fabrics and Gallery, Tucson, AZ, May 2004, September 2004
* Expressions in Textiles, juried show, New Haven, CT, August 2004
* Fabric of Legacies, juried show, Fort Collins, CO, July 2004
* Fish Follies, juried show, Cordova, AK, August-November 2004
* Art of the Sixth Extinction, WomenKraft Gallery, Tucson, AZ. Winter 2005
* Fish Follies, juried show, Cordova, Alaska, July – November 2008
And now – Fish Follies, juried show, Cordova, Alaska, June – November 2009!
Here’s hoping for more!
New to Marbled Musings? Here’s a sample of what we’re about!
The Waiting Game….Is It Worth It?

Now it’s waiting time. I have entered two shows in the last two weeks, one in Alaska and one in Colorado. There are several others that would be appropriate for my work (both fiber and digital), but too many entry fees really add up.
The Alaska show is one I’ve entered twice before and been accepted to, entry fee is reasonable, but I haven’t sold anything yet. My digital partner has sold pieces every time she enters – just not one of “our” pieces! So at least the odds for acceptance are in my favor. My first piece was an art quilt, second pieces were digital art, and this year’s entry is a very involved art quilt.
The Colorado show is also one I’ve entered and been accepted into, and there’s no entry fee, but a 30% commission. Haven’t sold anything, and haven’t entered in the last couple of years. So I’m hoping my work is unusual enough to be noticed. Once I hear something, I’ll post more.
I guess the questions for all of you are those of necessity. Do we need to have a juried list of acceptances to be seen as “real artists?” Do you choose which shows each year you want to enter? Do you set a budget specifically for art shows? Are there some shows you have more luck with?
Inquiring minds really want to know….and…wait for it….it’s the weekend!! More time for art!
First time reading Marbled Musings? Check out the Overview.
Last days for Contest
