Archive for the ‘quilting’ Category
Sunday Stories – Misfiring Synapses
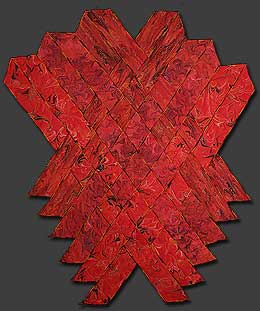
I’ve had a couple of people come by and see my “Misfiring Synapses,” a piece I did on depression. It’s getting mixed reactions. Some people don’t get it because it’s fiber and doesn’t look like their mental picture of fiber – which is a typical quilt. Some don’t get the imagery in the abstraction, and that’s okay. But most people who do get it love it – they say it’s exactly what they figure their mind is going through. Which is what I was aiming for in its creation. I think if you’ve suffered from some form of depression, especially situational, you get the idea that something is ultimately not right in your brain.
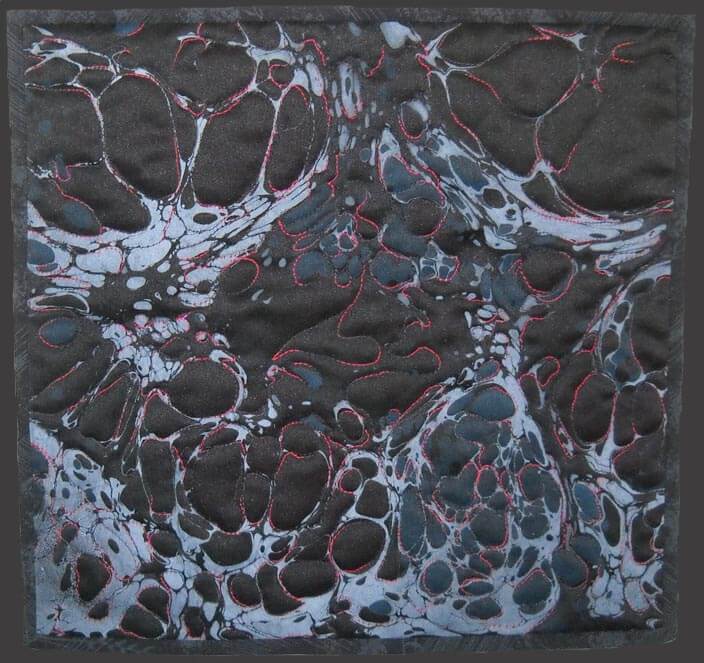
When the call for this show came up, I spent a lot of time trying to think 1) how I would interpret it, and 2) how I would do it in marbled fabric. We had done some black satin a while back for a different piece, and it was pretty organic in form. As I was going through fabric, I happened on the piece and thought it looked quite a bit like a nerve ending. Very dendritic. So I went with that piece, and I wish I’d taken a picture of the satin without anything done to it.
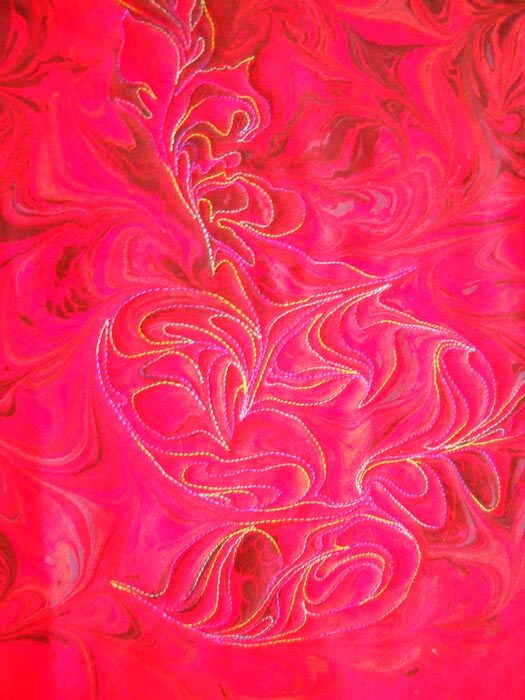
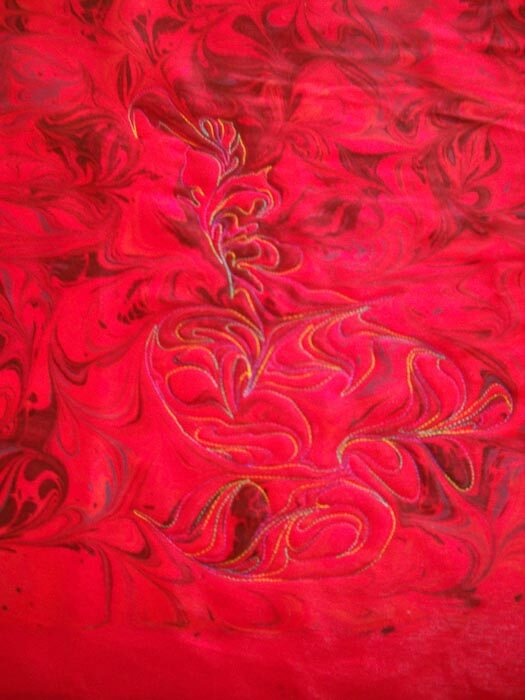
I wanted the effect of an irritation, like an itch that just wouldn’t go away. As I was checking through my threads, I saw a Rainbow thread from Superior that was a red/purple/black, and I thought it might work. When you look at the above photo, you can see that the red shows, and then it looks like there isn’t other thread. It looks like an irritated part of a nerve. Just what I wanted.
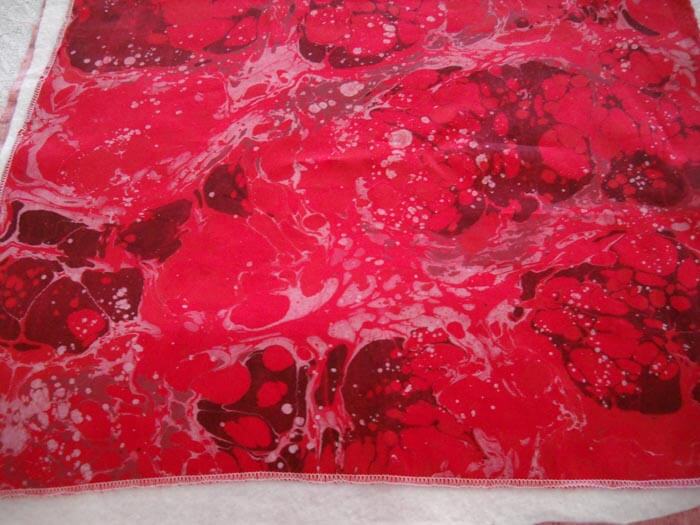
So I had the center of the piece, but I wasn’t sure how to develop the “looking inside” aspect – I wanted it to feel like you were looking deep into the brain and seeing just this one little piece of irritant. I had two different types of red fabrics, both satins, and both with some freeform designs, again very organic.
I did a lot of the same type of quilting, following the black, this time with a variegated series of reds. Lots of bubbling texture resulted. I did the same thing with the second piece of red. What I seemed to have were two different areas of the brain, both pretty irritated.
I also had some more great black satin, this time in more formal marbled patterns, and I figured this would work really well for the outer shell of the brain, all the “gray matter.” I continued with the curved pieces that overlapped each other, much like I would imagine the parts of the brain does. Each of the curved pieces had serged edges with the idea of the gray matter and all the wrinkles you see in the surface of the brain. There were a lot of issues in connected these pieces. I had to work from the design wall to the flat table, and then to the sewing machine, hoping I could get all the pieces of the puzzle together. My intriguing back of the piece started to look really messy, so before it travels at all, I will add another backing to it, to make it a lot neater.
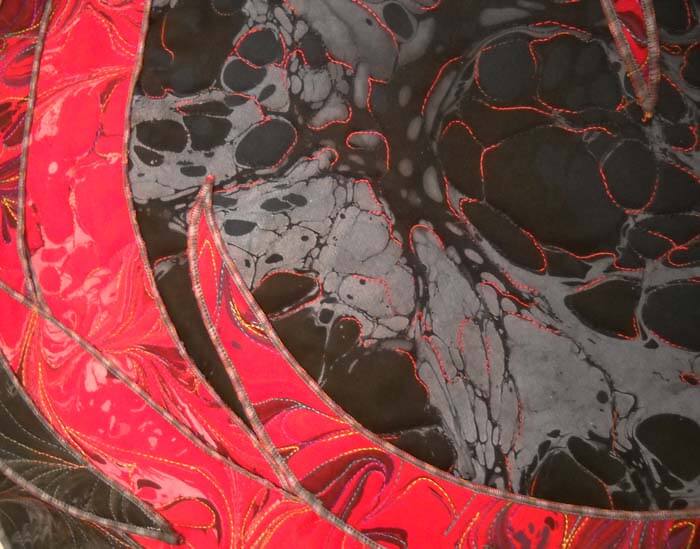 You can see a lot of the overlaps and edging in the above picture. What I particularly love about the piece is that it works both from a distance and close up. From a distance you see this really interesting organic shape, and the colors are somewhat disconcerting and upsetting. Close up it looks like it is undulating.
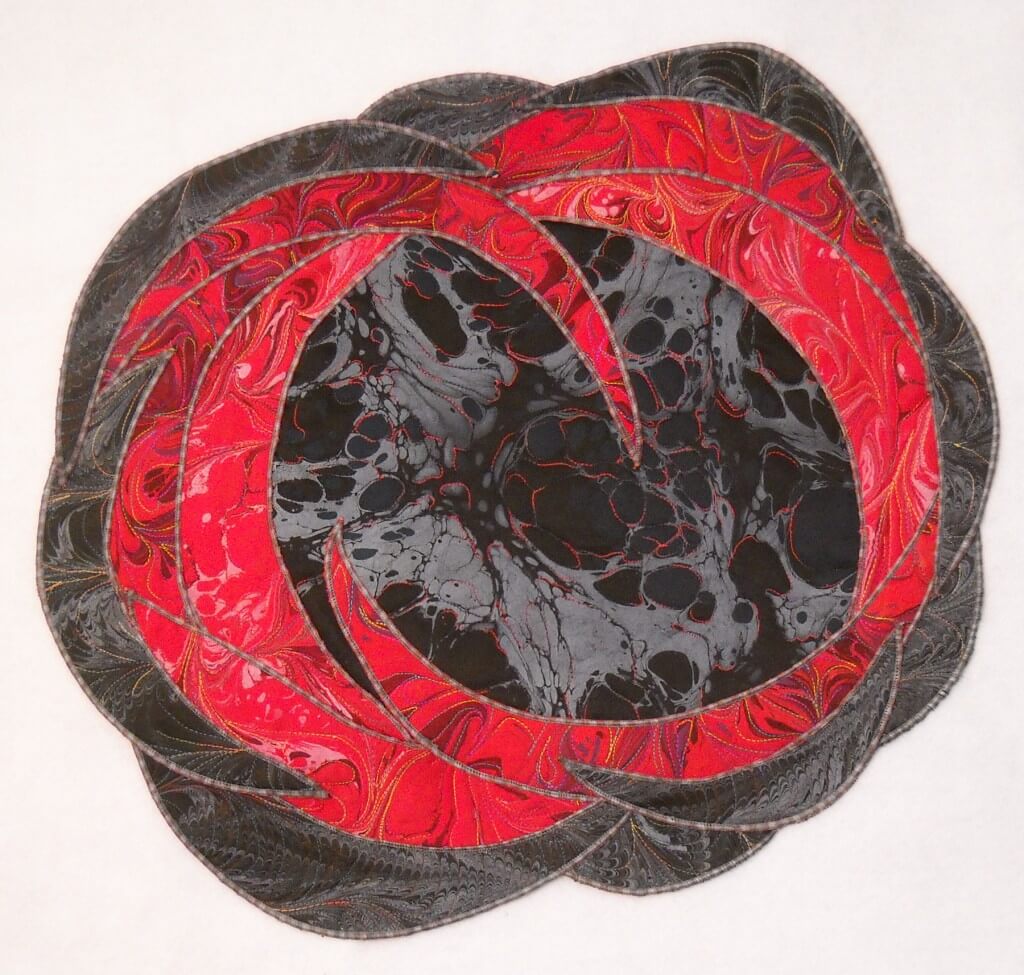 I left it nice and big for you so you could examine all the various parts of this.
17 by 20 inches, available for sale.
Comments?
Works in Progress…..
 …yeah, I know, I’m still behind….but I have been working.
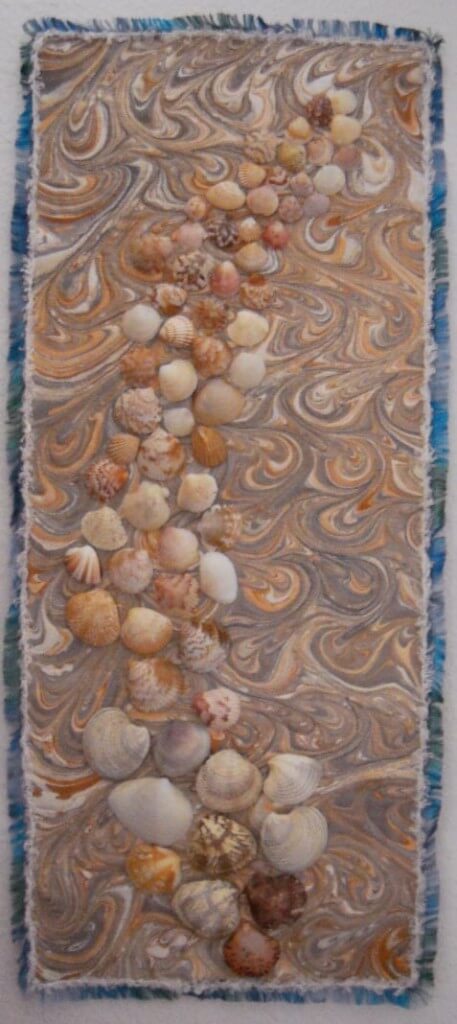
There are a bunch of things going on, one of which is finished and waiting to go up in Etsy, and the other two in various stages of completion. The completed piece started in a traditional clam shell pattern that I put aside in my stash. Since most of the small quilts i have done as practice pieces have all sold in Etsy, I figured to do a few more. This is a great piece of fabric, and it reminded me of the few times I went clamming on the Eastern Shore of Virginia and the Outer Banks, especially the bay side. So I just let the design guide my free motion quilting.
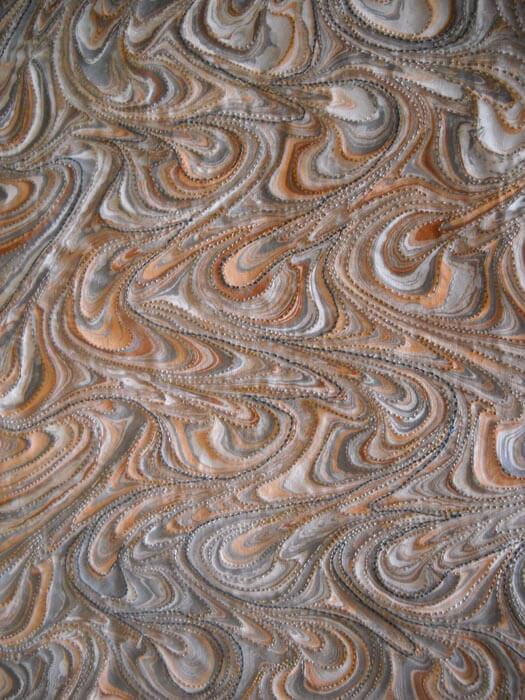 Quilting pieces like this is so zen-like, and I love the effects.
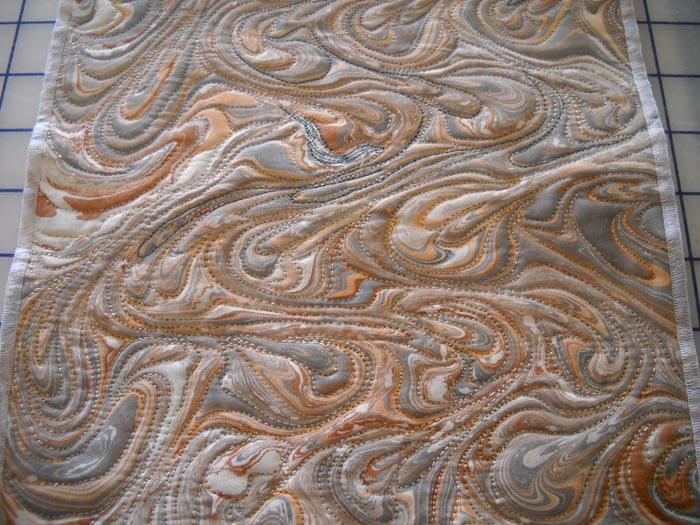 I serged the edges in a fine stitch, just shy of being a rolled edge. I knew I was going to add some yarn to the outer edge to simulate the foam of waves receding. But the piece also needed some focal points. I was looking around to perhaps buy some small clam shells and not having any luck (had no idea that there are so many packaging types labeled “clam shell”). It finally occurred to me to go to my second mom, who is a fanatic when it comes to shells…..she has LOADS of clam shells, so I had my pick, and then hubby added clear nail polish to bring out the subtle colors.
Problem was I still felt I needed some blues for accent, so I spent about an hour sewing on a variety of blue seed beads…..and it looked terrible. I pulled them off, only to realize I shouldn’t have any problem with beads coming off other pieces I do…they were secure. Went to get the white yarn and saw some cool blue yarn I have used in the past to simulate water. So…….got the fabric glue and went to town on the edges. I like the final result – don’t love it, but I do like it, and since it’s really a practice piece, I know someone else will like it too. Here goes:
Next up are some small squares and rectangles from about 10 years ago, as I wanted to do something with geodes. I pulled these out again to see about small Etsy pieces. I laid them out and realized I had kind of a cool wall hanging developing.
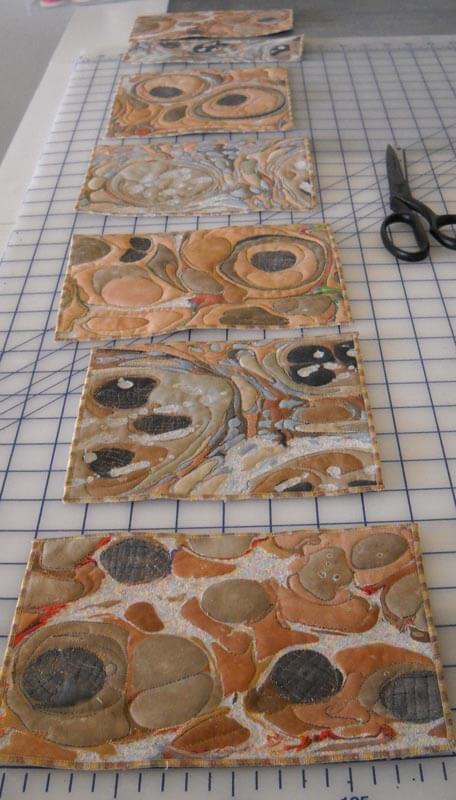 The quilting is completed on all seven, and the serged edging just kind of fades into the background, just like I like it. This is the basic stone pattern in marbling. What I discovered with them this time is I used a “micro” stippling for the white spaces, and all of a sudden I had a great sand effect.
I was thinking originally to connect the pieces with beads, but then I found some beige Offray ribbon that we marbled. Gorgeous!! What I don’t use will go up in Etsy or Tophatter.
And then I decided to look through the beads and stones to find something for the very bottom. Lava and some tree agate…..
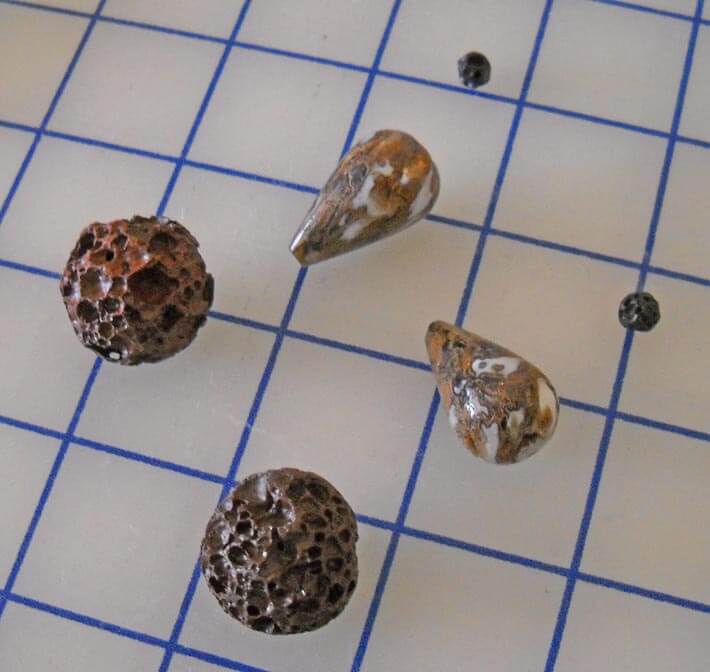 Hopefully by next week I will have a finished piece.
And then…as I am trying to work on some patterns, I started free motion quilting another piece of stash fabric. I used some Superior blue silk, with Bottom Line in the bobbin. I like the effect of not too large thread just outlining the design.
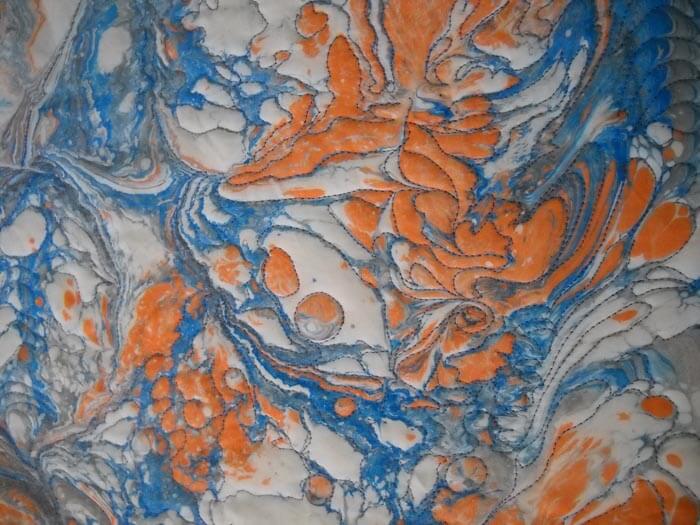 I have decided to go with an orange Rainbow for some of the piece.
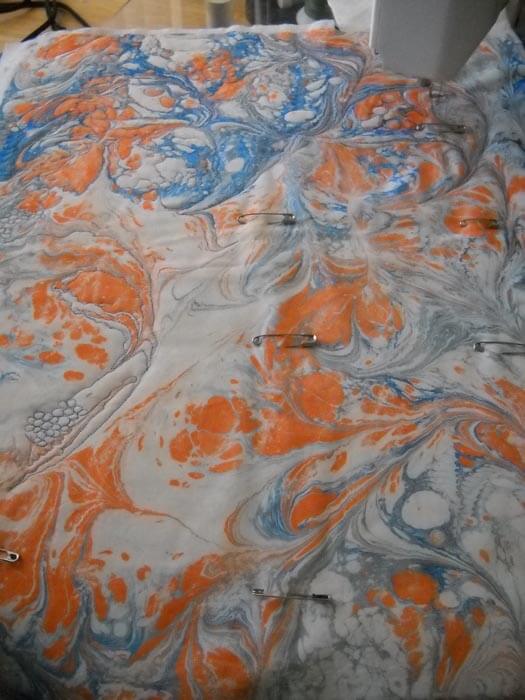 Again, hopefully, a finished piece for next week, along with a completed pattern. Lots to do!
Crazy? Maybe Yes, Maybe No……
Crossroads.
Had dinner last night with a really good friend to discover she had a rough week, nearly turned upside-down. And her former boss has medical problems (like being the 179th case of an artery problem since 1745). All of a sudden my depression didn’t seem that all important. And I left dinner feeling hugely better and came home to hit the machine for an hour, making good progress on a new small piece.
This was the culmination of about a week of wondering if my art quilt had made it into a fairly prestigious show. Antsy for the whole week, as I knew all the decisions had been made, and I was wondering why we hadn’t heard anything. I was trying to stay positive, as I believe if we send negative thoughts out into the universe, we will be repaid with negativity. Hard to do when I already was 0 for 2 in submitting work this year. I kept thinking “third time’s the charm.”
At 4 PM I had the email. Not good news. Very nice rejection letter – I’ve had loads of those over the years, especially in writing. The very first fiber show I entered I was accepted in, and I think had I been able to keep up creating work without having to worry about a teaching load, I would be in better shape as an artist, with many more shows on the resume. But that was not to be. I looked at the accepted list, and it seemed like it wasn’t the same-ole same-ole list of people who always make it into shows. That was encouraging, at least. Out of 128 entries, 20 were accepted.
Once I heard that, instead of feeling better, I think I got a little angry. Had I known that so few pieces were going to be accepted, I really don’t think I would have entered and saved the 40 bucks. The odds are definitely against you with those numbers.
The thing is, I do think this piece is exceptional. It’s unlike anything I’ve done so far, and it certainly met the theme – I felt it did. Your reaction to the stigma of mental illness. Have suffered from depression and needing drugs to help me through the last years of teaching, I know how the brain can react in stress situations. It’s nothing we can see, but it’s there. So I chose to look at mental illness from a single brain cell that is misfiring. I thought in the overall collection of pieces this would be one very organic “don’t forget the brain’s role in all this” statement.
And let’s face it, no one is working with marbled fabrics like I am. I think I was able to show with this piece that you can a textile that isn’t often used and manipulate it into a statement. It seems like “different” is what art quilt shows are looking for, and this piece was quilted to emphasize the message, not quilted just for the sake of showing off quilting skills (which is what one quilt show seemed like that I attended – and this January show wasn’t an “art quilt” show).
So now it’s a case of really thinking through what I want to focus on for the next couple of years, while I still have the vision (literally) to create pieces. While working toward a specific show and deadline works for me, especially when I have to really think through the creation of a piece from idea to finished product, maybe it isn’t where I need to be. Bottom line, I want our business to make some money. That means more online product and outlets. Smaller quilt pieces are selling in my Etsy store, so I need to create more of those (and three are right now in the works). And I want to continue to learn and take classes, which isn’t possible when I’m trying to meet a lot of deadlines. I want my work in galleries, and I want to be able to travel and do some teaching of marbling. I need to take the time and think through new possibilities.
Which means that karma and the universe may be showing me why the piece was rejected (and maybe not……).
Without further ado, here’s the quilt in its online debut. “Misfiring Synapses,” 17 x 21 inches, unpolished red satin, black satin, Superior Threads, batting, cotton backing.
PS – may just have lined up my first gallery……
Work in Progress Wednesday – Learning Lots!!
 Well, this has been a week of learning experiences, including running the machine needle through the tip of my finger. I’m somewhat frazzled deciding on a project, since I don’t have any looming deadlines. I do, however, have a list of projects that need doing, so I picked one from that list and then added another.
First, from the UFO list. Several years ago (going on three?) I took a class with a friend on a Judy Niemeyer pattern, Stepping Stones. You can see the pattern here. Originally it was going to be a king-sized bed quilt, but I was still teaching, so that got put on hold. When I reorganized the studio (twice), the blocks made it into the UFO pile, and when I made my list in May of projects, I listed these. But….I listed them as a potential table runner, figuring that way they would be done, and I could actually use the table runner, as we have a new dining room set (new to us – we’re babysitting it for a friend). I would also have enough for 6 placemats, too.
Well, there were loads of problems. Could I find the black fabric I was using for connector strips (three searches)? Could I do all the matching, since it had been about 3 years? How would I quilt it? What would I use for backing? I got the four completed blocks into one runner, and then I spent the next three hours taking out all the paper….note to self: you still need to vacuum. The blue I thought to use for backing was a stretchy polyester that wasn’t long enough, so plan B was leftover dark blue from another quilt back. Then I had to buy batting.
Finally everything is together and ready for quilting…..and I had no idea what to do for the quilting. Didn’t seem like feathers would work. Didn’t want to do a stitch-in-the-ditch. Tried some outlining, but I didn’t like it. Then I thought about the overall loopy pattern from the May challenge, but ended up picking all that out. I realized I would need to go with monopoly thread, so the stitching wasn’t obvious. And I was playing around with tension, including two more ripping sessions.
I tried doing some partial circles on each block, so it would look like rippled water. And then I discovered the settings on my machine were set for the decorative stitch I used in the black borders. Seems like I still had the setting on one of the decorative stitches, and I was trying to free motion and there was a lot of drag. I also discovered that I could use a variation of a zigzag stitch and still have the feed dogs up. Turns out I liked the ripple effect, and that’s what I went with for the rest of the runner. Here’s a pic:
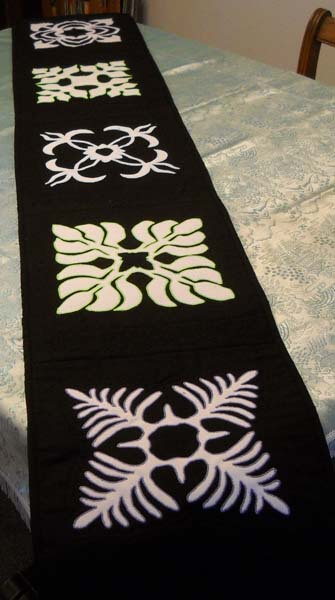
Here’s the finished table runner, which is absolutely perfect on the table. It will work with any of the leaves when we put them in.
Then I was feeling somewhat at loose ends. I had been watching The Quilt Show and following the color lessons from Michelle Jackson. I decided to do the first color study, and again I learned a huge amount. The first lesson was really interesting, especially since I have a lot of trouble choosing and working with color. This was to take a monochromatic color and determine dark, medium, and light. I chose greens, because I have a lot in the stash. I discovered that when I’m choosing, I really need to analyze tones and hues. I also need to be sure there is definite contrast. The first study I did was the one where you had a light, medium, and dark, with not a huge amount of contrast. I did not have enough contrast within those three colors.
I also was working with fusing for like the second time ever, and my pattern pieces were not always meeting up. I spent a lot of time trying to make this piece look like something – going back to linear me and not being able to just work without it having to be “something.”
I finally got all the pieces ironed down, and I felt I was moderately successful. Mostly because I learned a great deal about choosing the colors. I was still trying to figure out what to do with the piece. Yes, it’s just an exercise, but the linear part of me needs it to be “something.” Ideally I want to be able to work with light, medium, and dark marbled fabric, but I can see I have a long way to go.
Again, I couldn’t figure out what to do with quilting it. I tried out one decorative stitch and didn’t like it. I reverted back to the satin stitch I was doing two table runners ago. All of a sudden I began to like the piece more. It began to look more “painterly,” and pretty abstract in a pleasing way. I ended up binding in, and the piece would work as a nice little runner or table mat for a vase. It’s going up in my Etsy store.
Who knows where I’m headed next? There are 6 placemats to finish…..
Work in Progress Wednesday
 I gotta say, I love being able to do some kind of sewing every single day. I am keeping track of what I am accomplishing during this second year of retirement, and I am on track to get A LOT done! I finished the table runner for my second mom, and I still hate 1970s polyester (I had the wrong year in last week’s post.) Each of these blocks is not going anywhere – I have to make sure there is no unraveling in the corners and curves because of this fabric. That said, it will go well with the other three completed for last year’s Thanksgiving. I think I have one more table runner in me, in August. It is just too hard on the one eye I have left; I quilt for 25 minutes and then have to take a long break to bring back my distance vision. We’ll see after the August runner is completed. So here it is:
My other project for the week has been working on the free motion quilting challenge for June. I love Cindy Needham’s quilting, and she’s got a great tutorial for this month. Lots of tiny, close stitching, some new curves. As I’ve been reading what others have done on our Facebook page, I am amazed. I tend to be pretty linear with some of this – got to do it as the examples show. But then I see some of these great photos, and I realize how people take these patterns and make them their own.
Things I’ve learned: I can get smaller in my patterns. I started on a piece of blue gabardine, with some left-over batting. I did a grid of squares with chalk, used Bottom Line in the bobbin, and played around with the Art Colors from Superior. Now normally I don’t do any marking. I guess I always thought free motion was without any assistance. Well, on hubby’s quilt I redid, I marked some curves and liked the effect. This time I marked the grid, and I was very pleased.
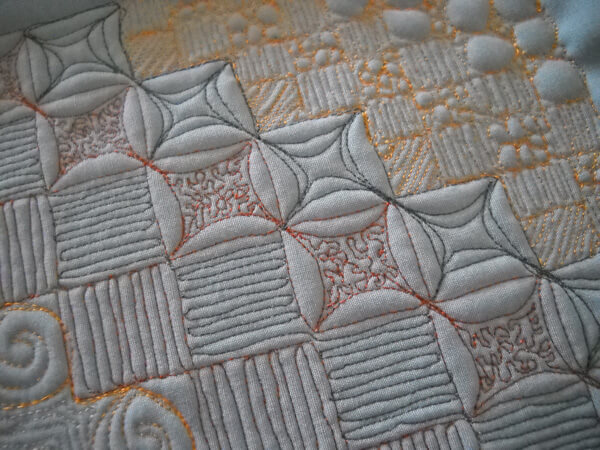
You can see the bigger squares. Then I tried some curves in a few of the other squares, and then some stippling. I had no idea I could get my stippling to be that small. Love the effect. I started out being worried about the lines being straight, but as Cindy said, ultimately they all look straight, so I stopped worrying.
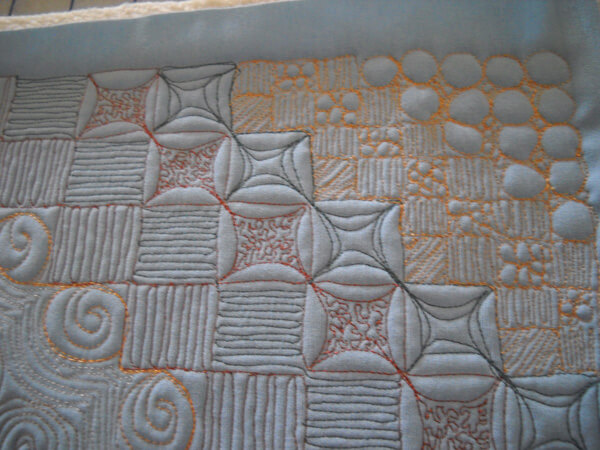 Here I have divided each of the 1-inch squares into half-inch squares. I wasn’t sure I would actually be able to quilt these, but I was wrong. I did the same pattern, and I even did some stippling in the smaller squares. I love the way the large circles really popped.
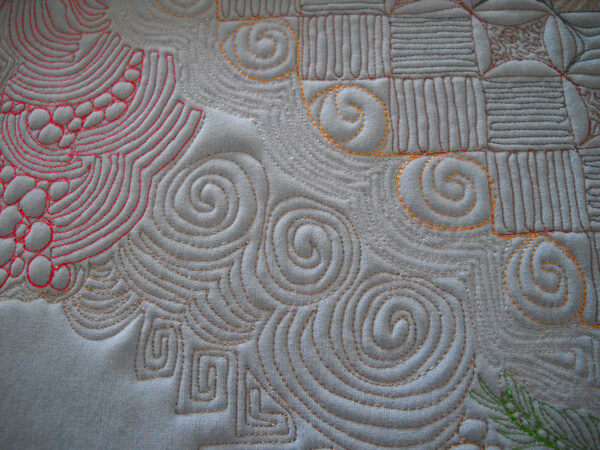 For this I practiced some echo quilting and swirls. Cindy’s right – you get much better with practice. And this is one of those pieces I just experimented with and practiced on, not worrying about what it would be when I was done. I was looking for where I get “puffies,” and where the fabric recedes completely. In the bottom right corner you can see part of my attempt to do more of a bird feather – not happy with it. I definitely need to have a grid to follow to do more curves.
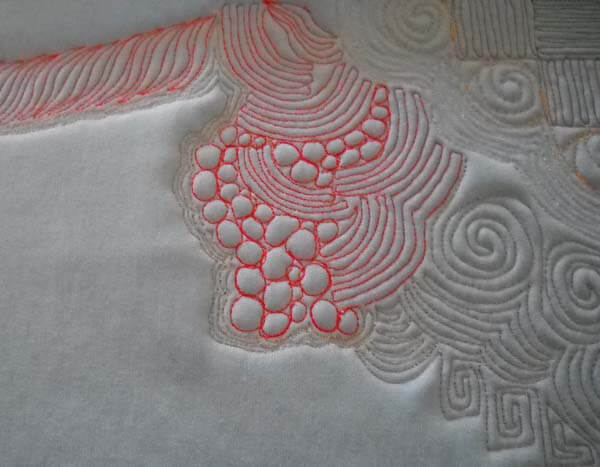 Somewhat better curves in the upper left, but again, something to practice. I do feel like I have a lot more choices in quilting designs. Now to go buy Cindy’s books….
And if this isn’t enough stimulation, I’m getting caught up on a couple of The Quilt Show episodes. After watching Stupendous Stitches, I spent an afternoon seeing what else my Bernina 1008 would do – I can get 16 stitches, not counting differing lengths and width. Then there was Marvelous Miters and Prairie Points – great ideas there, and last night I watched RaNae Merrill, and now I want to try some spirals.
Best part? Now I have the time!
Top Ten Tuesday – 700!
 I think I’m really glad that blog posts slow down over the weekend, because it gives me a chance to get caught up on my reading! I go through the list about once a month to delete those I don’t find as fascinating any more, but the problem is I keep adding at a rate faster than I can keep up with! Reminds me about all those lessons on exponential growth……
And….this is post 700! Who knew?
From the Best Article Every Day comes this little gem, and please click on it, because to show you a preview would ruin its sweetness.
This next is part of a TED talk, and the video is superb. Subtitled what goes on in your garden when you aren’t looking……
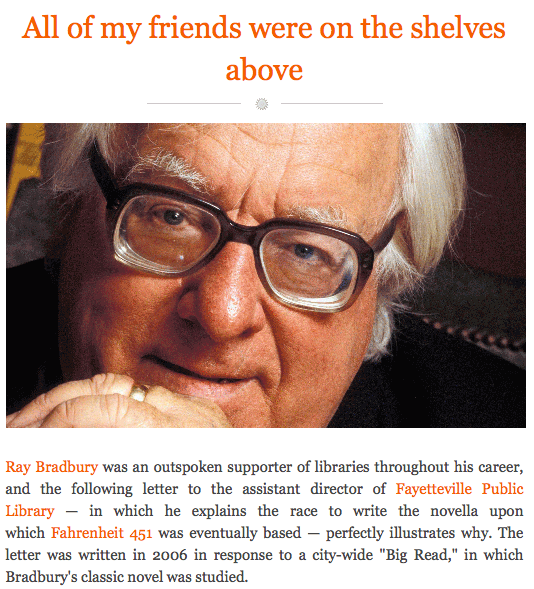
From Letters of Note comes a wonderful letter by ray Bradbury (who will be sorely missed) about the initial writing of Fahrenheit 451. What a great example of creativity!
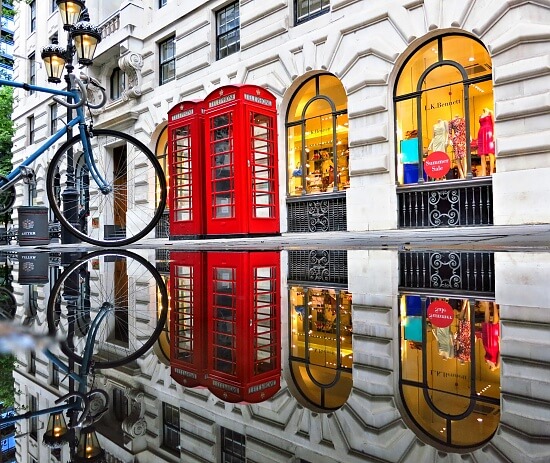
From 365 Project comes more fabulous photos. Love the colors and reflections in this one!
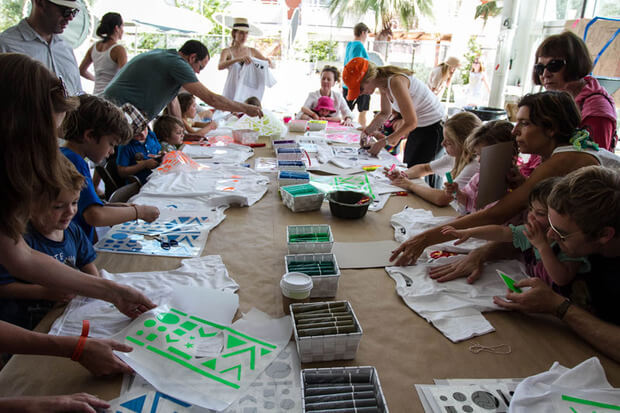
From Cool Hunting comes a really great idea for a family getaway!
I discovered Ranae Merrill in one of the episodes of The Quilt Show, and oh my, is her work wonderful! She makes doing a spiral quilt absolutely simple. Who knew?
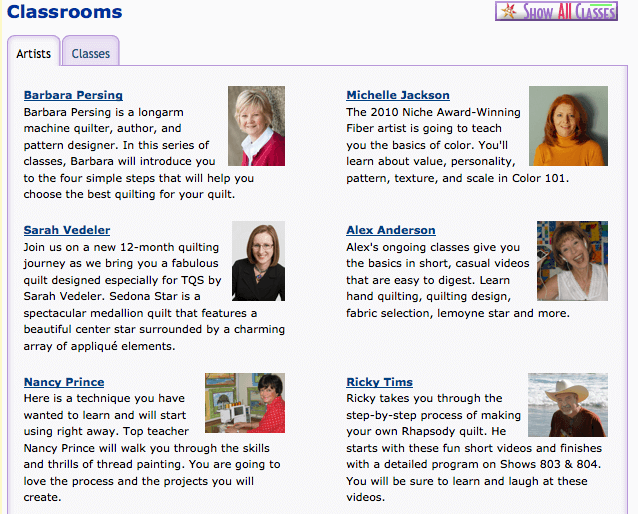
 Speaking of The Quilt Show with Alex Anderson and Ricky Tims, I have been enjoying the currect episodes, on all kinds of new techniques, plus a class on color. Really outstanding material. Here’s just a selection of classes:
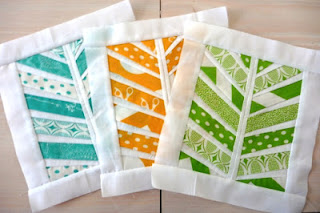
A great tutorial from Quilt Play on making some cool-looking “tree” blocks with paper piecing – called red herring blocks. I need to try this, as I can really see them fitting into a project I’m doing.
From the Bill Moyers blog comes the Peace Map, a way of looking at how peaceful countries are around the globe. Very interesting graphic, with some surprises – and some not-so surprises.
More eye candy, especially if you are in to hand dyes. Vicki Welsh does some amazing work, and she has a new gradient – rolling fog. I want me some of these!
 Have a great week – let me know what you find on line! Newsletter is coming in a week, so sign up in the block on the upper left if you want to receive “Out of the Marbling Tray.”
Work in Progress Wednesday – FMQ!!
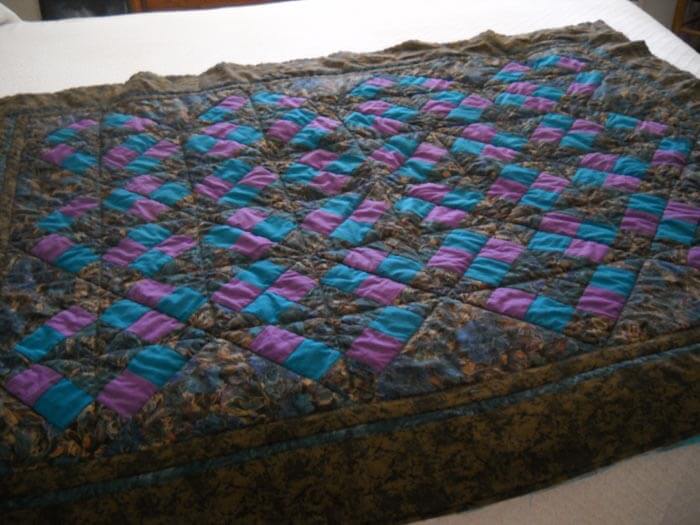
So for this month’s Free Motion Quilting Challenge, I set myself the task of remaking hubby’s lap quilt. I made this quilt about 16 years ago, when I was just getting into some serious learning to quilt. Oh my, have I learned a lot since then! Three hours of taking out all the stitches…think back to just how old that invisible thread was…..and how bad really cheap batting was (which was all I could afford at the time….). Yup, I was pretty appalled at what I had. Here’s the original – very square, emphasis on the squares. All stitch-in-the-ditch.
I used the pattern from this month – Leah Day’s wavy stipple, which I really liked. I was using a variegated thread, but then I decided it was too obvious, so I changed to a blue that blended in with the fabric. Much happier.
I’m really partial to what is happening with the backs with free motion. Here’s a couple of shots of the back.
What’s becoming obvious is how 16 years ago I used to “iron” as opposed to “press.” had a lot of squaring off to do…..
I really like what’s happening on the back.
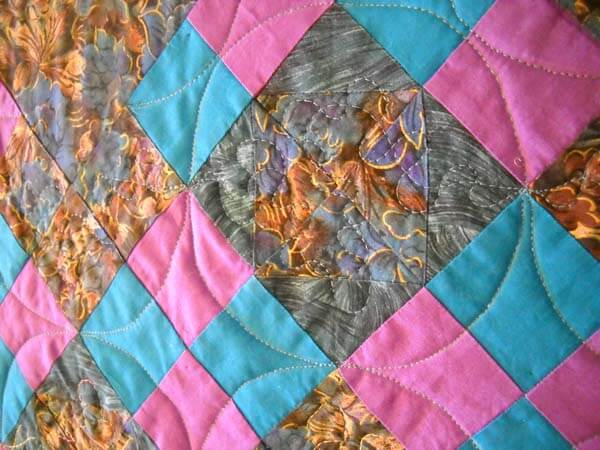
And now for the front…..for the first time I actually marked some of the quilt top. I wanted something in the purple/blue blocks to offset the square-ness, so I marked all the curves.
 I am very pleased with more curves showing in this quilt.
I did some pebbles in the first small blue border, which I like. I was going to quilt the leaves from January in the outside border, but I didn’t like it. One of the things I found at Road 2 California was that it seemed like a lot of quilting was done just because the quilter could do it. I opted to leave the border as it was.
I ended up cutting off about 1.5 inches all around to square up the quilt, so I had extra binding, which was good…..but oh my, how I had bulky binding…..Now I just have hand stitching for S&B tonight with friends. And then it gets put away till next winter, when it’s finally cool enough for lap quilts. I have enjoyed taking apart old quilts so that I can practice on them. Let’s see what Cindy Needham brings us in June!
All Kinds of Good Stuff
 A great big welcome to all the folks coming here from SewCalGal’s tutorial and Fun Friday Giveaway! I enjoyed doing the tutorial on quilting marbled fabric, especially thanks to SewCalGal’s sponsoring the Free Motion challenge this year. Hopefully you’ll leave comments about what you might do with the marbled fabric. What I want to announce today is a new part of the website and blog, for those of use who use – or have used marbled fabrics – in your quilting and assorted sewing projects.
When we first started our website (back in 1997….and a few changes along the way as we learned a whole lot!), we had part of the site to show off people’s projects who used the fabric in their quilts. We’d like to start that again. If you check here, you will see some of the very early quilts I did that used marbled fabrics. When I first started using the fabrics, after we began to learn in 1992, I pretty much put everything with black. I was rather afraid of color at that point. One cyber friend who paid us a visit back in 2002 said, “Let me take a fat quarter and see what I can do with it,” and a week later she came back with a completely quilted piece of fabric. Oh my, it was gorgeous.
That’s what started me actually quilting the fabric. It took a while to get the speed and rhythm down for the free motion and the stippling, but it made such an impression on the appearance of the fabric. At the time we were just making fabric and selling it, not really paying attention to the actual quilting of it. Along the way, several artists bought some and began to incorporate it into their quilts. Kathy Nida used some in one of her first quilts that got accepted into a show, in 1999. To this day I love looking very carefully through her work to see remnants of fabrics she’s purchased from us.
We’re on a mission to have people use marbling in their artwork. Send us a picture of how you use the fabric, whether you actually quilt the fabric or just use it in a more traditional manner. We’ll get you up with credit on both a blog page, as well as the web gallery.
Good lick with the giveaway – the fabrics are really quite pretty – and I want to see what you do. Plus….I’m doing a newsletter within the next week, so be sure to sign up to receive the monthly missive, and we always give away some fabric each month. Use the box on the upper right. Check out Ebay and Etsy as other sources for marbled fabrics, and you can always order direct from us.
Happy quilting!
Work in Progress Wednesday…..a Bump in the Road
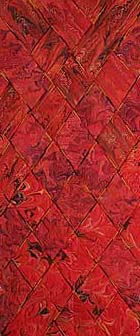 ….well, probably not a real bump, more like a slight detour in the development of this new piece. I am trying to represent depression as something that is hidden in the brain. I have a great center piece that looks like dendrites. I want to build around it in reds for the angst that comes with depression, and I was running into some issues with how to quilt the third piece. So I looked at the rest of the fabric pieces I had to see if anything looked like it would work better. Found a piece that will be fabulous, and it’s going to take a lot of quilting to make this piece really happen.
As I’m auditioning threads, hubby comes in for his opinion, and as I’m trying to explain what I want to attempt, he brings up some legitimate questions on construction. While this is an art quilt, it still needs to hang like a quilt in a gallery setting, so I have to keep that in mind. I’ve had issues when trying to construct “unusual” fiber pieces in the hanging, so I have learned to keep that more in mind.
We’re drawing back and forth on the ideas, and it finally occurs to me that I need to do a mock-up to see if this design is really going to work. If I can get it together, it should be pretty amazing. So that’s the task ahead of me tomorrow morning after marbling. It’ll set back the actual quilting a day or so, but next week looks pretty darn clear for work…..
With that in mind, it has been a productive week. I finished my commission for my yoga instructor. Did some minor beading to represent the little bits of water we have in the desert, hence the name “Desert Stream.” This is a smaller version, with a number of changes, from “The Shallows” piece. I’m quite partial to how the lichen looks in this piece….a lot of use of the reverse button on the sewing machine! My yoga lady LOVES it.
Along with this has been my auction piece for SAQA. It’s along the lines of the depression piece, but a whole lot more positive. It’s called “Hotwired.” It’s simple in execution, but I think pretty effective.
Because there’s not enough deadline sin my life right now, I decided to take apart one of my first quilts to requilt for the May Free motion challenge. I love the pattern, and I think it would look good on this pretty masculine quilt for hubby. Boy, you can tell how old it is (15 years?) by the really lousy batting I used – what was CHEAP at the time. I’ll post pictures as it get finished. This is it with the binding already gone, and I am starting to take out the really awful straight-line quilting in the ditch…with invisible thread, no less, back when I didn’t really have a clue. Should look considerably better when finished.
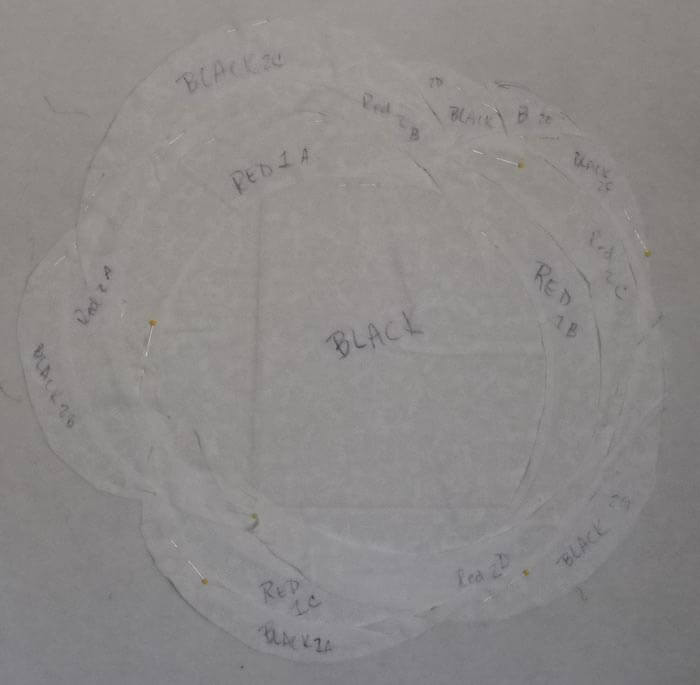
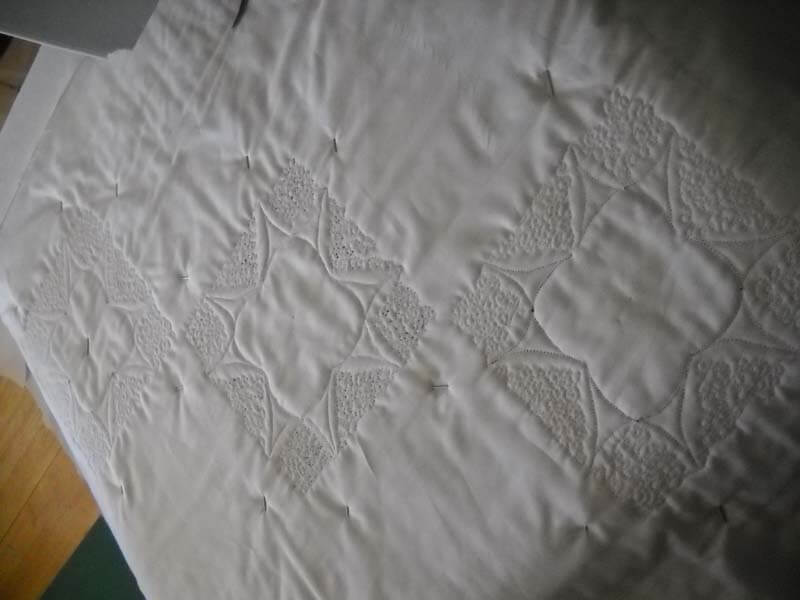
NOw fort he other piece in progress, my piece on depression. I spent some time today actually trying a pattern from some old white fabric, pinning it up on the wall. It was an interesting process, as I usually just try things as I go along. This time I just wasn’t sure that was going to work, as there were a lot of issues I wanted addressed in this piece. Here’s the finished pattern – and now I have pattern pieces to use – a bonus I never considered.
If I’d thought about it, it would have been in different colors……but I really like the shape – very organic, very like a brain. Here’s a reject piece of fabric, now available for another piece.
It just wasn’t playing nicely with the other fabrics. Here’s one of the reds with the thread to remind you of the colors of a PET scan. The problem with this piece is going to be the photography – the red is showing pink, the black is showing red….not quite sure what I’m going to do, so I need to get it finished with time to spare for the final shots.
THis is a little better, but you can’t really make out the sheen of the thread.
So it’s been a busy week, and hopefully it will continue!
Top Ten Tuesday
A couple of days off to visit friends in Sedona, so I’m playing catch-up on blogs. I have some great sites and info to share from this trip, so stay posted for some new artists. For this week so far, an amazing video by a “destination photographer,” Shawn Reeder, on Yosemite. Go check this out!
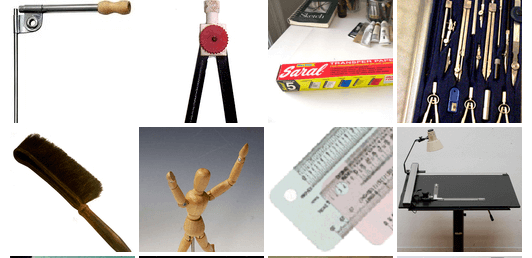
A very cool look at old/out-of-date art supplies: The Museum of Forgotten Art Supplies.…..I still have a bunch of these…..
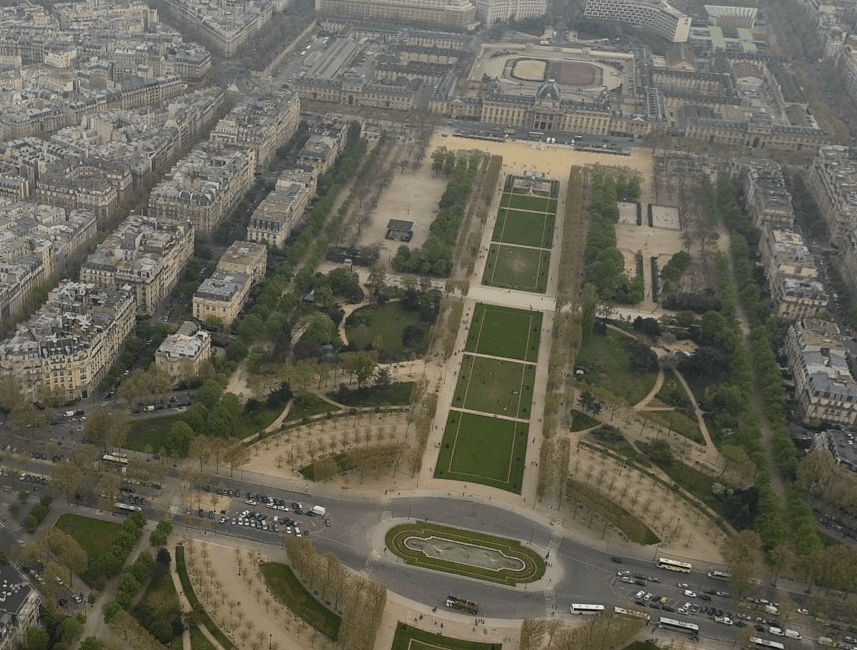
This next is a panorama view of Paris from a bird’s-eye view on the Eiffel Tower. Pretty amazing…I watched for about 10 minutes before I started to get dizzy. I SO want to get to Paris. Be sure to try all the buttons on the bottom.
Ever had one of “those” weeks, especially as a female? The Bst Article Every Day has it captured perfectly….and this is just the beginning………
An arts advocacy organization – the Western States Arts Advocacy. From their website:
“Celebrating the Western Imagination through the Arts
The Western States Arts Federation (WESTAF) is a regional non-profit arts service organization dedicated to the creative advancement and preservation of the arts.
WESTAF encourages the creative development and preservation of the arts regionally and through a national network of clients and alliances. WESTAF fulfills its mission to strengthen the financial, organizational, and cultural policy infrastructure of the arts in the West by developing and providing innovative programs and services, technology solutions, funding opportunities, advocacy and cultural policy work, and other services.
Founded in 1974, WESTAF is located in Denver and is governed by a 22-member board of trustees that comprises arts leaders in the West. WESTAF serves the largest constituent territory of the six U.S. regional arts organizations that includes the state arts agencies, artists, and arts organizations of Alaska, Arizona, California, Colorado, Hawaii, Idaho, Montana, Nevada, New Mexico, Oregon, Utah, Washington, and Wyoming.”
 R.I.P. Maurice Sendak, whose influence shows in some surprising areas…..one student was diagnosed as color-blind because he could always see where the wild things were. His books will live on. It’s a good video, worth the time.
“In this unexpectedly candid 2004 interview, Sendak reveals some of the early childhood memories and surprisingly dark influences behind his work. Shaped by immigrant parents and the tragedy of the Holocaust, Sendak provides frank insight into his complicated psyche and a rare window into the soul of an acclaimed artist. He also discusses how he shaped the character of Max, the mischievous lead in his blockbuster book, and what he might have been like as an adult.”
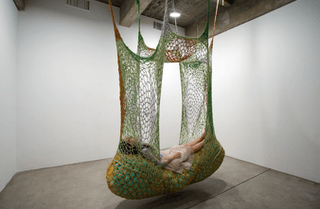
From Joetta Maue comes an interesting post on a fiber artist, Ernesto Neto, an artist I’m unfamiliar with, and one with some very interesting fiber work. See the person inside?
Belated, yes, but some amazing photos from JPG Magazine on Earth Day.
Eye candy from Joen Wolfrom, as she tours a quilt show in Brooking, South Dakota.
And finally, if you’re a fan of Monty Python, then you will appreciate this exchange between John Cleese and a newspaper who misquoted him, from Letters of Note. Love the sarcasm!
Enjoy your week – let me know what you find on line that’s unique and different!
Monday Marketing
It’s been a week since we got back from Seattle, and we’ve been busy doing a lot of catch-up and ordering of more fabric and paints. There were quite a few lessons from the event, most of them good ones.
First, we didn’t make all our expenses, with the cost of the trip. But we did make enough to cover all the supplies (fabric, paints, bags, etc). We knew we’d be going for a vacation, so there was a certain amount we wanted to be able to make – at least the cost of preparing the stock, which we did. But we had a fabulous time. You can check out pictures from the StashFest here.
Second, next time we will bring up more than just cotton. We had originally planned on other fabrics but were talked out of it, since this show was being geared specifically to quilters. Out specialty fabrics that we did bring went very quickly, with lots of requests for more.
Third, bringing all the quilts (even though we worried about them being stolen from our car) was excellent. One of the results is we need to bring up a lot of unpolished satin next time, as that is what all the big art quilts were made from. The traditional quilts were a hit, as people could see how small pieces of fabric could be used in traditional blocks.
Fourth, we did get a good mailing list, and now I am really committed to getting out the regular newsletters. I set people up as a separate group, so when StashFest rolls around next year, they can get separate emails.
Fifth, I definitely have to get a garment from marbled fabric for me to wear at shows. That’s another whole audience to reach.
Sixth, lots of good connections, including two new commissions. We really loved talking to people, and the article from the National Quilting Journal was great to show the marbling process. There definitely are some things to change in the overall portfolio set-up.
Seventh, we had a chance to go through the quilt museum, and there were two great exhibits. Larkin Van Horn curated one called Deep Spaces, with some really gorgeous pieces. Carol Taylor had her “arc-i-texture” series, and I enjoyed seeing some of the other things she did with that technique. If you get to the area, check out the La Conner Quilt and Textile Museum. The building is amazing, and the people are just great.
 And there’s probably lots more, but the marketing is ramping up again, so I definitely plan on capitalizing on our first really big event!
Work in Progress Wednesday
![]() Oh my goodness, life is busy! We returned on Monday from StashFest, a benefit for the La Conner Quilt and Textile Museum, with lots of new momentum and ideas for the business. I’ll be addressing some of the marketing issues and challenges in a later post. For right now, there are lots of new things in the works, as well as some current projects to finish.
Oh my goodness, life is busy! We returned on Monday from StashFest, a benefit for the La Conner Quilt and Textile Museum, with lots of new momentum and ideas for the business. I’ll be addressing some of the marketing issues and challenges in a later post. For right now, there are lots of new things in the works, as well as some current projects to finish.
We have two commissioned orders awaiting us. One has gone in the mail today to England, and the other is awaiting fabric and paint to arrive. On my walk this morning, I set myself the task to come up with what my “spring” and “summer” designs would look like for my seasons quilts. The marbled fabric is all ready to go, and I now have two specific designs in mind. This was a little trickier than fall and winter, because I still wanted to keep the log cabin basis for the new quilts. I’m hoping by the end of May to have the two new quilts finished and the pattern pretty much ready to go. Then I can consider the marketing for the kits.
I have a commissioned piece – a three-part triptych – that will pay for my yoga lessons, so I want to get that completed by this weekend. I have several small quilts that I am going to take apart and requilt, based on what I am learning with this year’s free motion quilting challenge. April’s lesson, about creating your own stencil, will solve my problem about wanting to do snowflakes for an old holiday quilt. I’m looking forward to trying this. The three quilts that I have requilted were all big hits at StashFest, as they were god examples of how marbled fabric can be used in traditional blocks. And I had LOADS of great feedback on how wonderful my quilting was. Yay me!
Now that I have installed Quilt Album software, I need to start putting in my quilts, especially since as I am traveling more, I can create an album to show at any time. This ties in to the portfolio we took with us to StashFest. We were able to show the article about us and the actual process through pictures, examples of Bernina garments that used our fabric, and other interesting patterns we had. The portfolio needs some updating….need to get that on the to-do list.
I really want to get to the DVD on quilting various marbling patterns. I need to perhaps start with just a couple of tutorials, and then let that determine where I go from there. As my quilting skills increase and improve, it will be interesting to see how that transfers to the marbled fabric.
Mainly I want to do a lot of sewing, designing, and quilting. So many ideas in my head! Hopefully next week there will be actual pictures to show……
Quilt Remake, Part 2
I finished the quilt remake in time to get the suitcase packed full of quilts to take to StashFest. Of course, it couldn’t be quite that easy to pack the suitcase….ended up packing it three times, as I went to photograph the quilts for a new book, and the first set wasn’t high enough resolution. So we set up again, and this time there was too much light. So third time was the charm….setting up the room again, and unpacking/repacking the suitcase. But the photos are on there way now….and my new little quilt looks great!
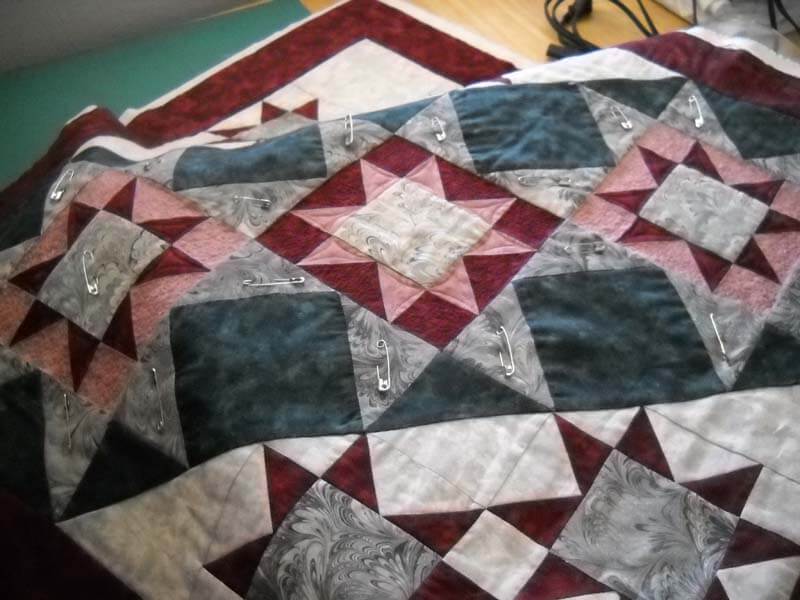
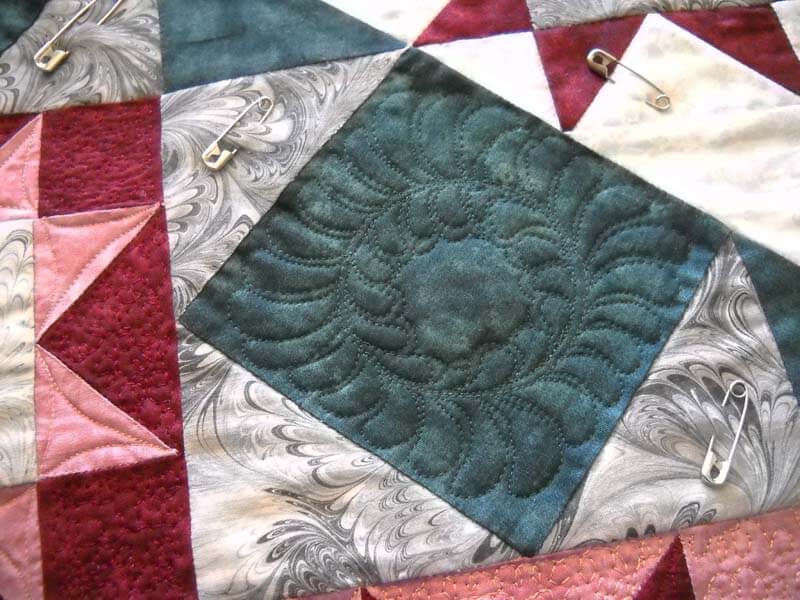
When I left off, I was working around the various quilting motifs. The larger triangles had a zentangle-like stippling, and the area around the stars was much smaller stippling. I will definitely need to practice that so the stitches are really consistent. But I really like how the rosettes worked out.
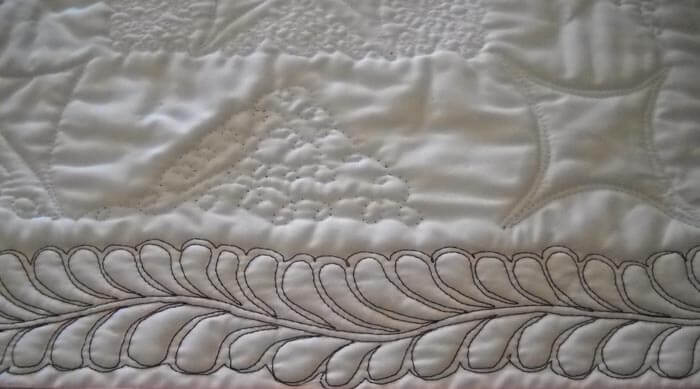
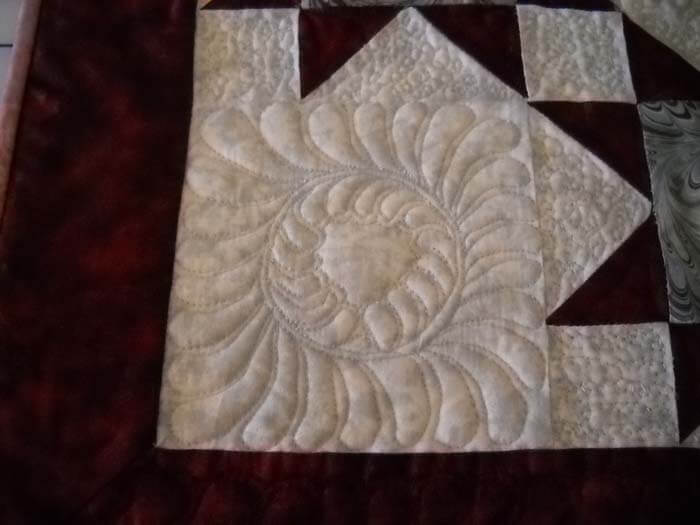 I wanted to do feathers on the border and ran into tension problems…the background thread (Bottom Line) kept peeking through, and I finally decided I didn’t want o keep taking the feather out. So I changed the thread in the bottom to be the same as on the top – problem solved for the time being. The feathers go up half of each side. They’re pretty subtle, but I like them.
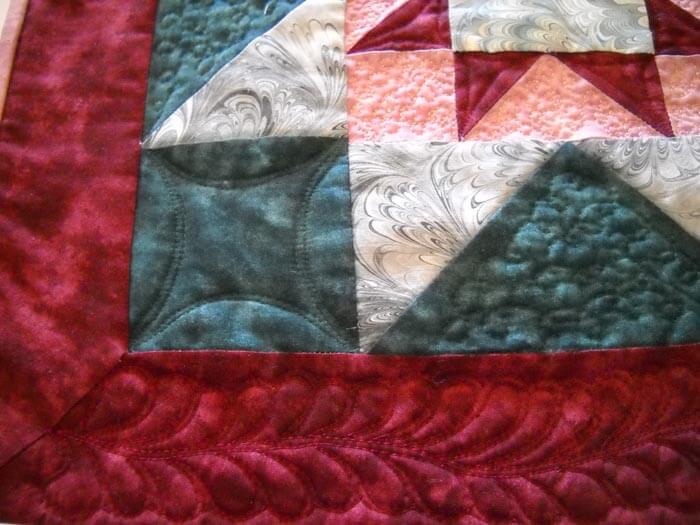 You can also see the corner squares. I actually marked those lines for consistency. I must say it was the first time I marked anything, and I will probably do it again. I liked the effect, but I need to consider what I’m going to use for marking, so it’s easy to get out.
I absolutely love the back! Yeah, there are some tension problems, but I am making SO MUCH progress.
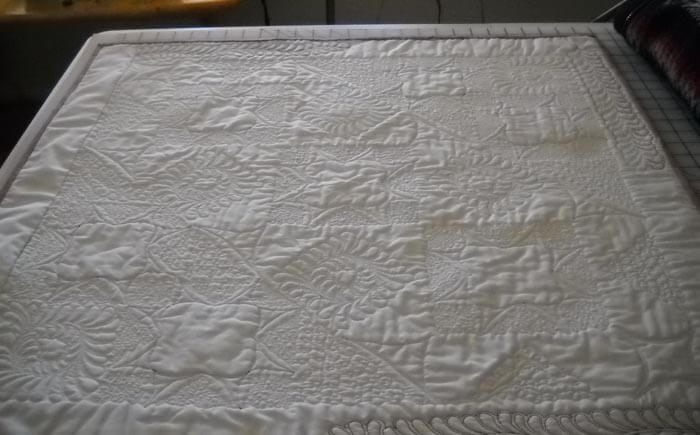 I can certainly see the appeal of white whole cloth quilts. I feel the same about the backing quilting on my whole cloth marbled quilts.
And finally, hanging briefly on the wall before being packed:
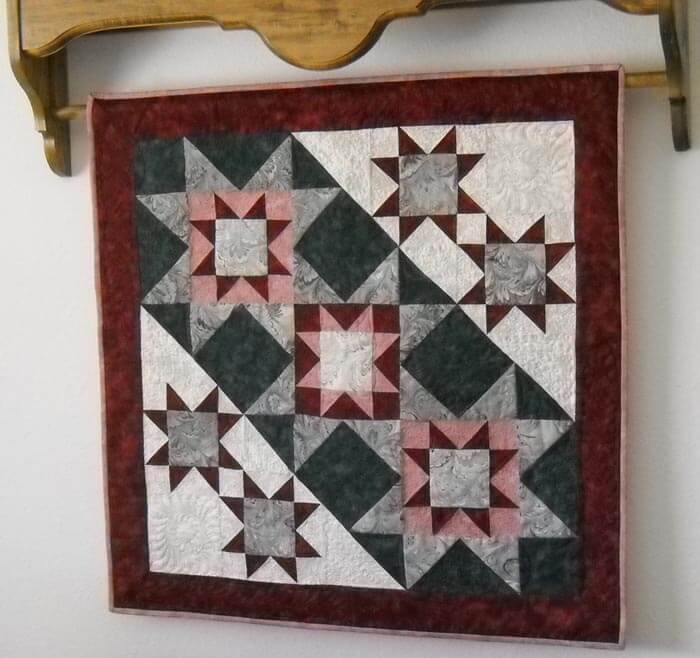 Tomorrow I will be so ready to leave, and no doubt all the loose ends will be done by noon, so I am going to start taking apart another older quilt in preparation for some brand new quilting!
Work-in-Progress Wednesday
So I am totally enjoying the free motion quilting challenge, with a new pattern each month for the year. I LOVE doing feathers – never EVER thought I would be able to do them on my own. Now since I have these new skills, I have all these old quilts that look pretty blah…..and I’m going to take them all apart and use them for practice of all my new patterns. I started with a BOM (with Judy Martin blocks) I did in probably 2000, when we were selling marbled fabric in kits, as it seemed like so many people loved the fabric but didn’t really know what to do with it. I had a new block every two months (I had six small quilts, but I ended up selling two of them. I redid one of them last summer, after I looked at some videos from Sharon Schamber. This was originally all stitch-in-the-ditch quilting. Here’s my Monet’s Marbled Garden:
Next one I took apart was my fish quilt, with fabric marbled probably in the late 1990s. Again, just stitch in the ditch. With this one, I realized I could use a couple of decorative stitched on my machine, along with fmq. This time I actually quilted in the marbled fabric, following the lines of the pattern.
Then I decided to get another little one ready to take to the Seattle show, so I spent a weekend taking out all the stitch-in-the-ditch. No picture of “before,” but here’s the backing fabric:
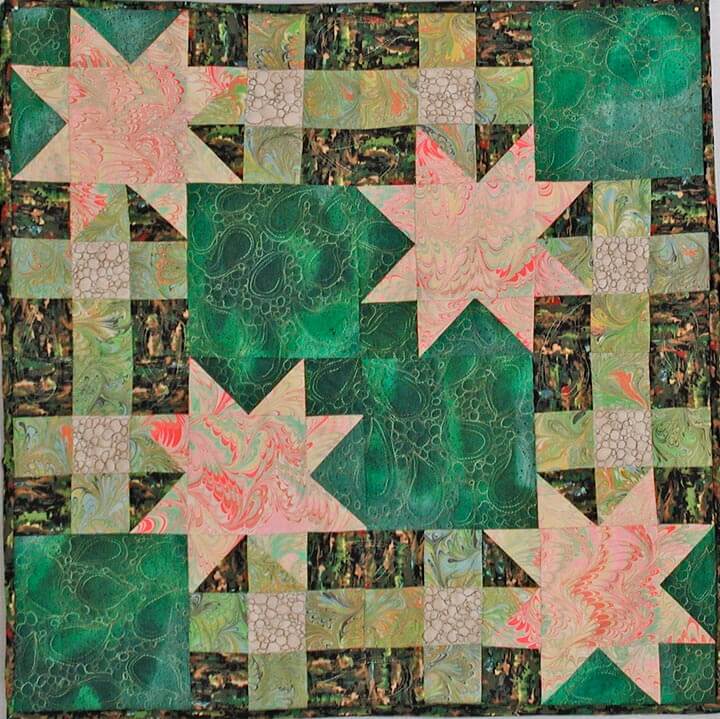
Part of what was so much fun with this quilt was looking at each of the various sections and deciding what I wanted in each place. I happened to have four different Superior Threads that would blend perfectly, as the purpose with these small quilts was to show off the marbled fabrics. I used the Superior silk thread for the first time in the green sections and loved it. You can see in the stars I did some loops (more like zentangles) in the backgrounds of the stars, and did some free motion curves in the points. Everything is very subtle.
My free motion loops need work here. I think it’s a combination of speeding up the machine, as I do move my hands and the fabric pretty quickly with these loops. I’m not happy with the stitch size – very inconsistent, so I know I need more practice.
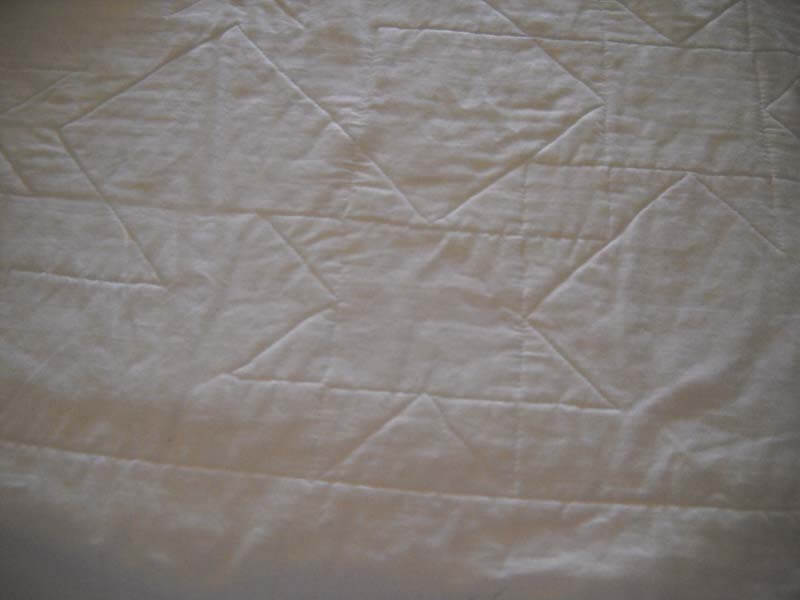
Now while I don’t subscribe to the quilt police, I really do like to have a ice back to the quilt. While I had some tensions problems, overall I am THRILLED with the back of the quilt. The whole thing finished is going to be gorgeous!
Of course I had to include some feathers, so each of the green squares has a circle of feathers – more like a rosette. Love them!
I thought I had more pictures, but evidently not. Tomorrow is a picture-taking day, so hopefully I’ll get the rest up. I need the feather borders, the white squares, and the back.
Later – packing for the trip!
Work-in-Progress Wednesday
Happy Pi Day! It’s the math nerd in me celebrating……no more having to plan special activities. Now back to regular blogging….(I started this on the iPad….)
Hmmmmm…..not sure if this is going to get any better….took me forever to log in, but I think I figured out what I was doing wrong…..now to get the pictures I want…..
That said, it has been pretty productive when it comes to fabric, even amidst the move. I finished my iPad cover with the feathers from the February free motion quilting challenge, and I’m really happy with it. In fact, at a birthday party last night, three of my friends want one and suggested I put them in my Etsy store. Something to consider idea when we return, as the Etsy store is disabled right now, as we are taking some of the product, with us to Seattle.
The front is a great big feather. I love the ideas people are posting, so I went with some Superior Rainbow and added some extra spines.
I added a small facing, and then added velcro to the inside in three different places to hold the cover closed.
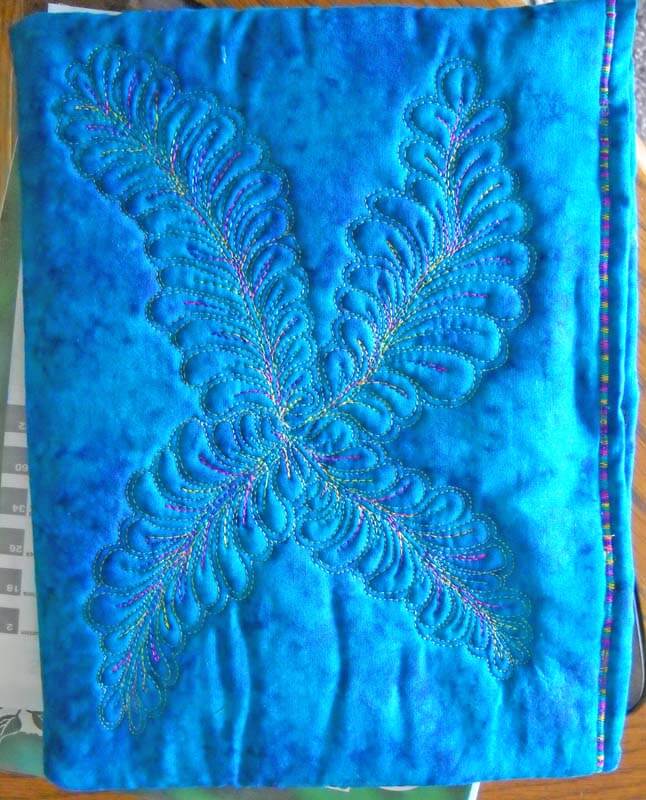 Some things i would definitely change next time around, but overall, I LOVE it….never thought I would be able to do machine feathers!
Now for an update on Visions……I didn’t get in. Plain and simple. But….I’m okay with it, despite the fact that the very first show I ever got into was a fairly prestigious one. I know that the work is excellent; it’s some of the best I’ve done. And I have more ideas just ready to go. It just seems like the only way you get validation for your work is to get it in to major shows. I will keep making work, because that’s what I want to do.
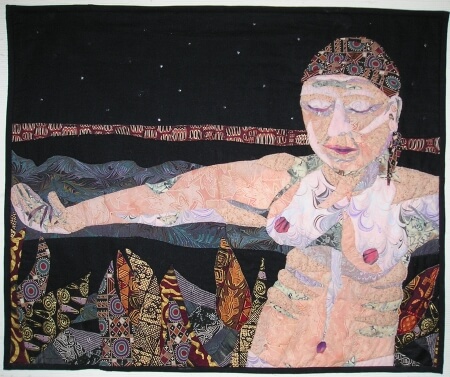
If it weren’t too old (2003), this is what I would have entered: my absolute, favorite piece ever. I won’t sell this, because I’ll never be able to make another one. It is now on the wall in our new home, as we actually have wall space for it. This is part of the Gaia series, where I do weavings with strips of marbled fabric. This is Gaia 2: Beginnings, affectionately know around here as my Pele quilt.
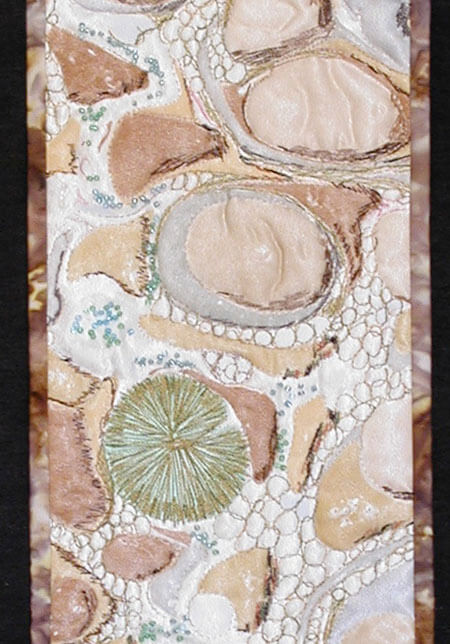
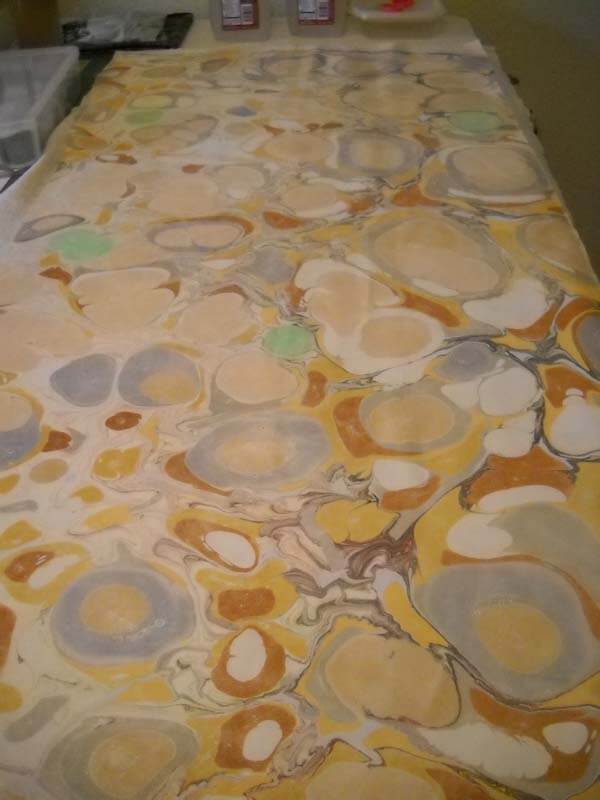
My machine quilting skills have come along tremendously since that piece. The fabric of “The Shallows” was created about the same time, but it has just been in a drawer, waiting for the right time, which I figured was now.
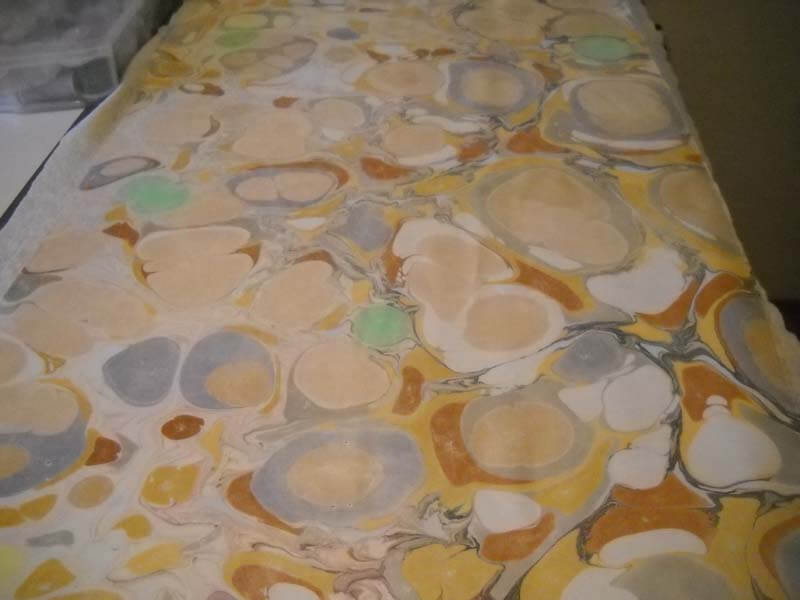
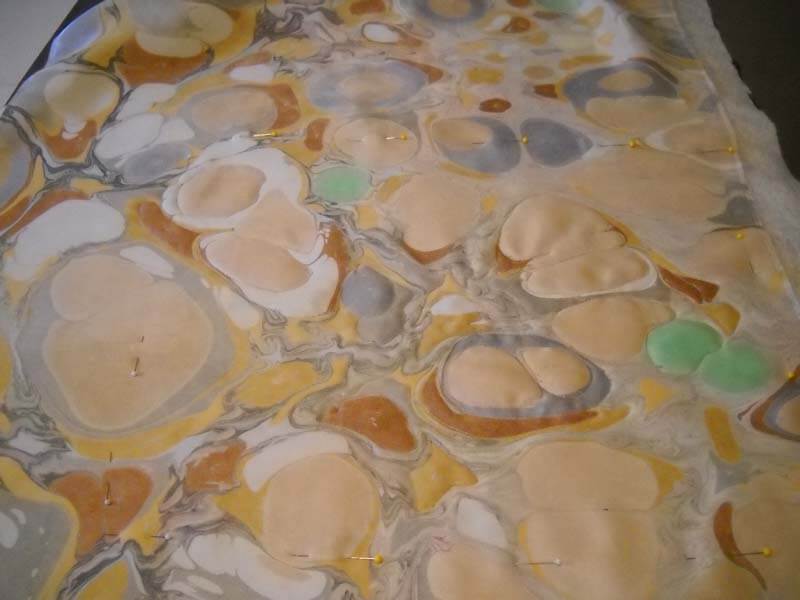
Here’s the fabric at the beginning – it looks pretty bland.
It’s a pretty large piece of marbled fabric.
 Making some early decisions on thread and backing. Everything was done with Superior Thread – Bottom Line in the bobbin, a mixture of King Tut and Rainbows and Art Studio for all the rocks and shading. (I never did take a pic of the back…..)
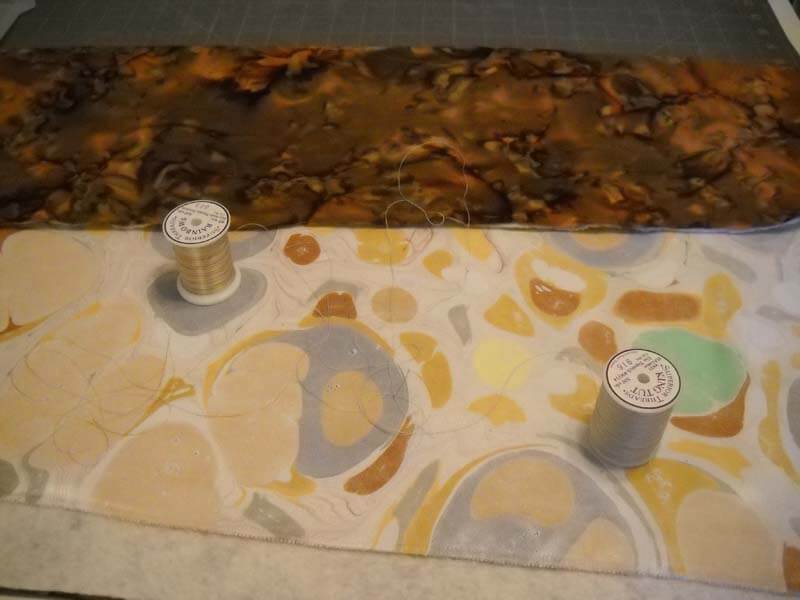 I knew how I wanted to start, but I wasn’t thrilled with how the fabric looked, after not seeing it for so many years. I thought in my mind it looked far more interesting. But I started anyway.
Already I could see improvement in texture, so I figured I would be okay. But I was worried about the green spots, which were originally designed to be some kind of leaf….now I was thinking lichen. I also wasn’t happy with the amount of white showing…needed to do something with that.
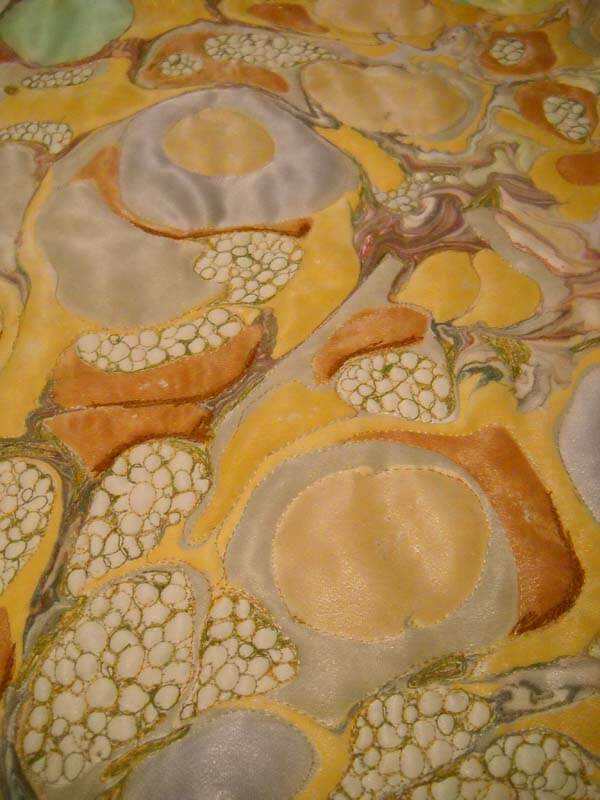 At this point I am becoming quite enthused with how things are shaping up…..but that’s a LOT of pebbles, and it took most of December to get the pebbles where I wanted them, without affecting the “veining” left from the marbling.
I was also starting to think about shading, which I guess is more thread painting than free motion. I consulted with my art mom to get advice on scientific shading, in which the light source always comes from the northwest. So I needed to start thinking about shading all those rocks…..at this point I became very aware that there are a LOT of rocks. YOu can see some of the beginning shading here.
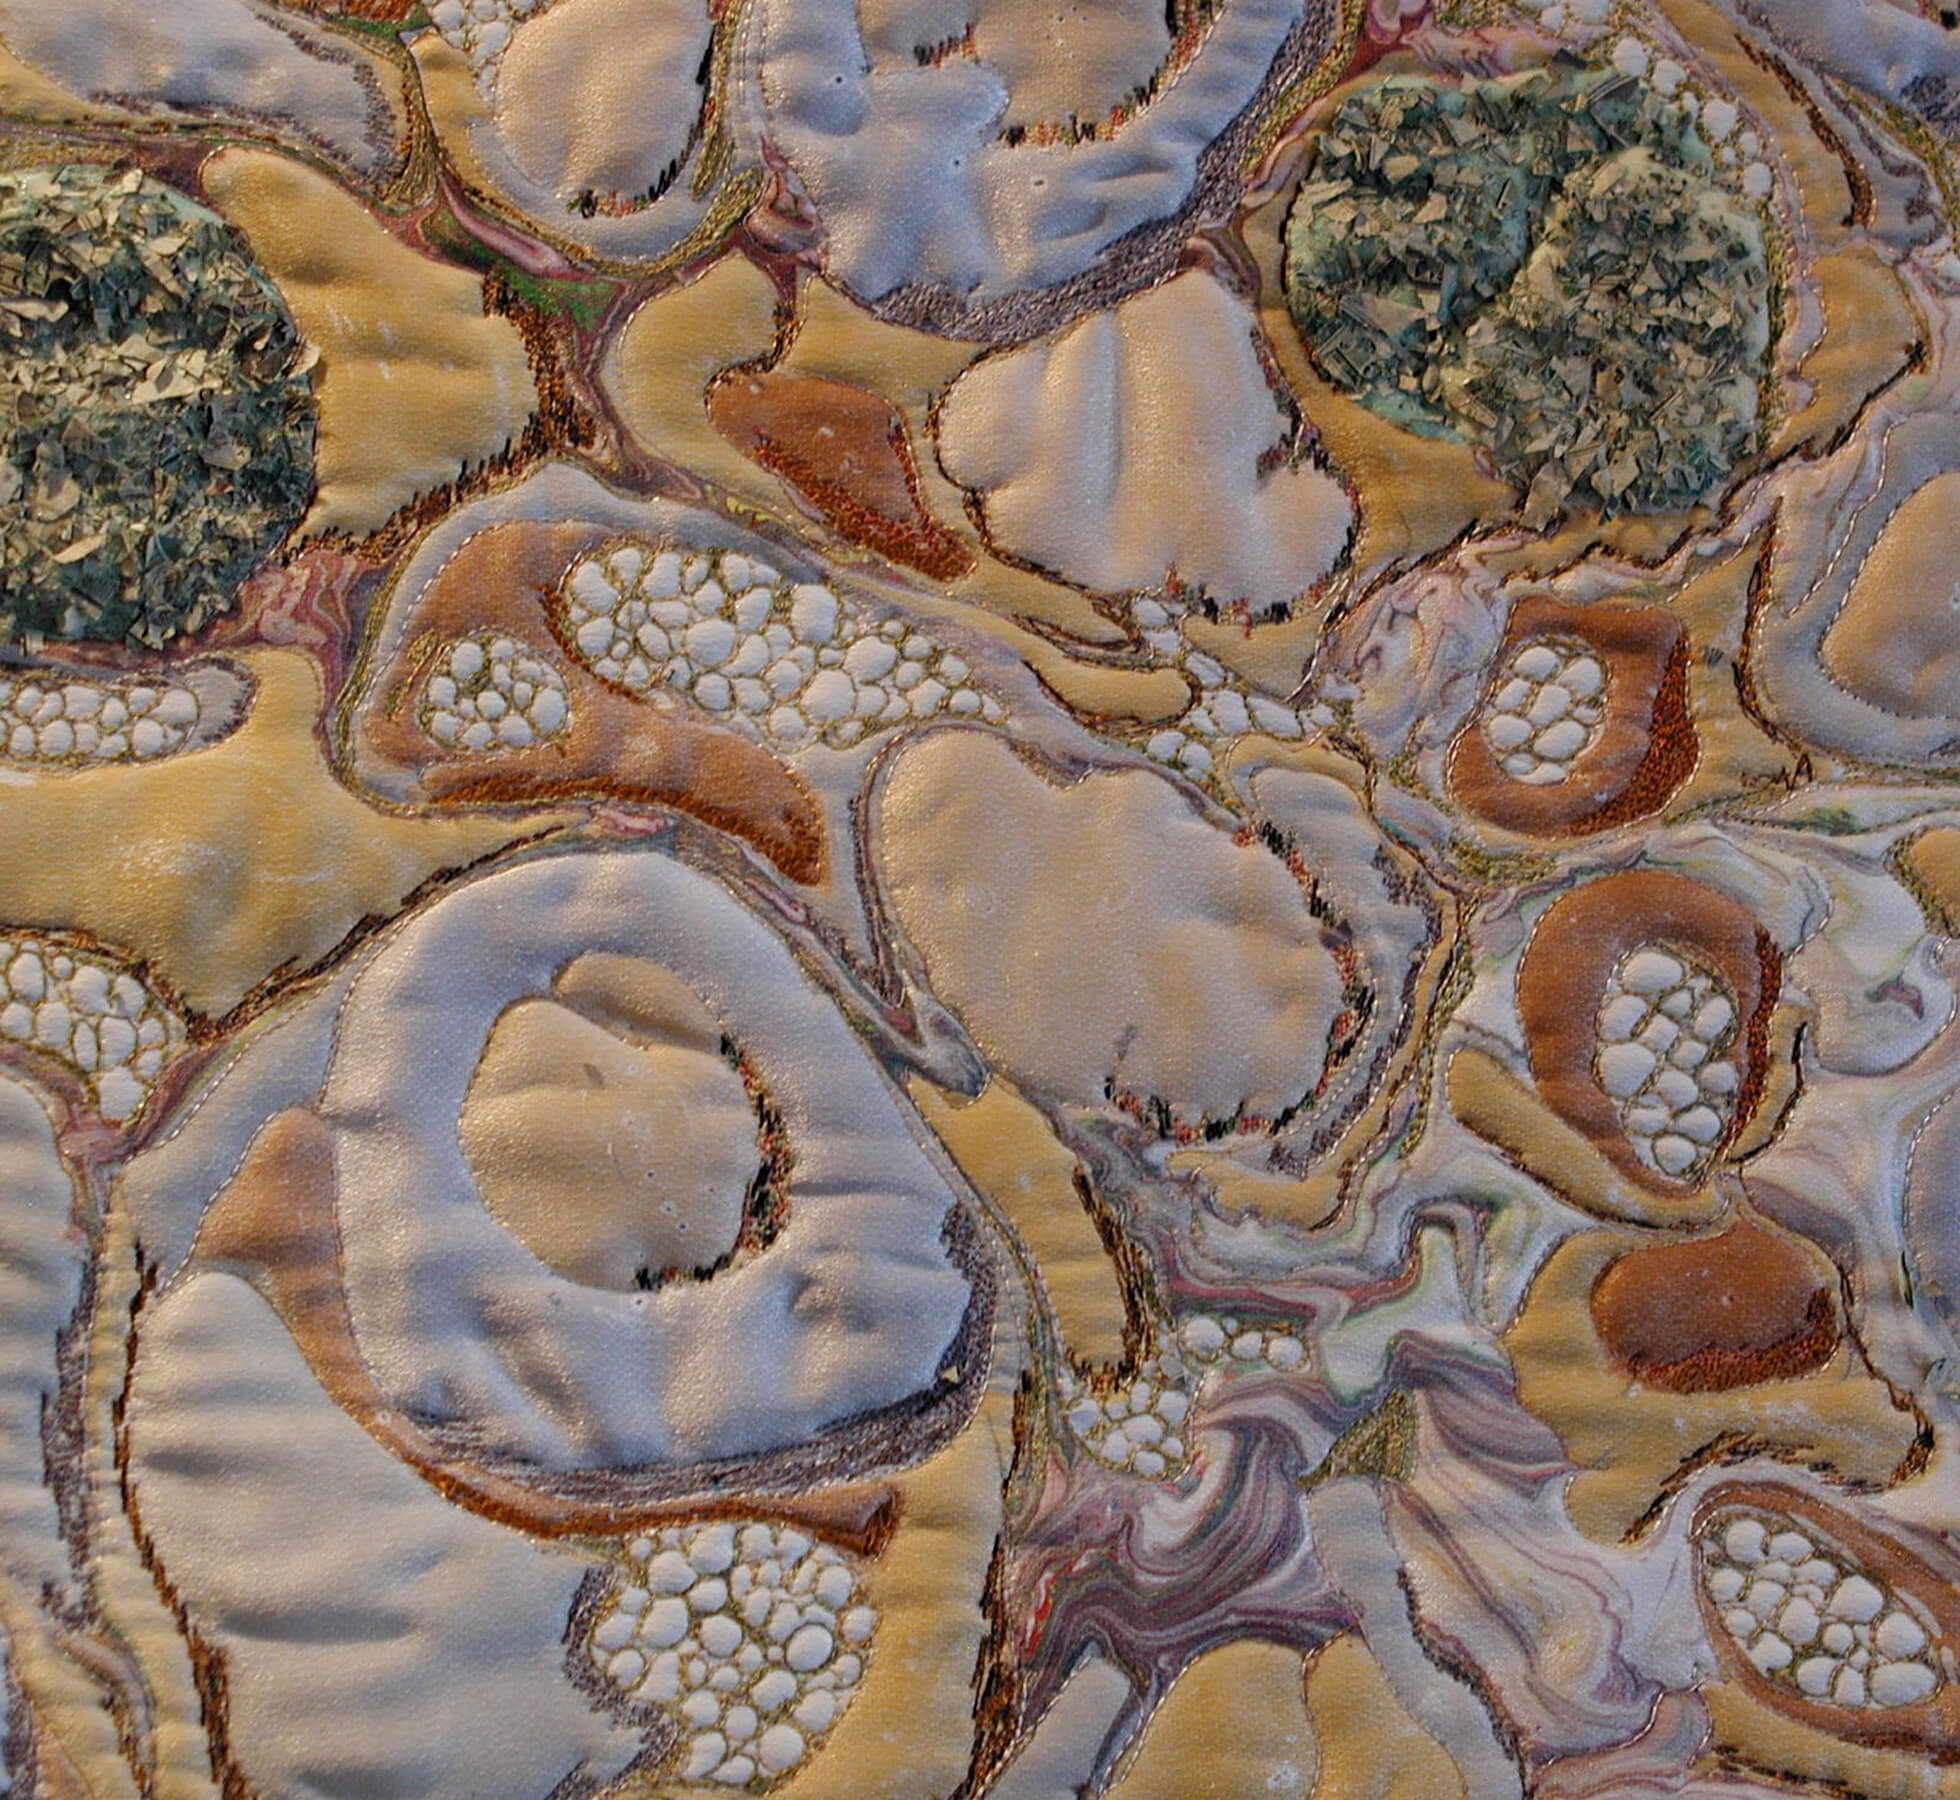
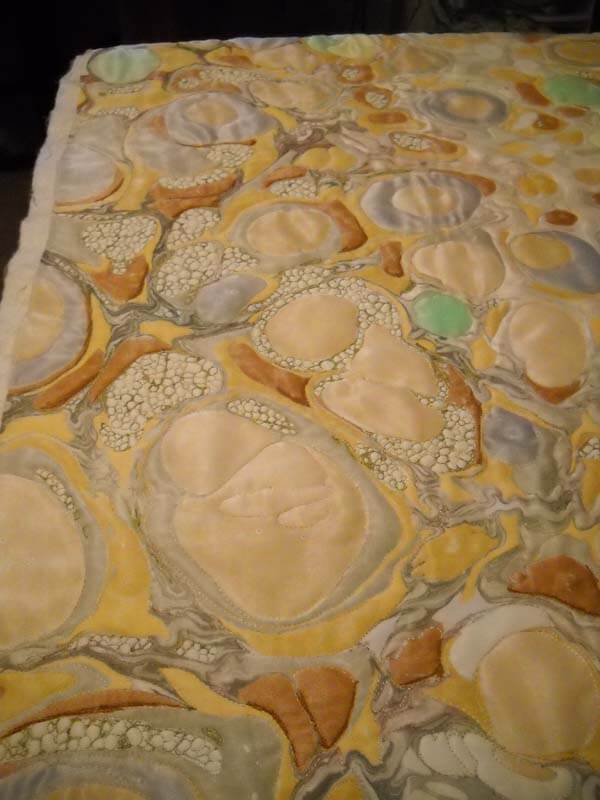 So January hits and I’m aware of my deadline, knowing I need to leave time for photography. I’m shading, and doing pebbles, and thinking about trimming. About one-fourth of the right side is cut off, as the proportions seemed much better without it – and a lot fewer pebbles that had to be completed…. I needed to think through the lichen, and if you look closely at the detail, it’s shredded money – perfect texture!
And finally: The Shallows
It’s a far cry from the original fabric, and it is now proudly hanging in our new home.
