Archive for the ‘quilts’ Category
Monday Marketing – Update
 I’m going to just think as I write for this post. After four full months of almost non-stop marketing – and a whole lot of sewing in there also – the business is very busy. We have some things coming up, some things we’ve dropped, and it’s time to evaluate where we have come and where we need to go.
We have dropped a potential art show for a variety of reasons, none of which are really positive in the long run for both us and the business. That was a hard decision to make, and I learned a couple of things. One, we don’t have to jump at everything and say yes to a possibility if it doesn’t feel right. When we were first starting out, I wanted to go after every possibility, even if it was unrealistic. Two, if we have to “push” to make it work, then chances are it isn’t for us. Three, I really like being able to take things at our speed. Even though we have limited years to build our art business, it is more important for us to enjoy each other, take opportunities to be together, and be able to actually create art when we want to. Those were some good lessons on which to ponder (for my English-language friends, no “ending with a preposition”….).
I have started working again on publicizing Art from the Heart, something I really want to do. I am behind on it, but I am slowly seeing progress. I am working on a major commission and learning lots, and I’m nearly half-way through. We are marbling a lot, which we are enjoying, and it seems like we are back to where we were before water and paint and so on became issues. And….we have a guild workshop to do the beginning of November.
Now, we used to do a lot of workshops, and we – not realizing it at the time – blew lots of opportunities to sell fabric. We would go and demonstrate, but never have fabric for folks to buy. Nothing like violating one of the basic rules of marketing – always have product because you never know when someone will want to buy. When I went to the School of Threadology at Superior Threads a year this past April, I took some fabric and sold out in 10 minutes – I could have sold a LOT more. Lesson learned.
So for this workshop we are doing things very differently. We will go with fat quarters and a couple of gift baskets. We will have hand-out of all our contact information, supplies connections, order forms, and class sign-ups. We need to get back to dealing with all the guilds (and there are a lot more in the city since we were doing this), especially since we have more to offer than when we were originally doing this. And….since we are talking about going east again next year, I need to put the word out and see if we can book a few gigs.
We will do a demonstration in our cookie sheet, so we can create a lot of small pieces to demonstrate patterns, and everything will be easy to transport. Then I have a lot of quilts (as opposed to art pieces) to show a group of beginners. The first quilt I show is my small Attic Window, where I felt the only color I could use with the marbled fabric was black. We’ll come forward to the fish quilt, which I am in the process of re-quilting, since those skills have tremendously improved. Hopefully people will feel inspired to buy/order fabric, and we’ll be busy for the bulk of November.
I need to take pictures of those quilts and get them online to document the journey. October and November hopefully will be extremely busy making and selling fabric!!
Quilt, Sewing, and Gift Show
 This weekend is the Tucson Sewing, Quilt, and Craft show, which has not been publicized much. I only know about it because I had a call from a vendor trying to sell me stuff, and I found out they would be here in town. Plus, the show is at an “expo” center that’s not in a great part of town, and entrance was around the back – and not well marked. That said, I enjoyed two things about the show. One, I could go on a SCHOOL DAY!!! I didn’t have to wait until the weekend. Two, I met some really cool people and saw some unusual gadgets that I really want…..that’s always a good sign….
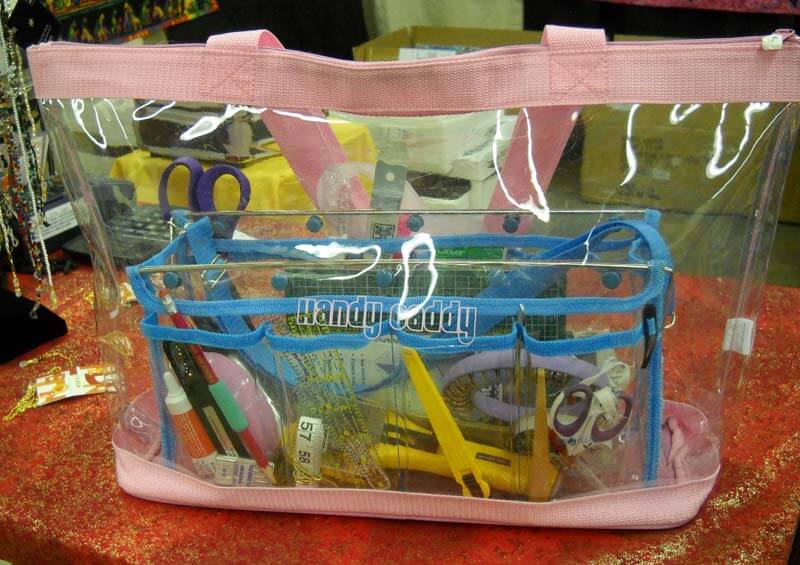
The Handy Caddy – I don’t normally buy impulse items, but I could immediately see a use for not only organizing my sewing table, but also carrying my sketch materials with me a whole lot easier than dropping everything in the bottom of my purse. The bigger tote will hold my sketchpads and assorted material for trips.
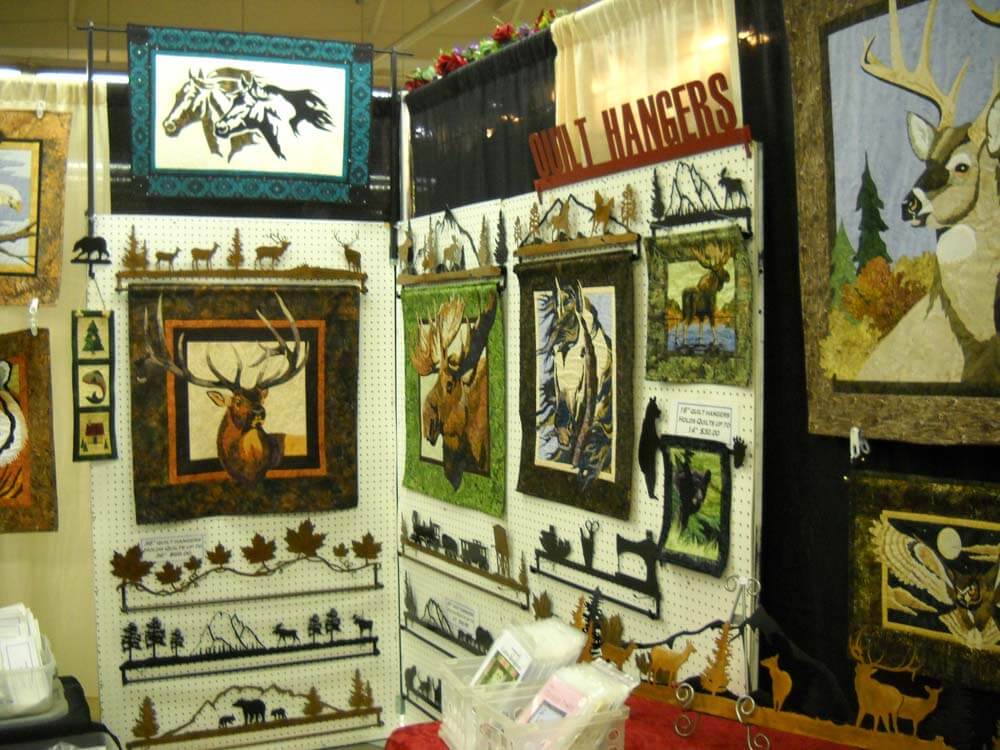
Also of interest were these really cool custom quilt hangers. I could see using these to hang pieces of fiber art for a quilt show, from Summer Sky Creations. The owner is local to us (well, norht of Phoenix, as opposed to East Coast) and can do custom work.
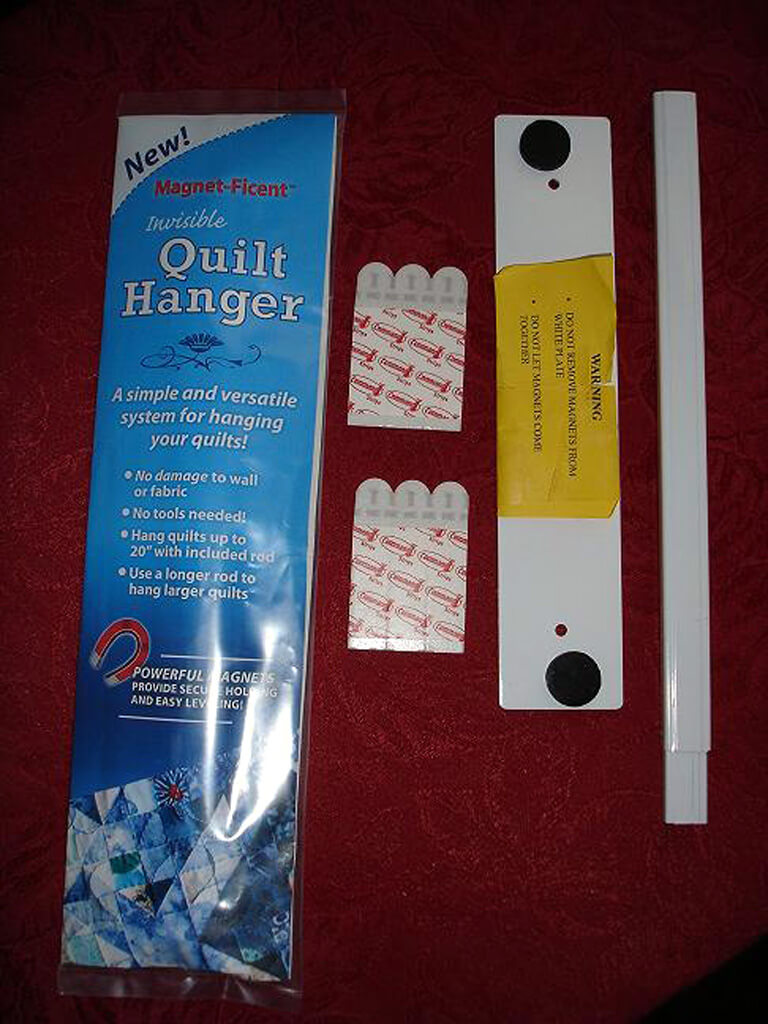
There was another quilt hanging system that uses magnets that I thought was brillian – even better for hanging shows at a gallery, and no tools needed or holes in the wall. From Rom Woodworking (check under Miscellaneous) comes Magent-Ficent: “$35.00 – Magnet-Ficent(TM) Invisible Quilt Hanger A simple and versatile system for hanging your quilts without using push-pins, screws, nails, or levels! Magnet-Ficent(TM) Invisible Quilt Hangers allow you to easily and securely support your quilt for display, yet it will appear to be floating very close to the wall with no means of support. This hanging system uses a small mounting plate attached to your wall using removable adhesive strips. ” We saw it displayed and LOVED the idea.
PS – his wooden thread cabinets are gorgeous!
From VJ’s Creative Designs come additional quilt hangers, and they are also even more local to us – just south of Tucson. Gorgeous wood designs for hangers.
This is within the first hour, and we could already of spent lots of money. I did pass on the $300 iron (down to $200 as a show special). Loads of bells and whistles, but I really don’t need steam…..
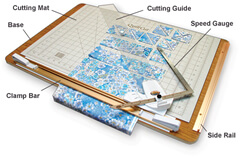
Then we saw THE cutting system….on our wish list. From Sew EZ Quilting comes this QuiltCut2 Fabric Cutting System. We saw it demonstrated, and when we get a little busier, it will help us save a lot of time preparing fabric.
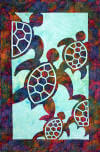
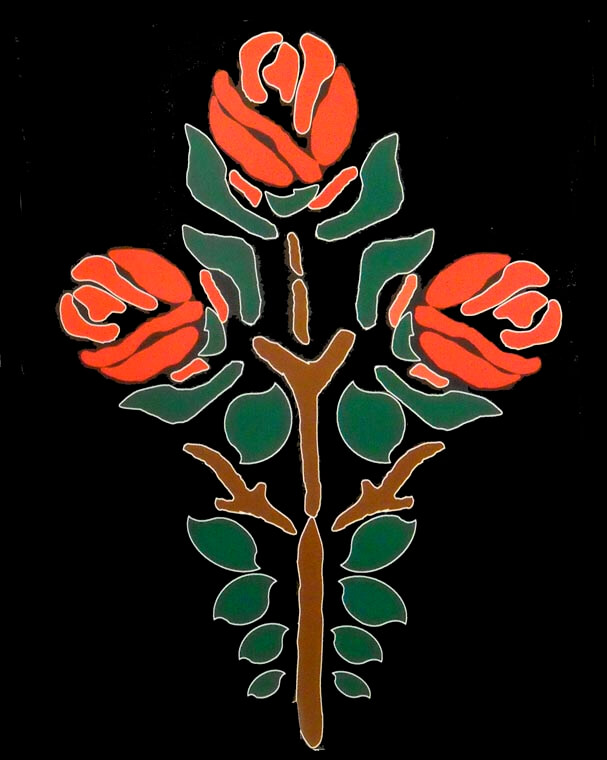
 Love this! Then I saw some GLORIOUS patterns from Pacific Rim Quilt Company that would be gorgeous in marbled fabrics. I love this pattern:
So it was a wonderful 2 hours of browsing, shopping, and talking to vendors. Now I need to go get busy!!
Visions Art Museum
 “Visions” is a major quilt art exhibit usually held in Oceanside, CA, every two years. It’s like the Holy Grail for art quilters. The Visions Art Museum has now opened in San Diego, at the old Naval Training Center, and will now host its own show. Just to be able to finally get to the museum this last trip to San Diego was a delight. The docents were wonderful and took their time showing us quilts, as well as asking us about our work. It is SO NICE to be with other artists who GET your work! One of the disadvantages to being an artist in the Southwest is unless you’re a painter or sculptor who “does” the southwest, no one is really interested in your work.
The major exhibit was Urban Landscapes and Soft City, with a special collection by Marilyn Henrion. Pictures were allowed in the outer area and in the gift Gallery. You can view a gallery of work by Marilyn here.
Here’s one of the really intriguing quilts from Urban Landscapes by K. Vellis Turan:
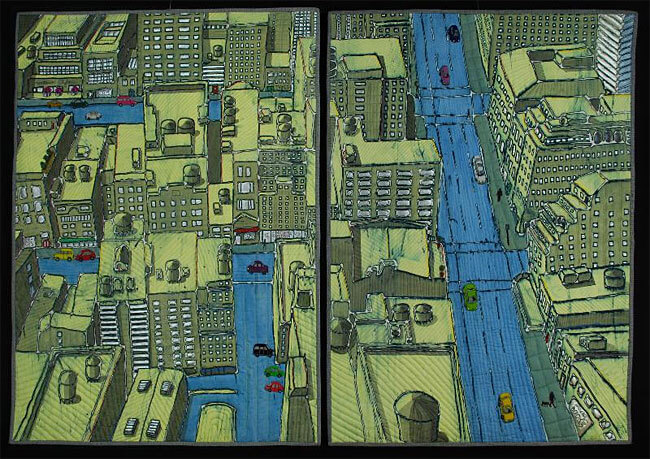 I purposely left this large so you could see details.
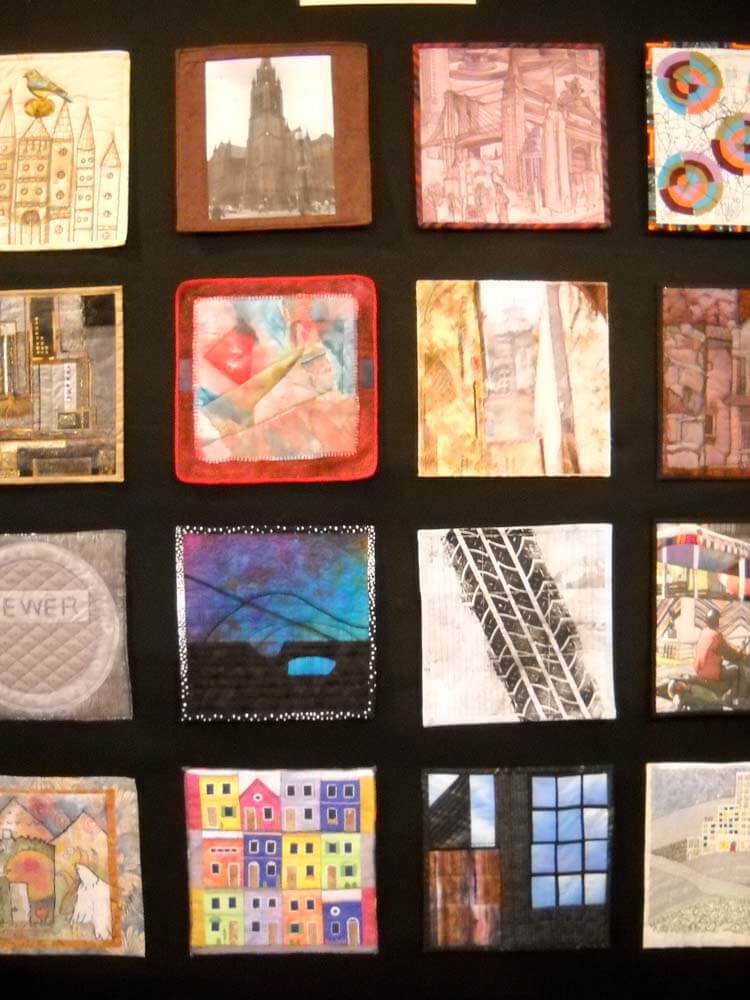
The challenge had some really interesting small quilts – 12 by 12 inches, which is a size I have just started to work with. These are all by members of the Visions Museum. Sorry I don’t have names….
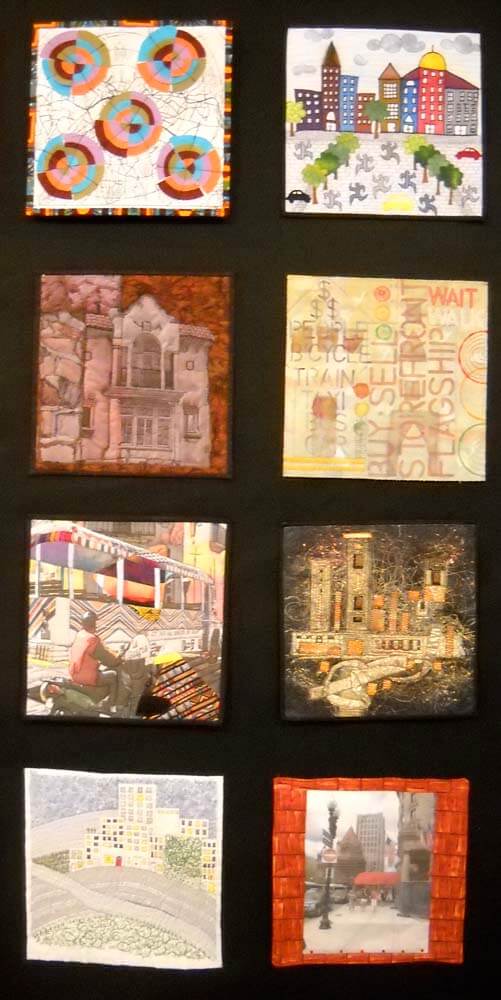 Here is an example of Marilyn’s work. Her Photoshop skills are superb.
 There were a couple of quilts by members in the gift Gallery – really superb work – and again, sorry for no names.
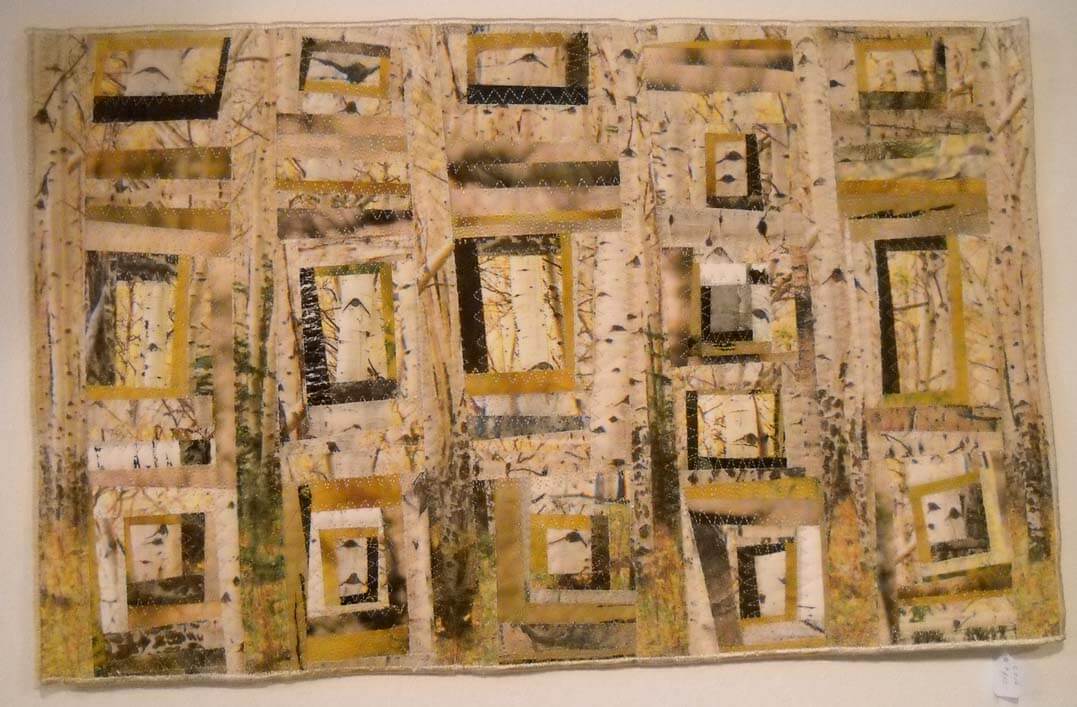 An interesting take on the “log cabin” traditional pattern, with lots of details.
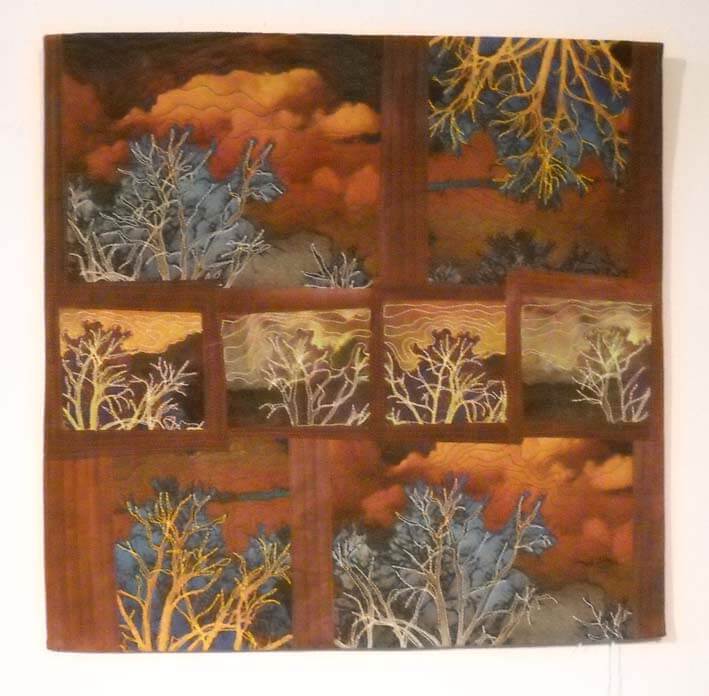 Love this one. Those are definitely my colors!
We bacame members, and I am looking forward to our November trip to see the new exhibit on “Interpretations.” LOVE LOVE LOVE seeing fiber!!
Work in Progress Wednesday
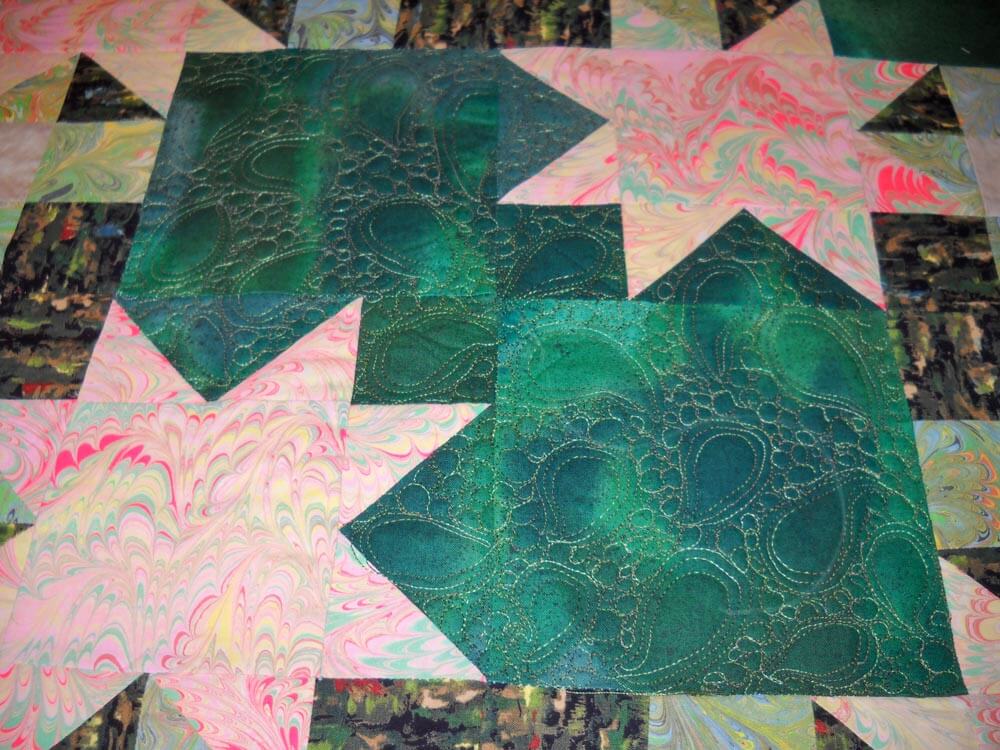
It has been a productive week, and I have two new projects on the agenda, but first – my finished quilt from last week. This is waaayyyy better! It was originally done many moons ago as a marbled BOM, and I wanted the quilt, which I have always liked, to reflect the new skills I have. It’s from a block pattern from Judy Martin’s Around the Block.
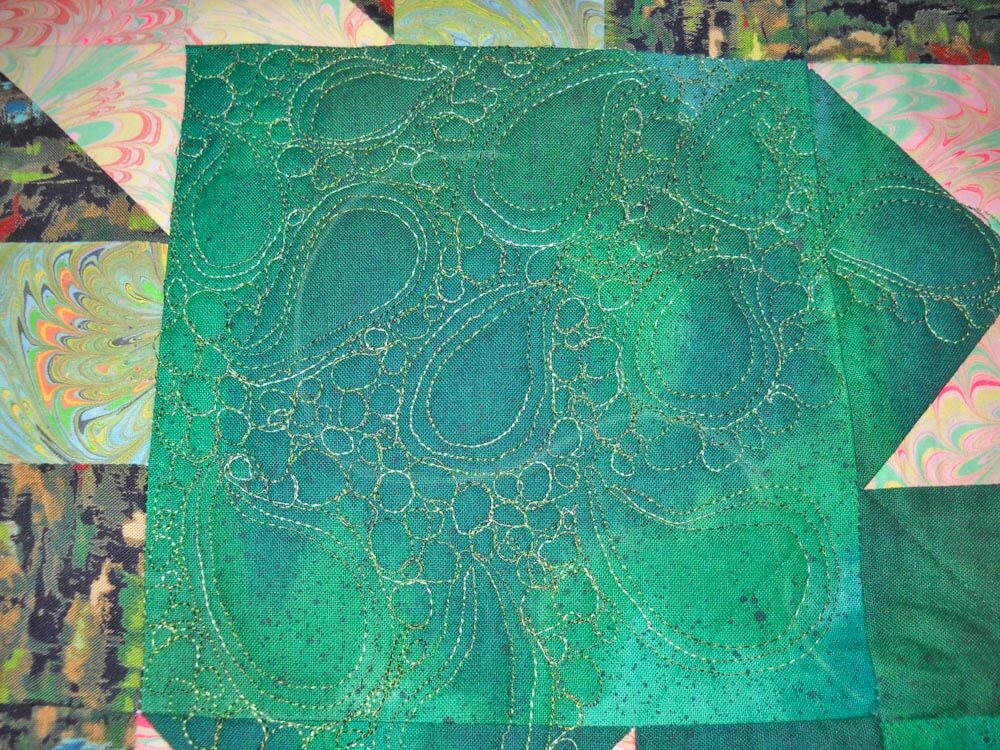
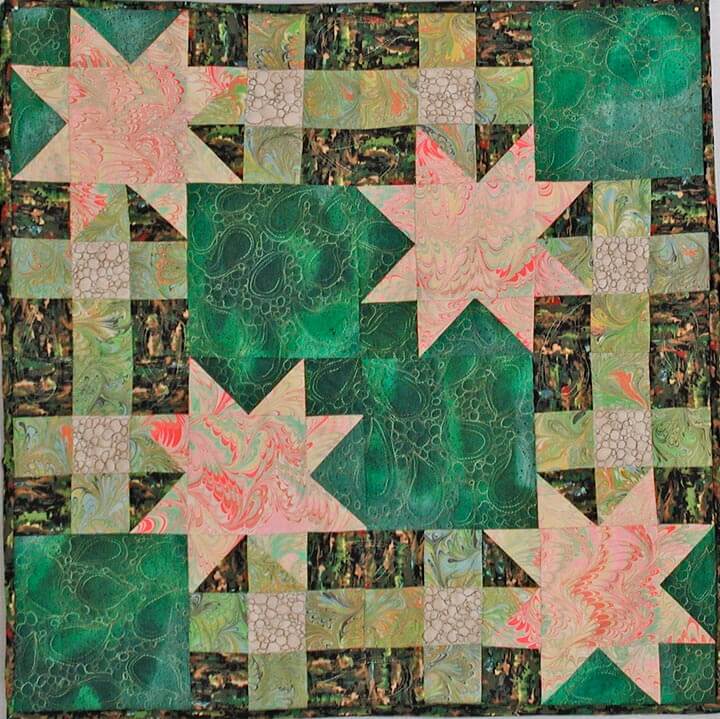 I’m calling it Monet’s Marbles, based on the mottled green fabric, which I bought years ago because it reminded me of Monet. I didn’t quilt anything in the stars, because I wanted them to stand out from the rest of the quilt. Here’s a close-up:
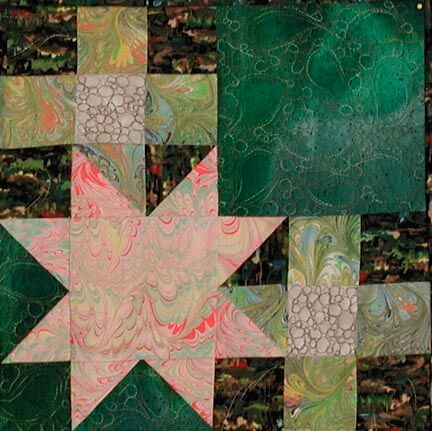 This is one of the blocks from Judy Martin – the quilt has four and uses two different marbled fabrics.
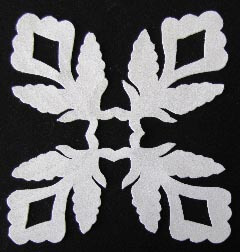
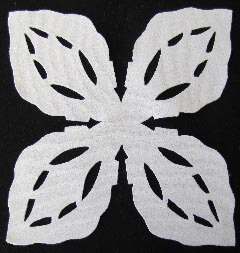
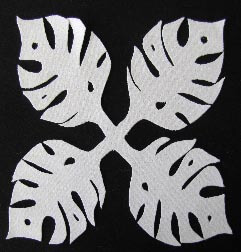
The next project is to finish up some small wall hangings for my second mom. She spent one winter in Vermont cutting out Hawaiian designs for a potential quilt – they never made it into a quilt, and I am trying to put them into something that Momcat can use. There is one major problem….these amazing blocks are all cut out of a heavy white polyester fabric…that ravels…………so I am using a lot of satin stitch, which also adds a slight bit of color to the blocks.
We decided on a black background to emphasize these wonderful patterns. I am hoping for one of the small wall hangings to be done for next Wednesday….we shall see…..
Many of these are original designs , and they are certainly a challenge in corners, heavy polyester, and satin stitch….but they will be gorgeous!
Work in Progress Wednesday
Sometime this past autumn, I posted a picture of a quilt completed at least 10 years ago, asking for suggestions on quilting it. I had used invisible thread (waaaayyyy before the improvements in threads) and did basic in-the-ditch quilting. Pretty darn blah. So I took ALL the quilting out, including taking the binding off, and washed it to hopefully remove the shadow lines.
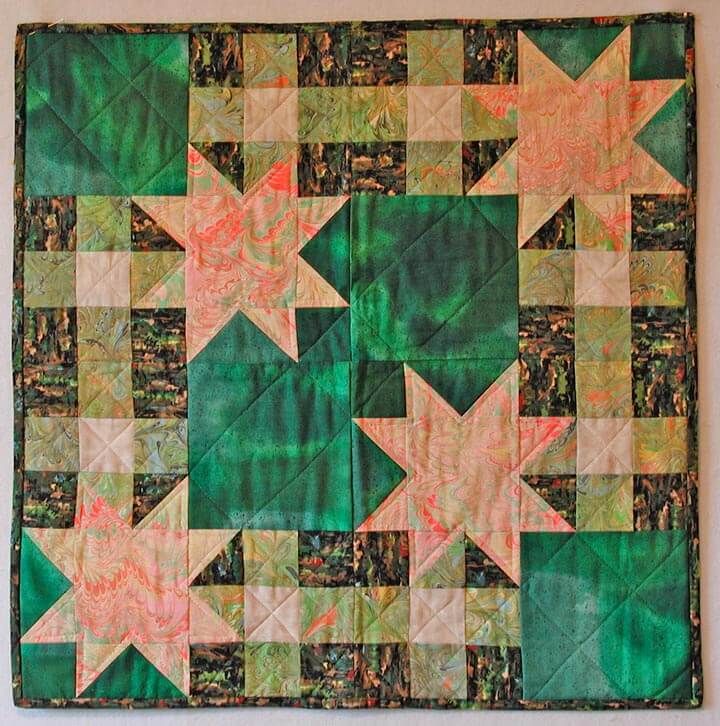
Silly me, I was thinking of having it available for sale at the art show we did in November. Well, that didn’t happen, so it moved to my “to do” list for when I retired, and then to the top of the list as I saw the studio coming together. I thought of attempting some feathers, because most of what I have done for quilting has been stippling or stitch-in-the-ditch.
Before I could start, I discovered this video on stippling, and I was hooked. Sharon Schambler had an hour-long video (actually longer) with 9 free motion patterns she has used in one of her quilts. Easy to watch and very easy to do!
I chose the second pattern, used some variegated thread from Superior (of course – I am totally hooked!), and started. I wasn’t sure I could really do this. So voila –
I was thrilled at this point, because I realized 1) I could do this, and 2) the quilt was going to look SO much better!!
This is the completed center. I’m not going to quilt the marbled stars (unless someone has a really good idea for me?? Hint hint…). I ABSOLUTELY love it! I’m doing a variation of the pattern on some of the side strips, and it’s coming along well. Hopefully pictures this weekend…..
Work-in-Progress Wednesday – Seasons: Ice
I am enjoying not feeling pressure to finish or make something under deadline. So I started another new quilt that I would like to make into a pattern. That’s one thing that’s been appealing to me…ever since I sold off the rights to several early quilt patterns. This one just seems to be happening.
It started with my Desert Heat Quilt.
 I really like how this came together, and everything I wanted it to do (especially radiate heat), I was able to get it to do. Once it was up on the wall, I decided I needed a companion piece, called Winter Ice. So since the move happened, and I had to rearrange and clean the studio, I pulled all the fabrics that spoke to me of “cold.”
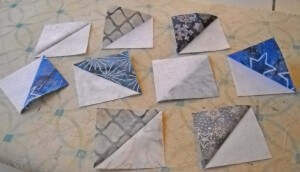
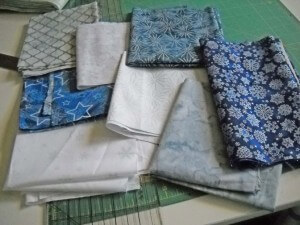 A beginning selection to work with. The center white one is full of glitter.
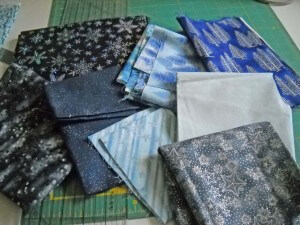 Except for the bottom right, ones that didn’t make it into the selection. I try to match a light and a dark, a light with a medium, a medium with a dark. I make waaayyyy more triangles than I need, because I like to have a variety to choose from. My center block with be eight by eight in triangles. You can work in groups of fours to keep a square: 4 by 4, 8 by 8, 12 by 12, and so on. I like the 8 by 8.
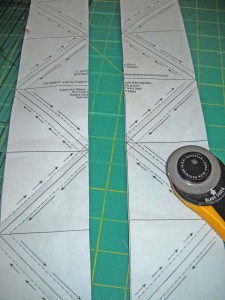
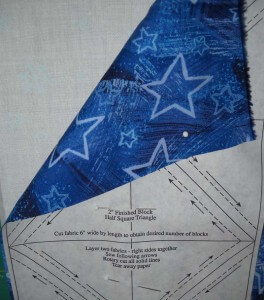 I like using the Triangles on a Roll, because you can do some mindless sewing. I cut pieces the long length of the fat quarter, about 6 inches wide. Put the right sides together. I tend to carefully pin, but if you don’t iron well first, you can get lumps in the back that may not come out with ironing, and may cause some stretching.
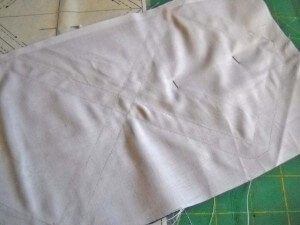 But the great thing about sewing these triangles is that you can just follow the lines. Use a small stitch, because you will be tearing the paper off each smaller triangle when you are done.
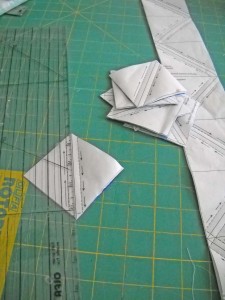
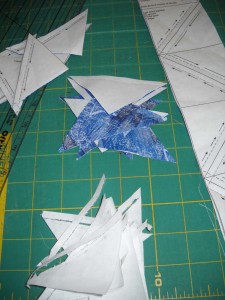
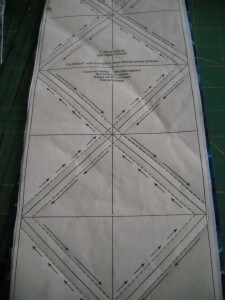 What’s nice about this also is that you can have several stages going at the same time…..sewing on the paper, cutting the triangles apart, tearing off the paper, pressing, cutting off little ears. Some at different times, or all at once. I like doing the stages.
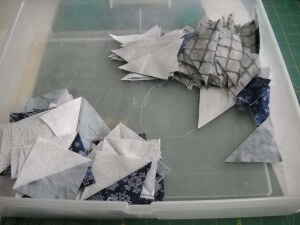
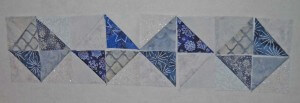
I iron to the dark piece. I tried on Desert Heat to iron all the seams open, and I ended up with major lumpy bumps, so this time through I am ironing everything to one side. I use a small container to keep my triangles, ironed and un. I just slowly work through the ironing. Once I have them all cut, I play around with a design. Below you can see how the initial triangles worked out.
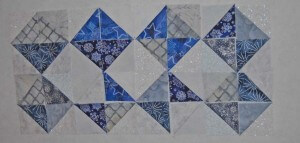
First part of a layout, just playing around…..
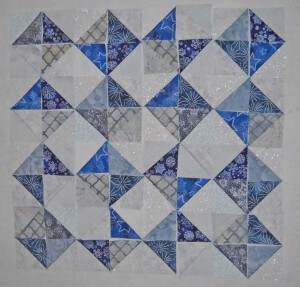 The last is the potential final layout.
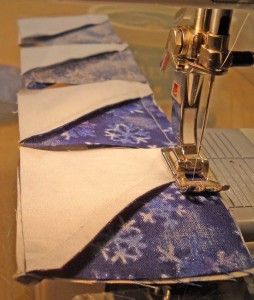
Then I strip-piece the rows together. This can be a bit tricky, as you are matching the seams on top of each other.
At this point you need to make some decisions again about ironing.
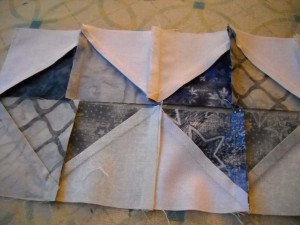
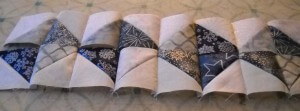 Here’s two rows pieced together, waiting for ironing. One row I press seams in one direction, the other row the seams in the other direction. Then you can “butt” each of the seams together for virtually perfect points.
 And that’s where we are at this point. I now have a draft of the beginning of the pattern, and I know all the places where I want to add more hints. So we’ll see where I am this time next Wednesday.
Any pattern-writing hints you want to share? Let me know – I’m interested in any and all ideas!
Other Work-in-Progress Wednesdays:
Work in Progress Wednesday – Two New Quilts
Awright, so they’re not technically WIPs. But I haven’t shown all of them on here before, and I really do love them. And close observers will recognize the blog heading as the fabric in “Salmon Run.”
“Salmon Run” returned from its several-month engagement in Alaska at the Cordova Historical Museum. I love having it back – I am so fond of the fabric.
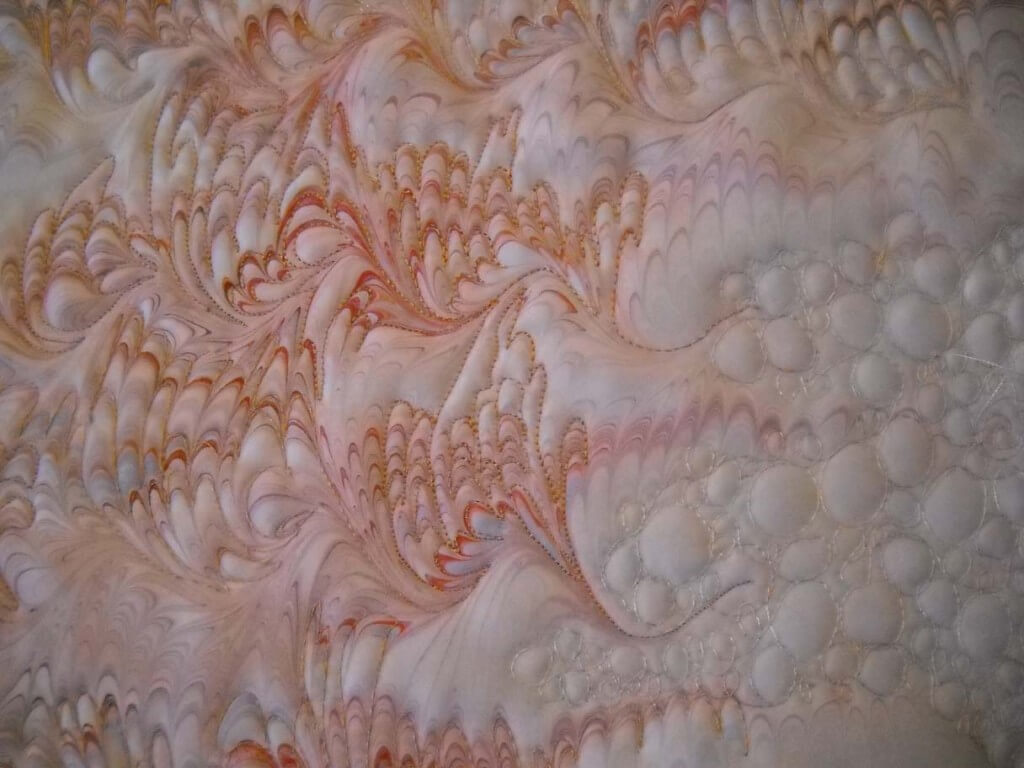
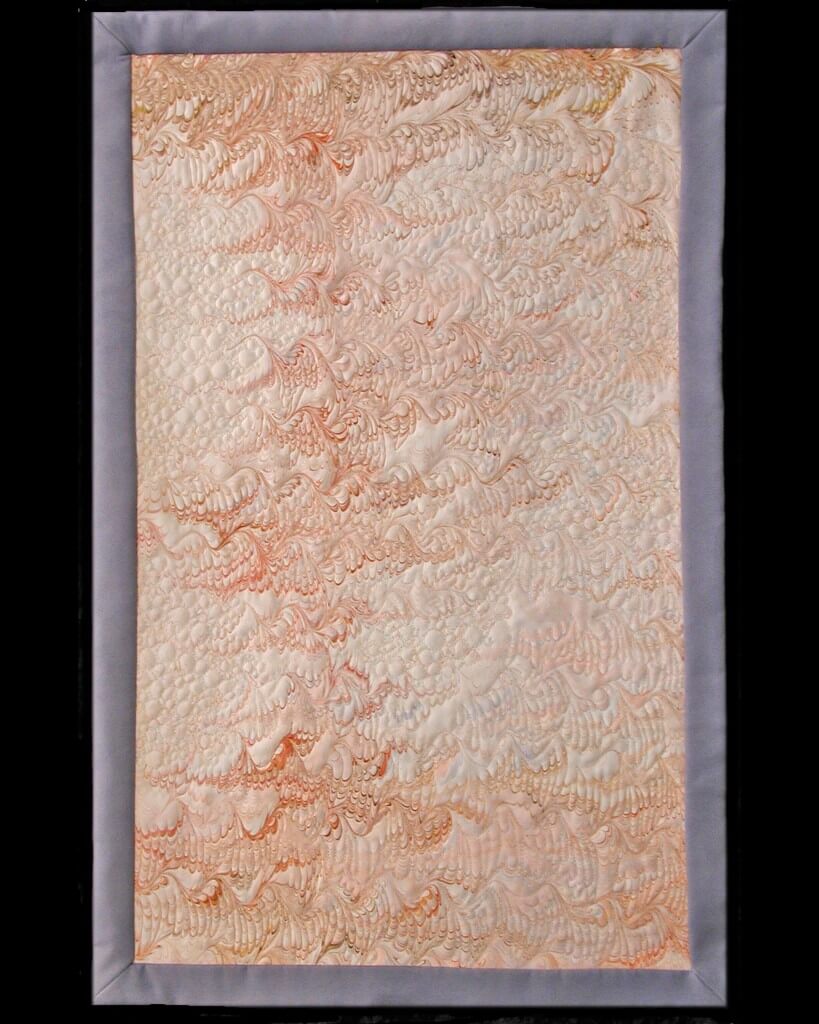 Here’s a close-up of the quilting.
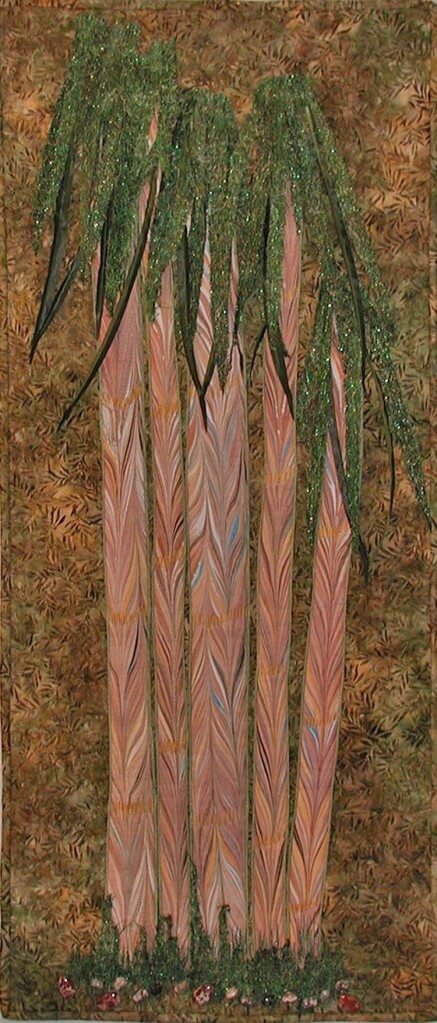
You also haven’t seen my latest piece, “Bamboo Grove,” in a full shot.
This piece had so many techniques I hadn’t tried before. I am reconsidering the tops of the bamboo stalks…I may decide to take the leaves off and try another way of attaching them to increase their fullness. So I guess it still is a “work in progress.”
What am I working on now? I am doing an art show on November 20 with the Tucson Art and Craft Association, so I am preparing fabric for that, as well as requilting a few small quilts. I am thinking of revising my still-unfinished “Iceberg” piece from several years ago into a series of Icicles for Road to California – I have till December 15. I can still use all the techniques I had planned, just in some different forms. I am still thinking about the next “large” piece with marbled fabric and don’t quite know what it’s going to be……I have some really great large pieces of fabric lying around.
But…I also have about four other quilts in various stages that I need to get to! Such decisions we all have….what’s waiting on your list of to-do?
Quilting Designs and Illustrator – and a GIVEAWAY!
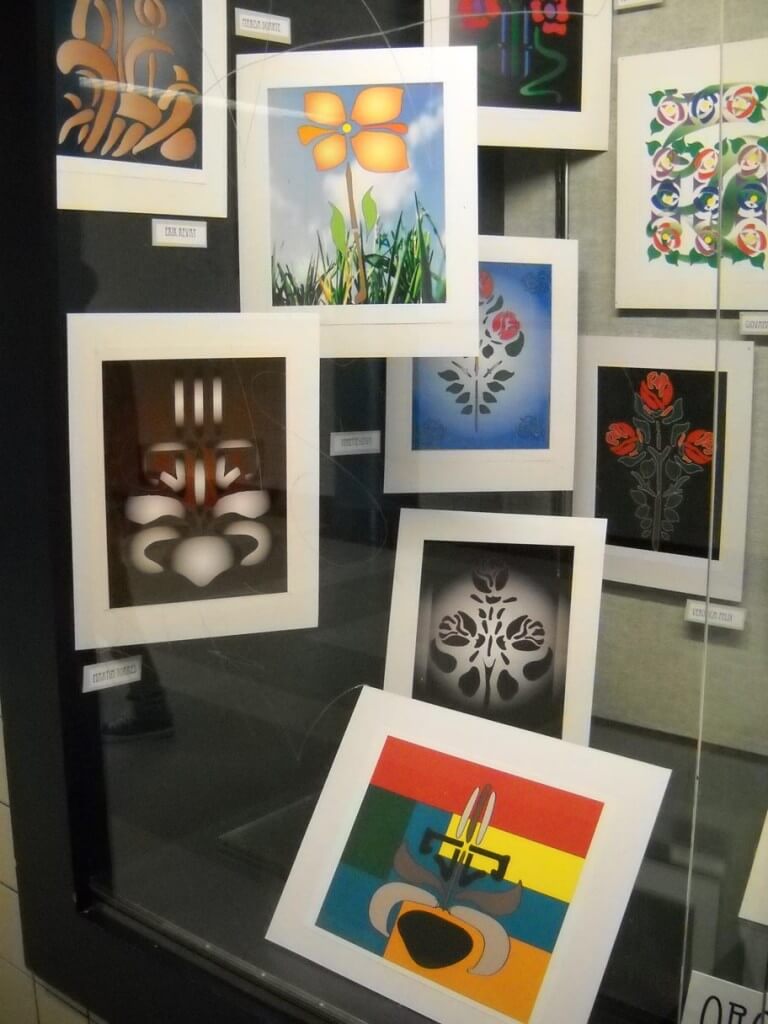
The high school I work at is the arts magnet high school for the city. The kids have some amazing opportunities in both performing and visual arts. Imagine taking a class three times a week in all the Adobe programs – all updated, where you don’t have to worry about buying the programs, getting updates, and making sure your computer always works, plus hands-on instruction rather than learning yourself. Can you say “jealous?”
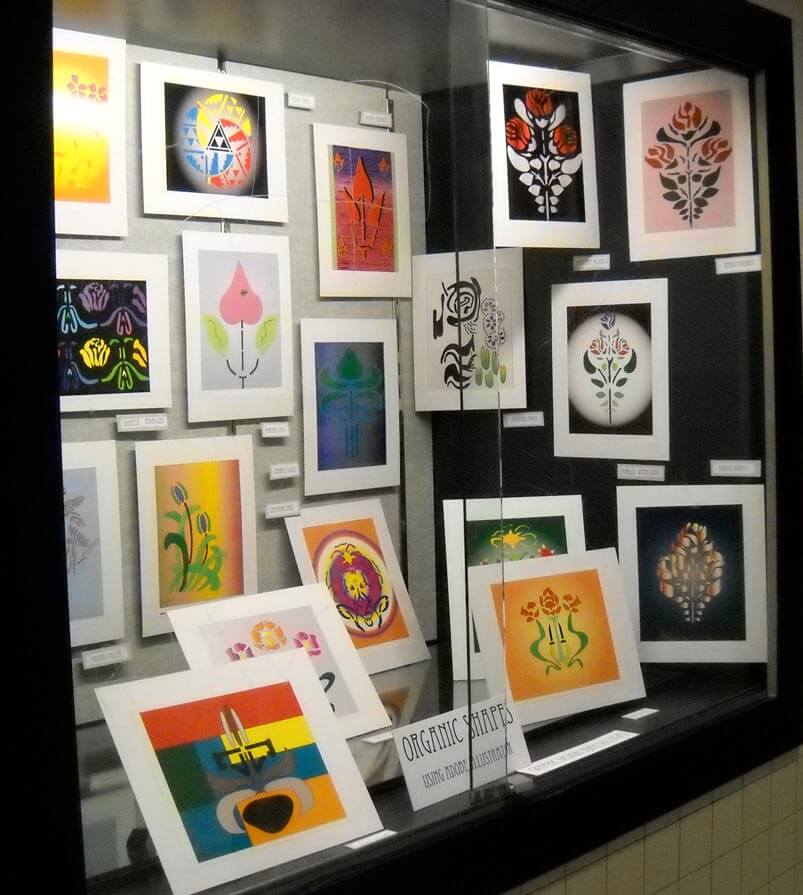
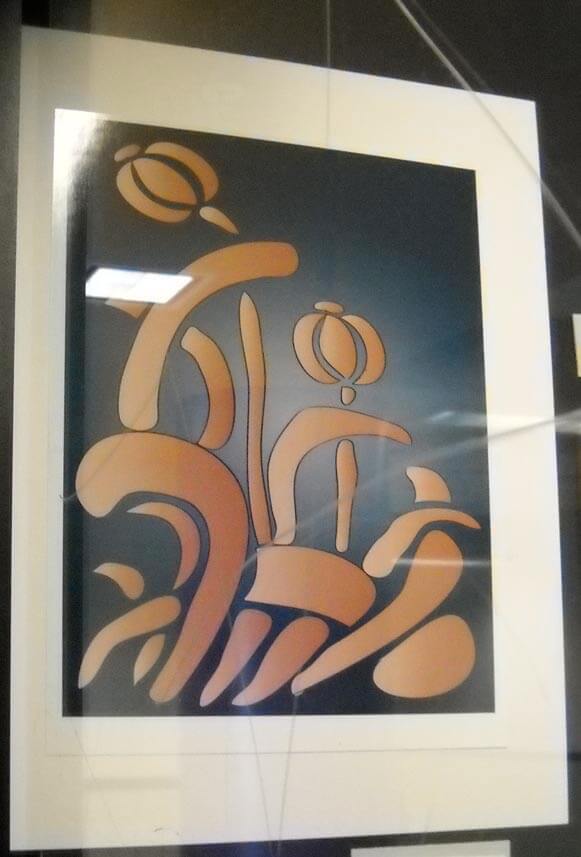
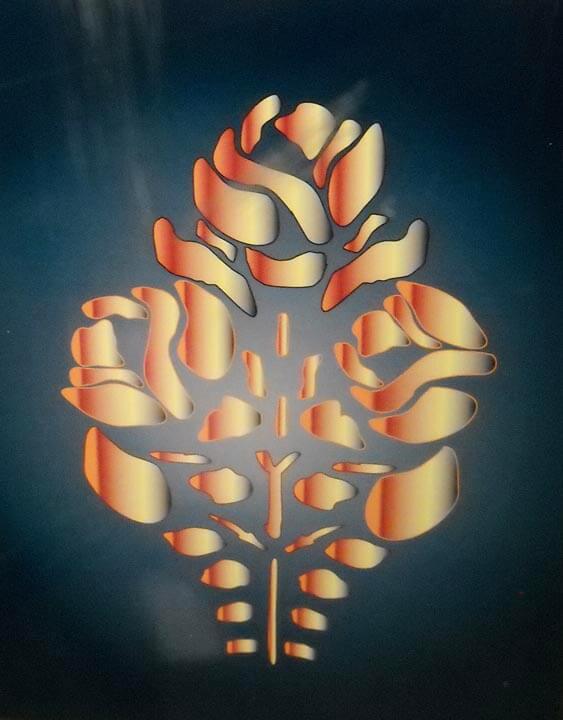
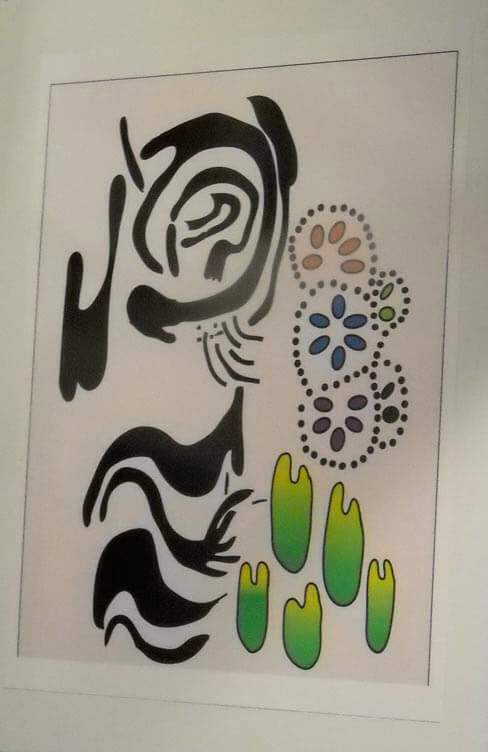
I think back to learning Pagemill waaaaayyyyy back when I was just starting my website in 1998…I still know a little code from teaching myself. Everything I’ve done has been self-taught, so I love the opportunities the kids have. About two weeks ago I walked to the end of the hallway to discover a new exhibit of student work, using Illustrator – a program I just haven’t had time to explore. The kids had to recreate some organic shapes (the pen tool makes me nuts….) and use some filters to develop their piece even further. All I could think of was what cool quilts these would make. There is glare (and the remains of some graffiti) on the showcase window, but I think you can get a good idea of what the kids are doing.
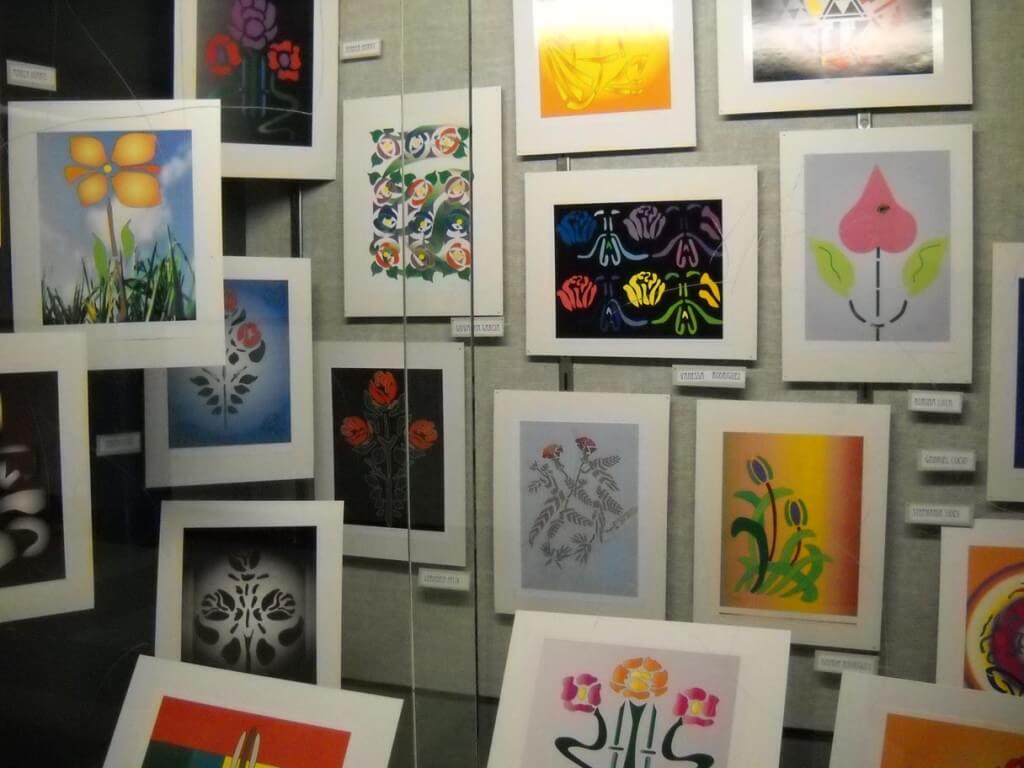
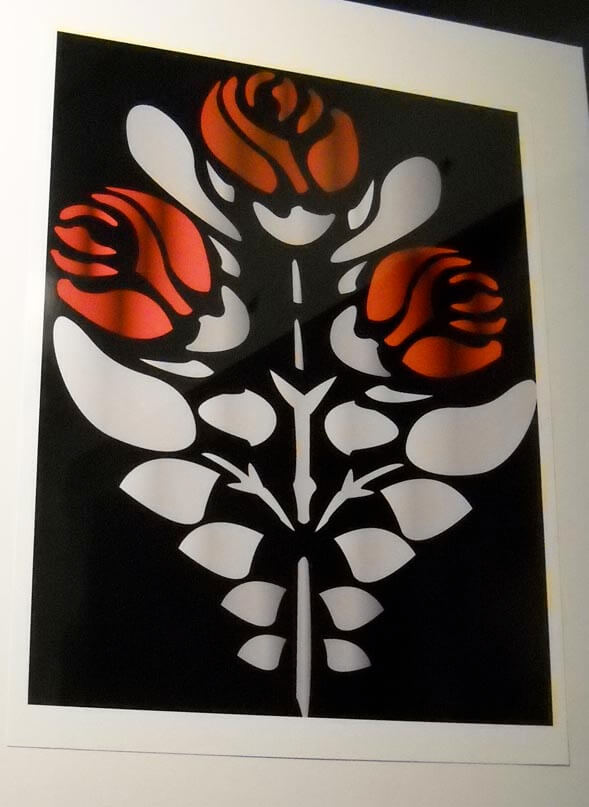 What I like about this is the blossoms. I am thinking they would look good in free-motion on a solid area of a quilt. See my dilemma below the pictures…….
Now, speaking of quilting designs….I need some help. I have two “older” quilts that I am requilting. I took the stitches out of one while in the hospital, and I’m working on the other one. I need suggestions as to quilting. I have grown beyond stippling, but I am still having trouble with actual designs that will work with the patterns. Here’s the first – four traditional blocks with marbled stars in a neon paint.
You can see all the old quilting. When I get all the invisible thread out, I’m going to soak it in warm water to see if I can make the lines disappear. But what should I do for quilting?
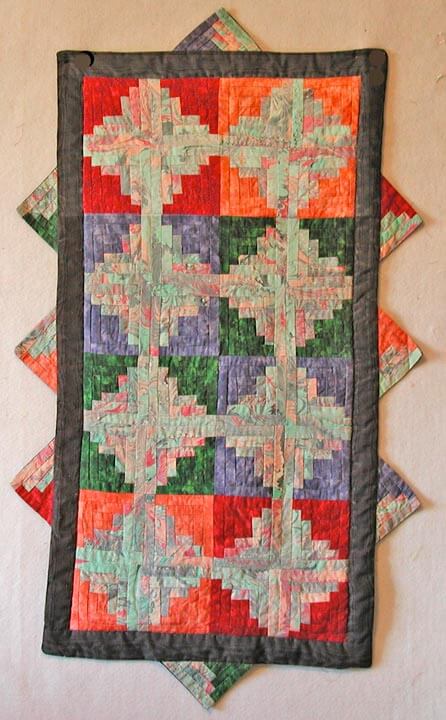
Here’s the other – a log cabin table runner done with marbled fabrics. What do you think? Just stitch in the ditch??
Leave me comments on the blog, and I’ll do a giveaway for the best suggestions for each – some digital note cards based on marbled patterns. Come on, help me out!!
Work-in-Progress Wednesday
 My thread arrived yesterday!! Lots of new greens, so I want to start in on the bamboo leaves tomorrow. Expect an update next Wednesday – and maybe even finished….
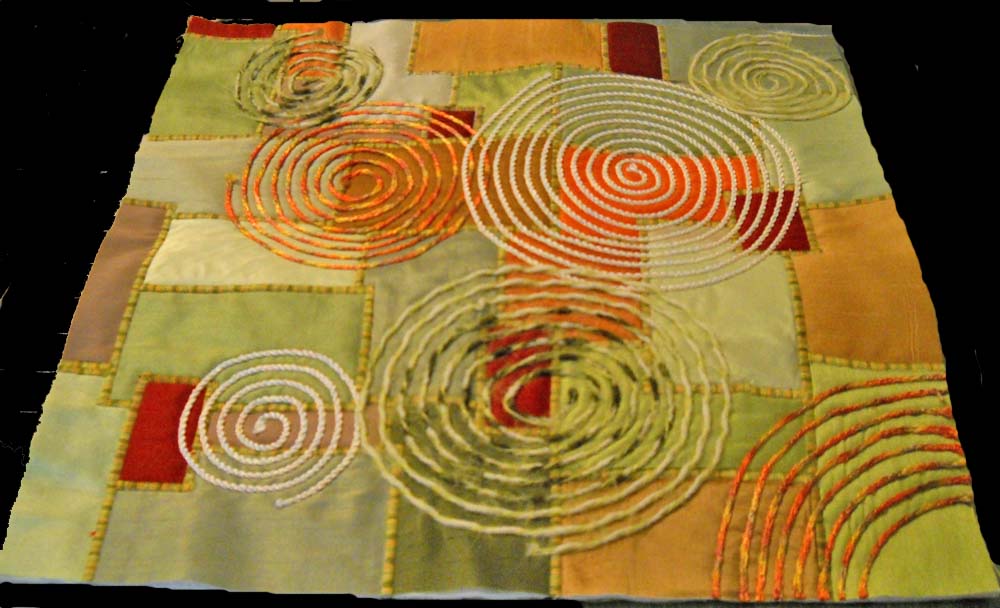
I wrote a while ago about using some dvd’s for professional instruction and how much I am enjoying this new manner of learning. One of the dvds was by Carol Taylor, about design. She called her method “arc-i-texture,” and by the time the video was done, I wanted to try it out. A long-time friend has twin girls whom we got reacquainted with in Vermont, so I am making them housewarming presents. Shelby likes greens, and Brianne likes blues. This started because Shelby gave me lots of small pieces of various silks to try and marble. For whatever reason (I think too much sizing) they didn’t marble well, so I decided to use them for this project.
While I finished Shelby’s, except for the facing, here’s Brianne’s to show you how I started out.
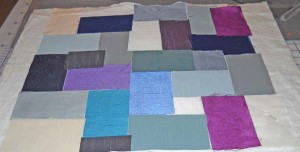 All I did was arrange some rectangles into a fairly pleasing design. At this point, ho hum – doesn’t look like anything. The next step will be to anchor each of the pieces, which I will do using a satin stitch on each of the edges. That will provide another layer of interest. Once that is done, I will couch down a variety of threads for a third layer of interest. What I found with this project is that as I attacked each new layer, the piece not only became more and more complex, but also more interesting. Here’s Shelby’s, so you can see what the final piece will look like:
Way more interesting! While I have a couching foot, I haven’t used it before this, and I do like how it works. I learned to give the yarns some play and let the machine and the foot do the work. Next piece shouldn’t have the drawing up of the fabric from my pulling the yarns. I will say for the blue one I tried a whole bunch of stores trying to find some interesting yarns and trims.
Carol mentions in her video that she’s made something like 400-plus of these, and I can see getting addicted. I like the sheen and play of the silk, especially since the “nap” is going in different directions and takes the light differently, but I want to play with some lights, mediums, and darks from my stash for the next couple.
I want to know what videos and dvds you’ve watched for instruction and inspiration!
Sunday Stories
I love reading blogs about the stories behind the art we create. It occurred to me I could document (primarily for myself) the process and story behind some of our pieces in our gallery on the website. There is a page on the site with some very early quilts, including an original design for a math program I participated in.
This is the PRIME quilt – the name of the program was Promoting Reform in Mathematics Education, and it was a total of 6 weeks over three summers at the University of Arizona. We gave this quilt to our professors at the end of the third summer, and it still resides in the math department.
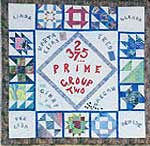 The center is the program itself, with the first few prime numbers. Each triangle attached to it is the name of one of the professors, with a little graphic representing each one; Fred, for example, had the calculator. The four corners are the teacher assistants we had, and each of the blocks is made with marbled fabric and a PRIME number of pieces. Let me tell you, the block with 37 pieces was a doozy to do.
We all signed the back of the quilt and presented it with the message that a puzzle was built into the quilt. Five 9 years later I filled in two of the professors as to what the puzzle was – the prime number of pieces. This was a fun quilt to design.
The quilt that started me on my present journey with marbled fabric is Gaia 1: Interdependence.
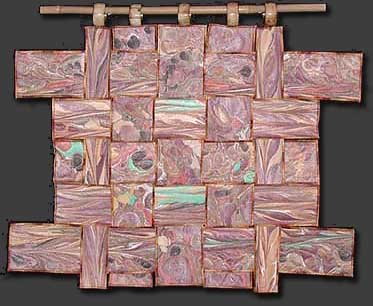
This is kind of a cross between a traditional stone pattern, some basic combing of paint, and some chevron pattern. When the fabric came out of the tray, I liked the interplay of the turquoise with the earthy colors. The turquoise reminded me of the gifts from the earth. I don’t know why I started to cut into strips – maybe just because I wanted to try weaving something. I really don’t remember.
I had five strips and nothing was working. Then I decided to just weave it back and forth and see what would happen. I liked where it was going and cut the strips in half so I would have more to work with. I used a thin batting (which I since use exclusively) and backed it with a fossil fern fabric. Then I started to quilt, just by following the lines of the fabric. I went for three hours without stopping because I was loving how it was working.
I didn’t want bindings. I thought it would detract from the message of interdependence of all the elements on earth. Then I hit on serging the edges. Now this was before I really understood what a serger can do. I still hadn’t figured out rolled edges. But I knew I wanted some type of variegated thread, so I just experimented.
Then came trying to hold it together. I used a LOT of pins and very carefully pulled the weaving off the design wall onto the quilting table upside-down and started to stitch all the strips together. Let me tell you, that took forever….
Well, the problems weren’t over. A basic sleeve wasn’t going to work for hanging, so I spent a few weeks trying to figure that out. I ended up buying a set of napkin rings with an earthy feel to them and looked for a piece of bamboo. The big problem was anchoring the napkin rings to the strips – with a lot of delicate sewing….but the piece has hung for five years in an office in Tucson with not a single problem.
I knew when this was finished I was on to something. The bamboo I am currently working on will be the fourth in the Gaia series of weavings. I do want to do more…the images I saw of rice paddies in southern China would make another interesting weaving…..
Work-in-Progress Wednesday
I have to say, I have been busy. I originally was thinking nothing was going to happen art-wise in July because of so much work on the business. I was wrong…the last week has been incredibly productive. Last Wednesday I wrote about my lava piece just telling me it really wasn’t finished. Here’s last week:
And here it is now, since it told me it was “finished:”
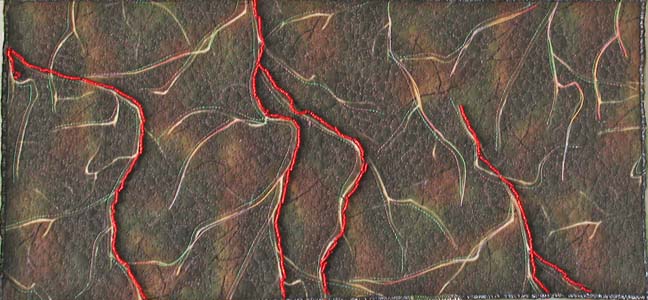
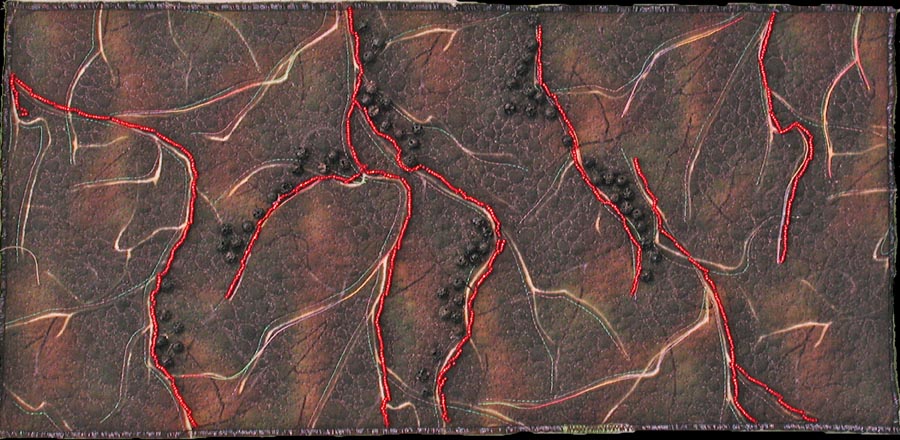
Turns out it needed actual lava – those little round pieces are actual chunks of lava I collected over a couple of visits to the Tucson Gem Show each February. I also added more lava flows, and nothing really interferes with the quote on the back. This is going to go up in the newly-developing Etsy store.
My “purse” didn’t make it as a purse…I loved the play of the fabrics together, but I couldn’t get handles to work the way I wanted them to…so now it’s a nice new basket for collecting fabric scraps.
If you were reading on Sunday, you saw the finished “Desert Heat” quilt, now on the wall in our bedroom.
Now I am working on my “bamboo” quilt, started about 5 years ago with a piece of marbled fabric in the chevron pattern. One of the things I like about this quilting is that it is very zen-like, in that you can just follow the lines of the patterns. You can see the original piece of fabric here. You’ll see what I mean about the lines of the pattern.
As I was quilting yesterday, it occurred to me to take pictures of the process, and then that led me to think about putting together a tutorial on quilting marbled fabric. There is an interesting story behind the quilting. Years ago I pretty much just put marbled fabrics with blacks, as I wasn’t sure at all about my color sense. I did slowly branch out, but it was Quilt artist Ellen Kohen who took a piece of fabric and quilted it. I knew there was more I could do with the fabric, but I wasn’t sure how to approach it. Once I saw what Ellen had done, I was hooked, but it took confidence to start the free motion needed to accent these patterns. Starting this Sunday, I’m going to introduce “Sunday Stories,” and I’ll take a look at the story behind each of the pieces in my gallery on the website.
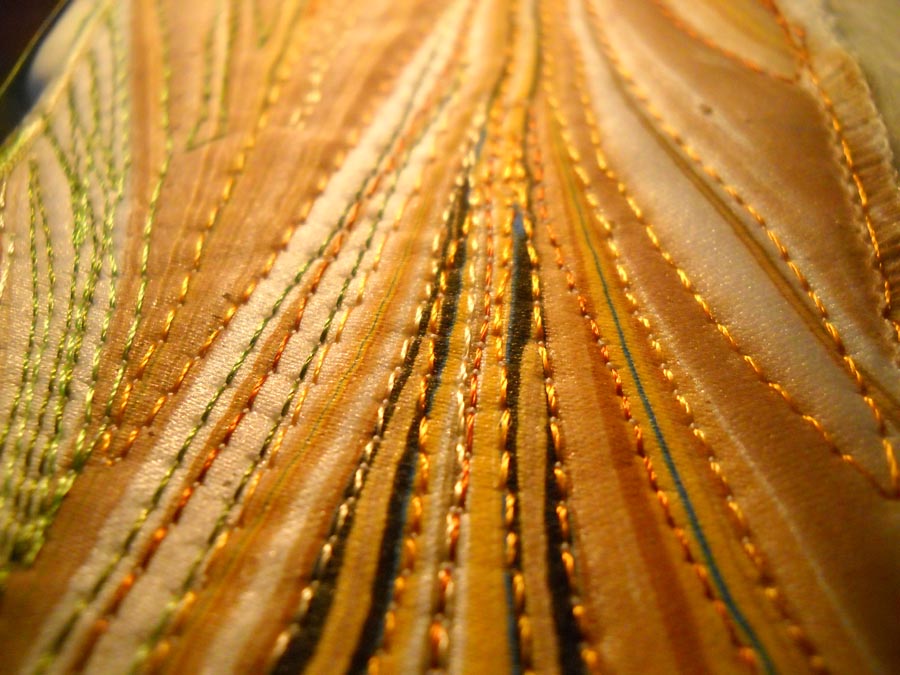
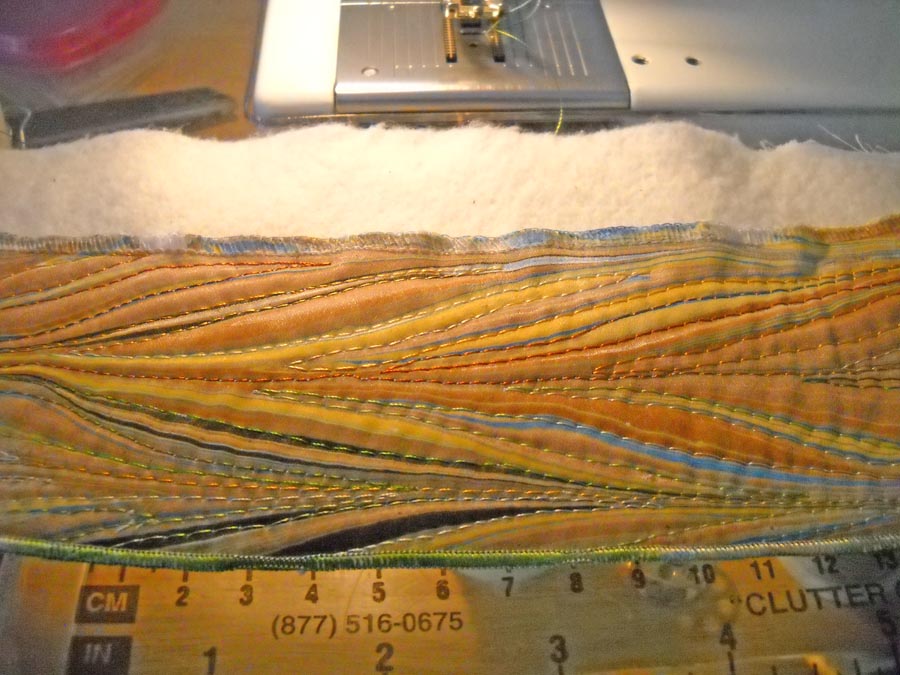
For today, here’s a close-up look at one of the bamboo strips (which I am aiming to finish by mid-August, as I want to enter it into an art quilt show with my “Ocean’s Bounty.”) You can easily see all the “lines” in the pattern and how I have followed the lines with a variety of different colored threads. The problem you might run into (as I have) is when to stop with the lines – you can get easily sucked in to quilting everything.
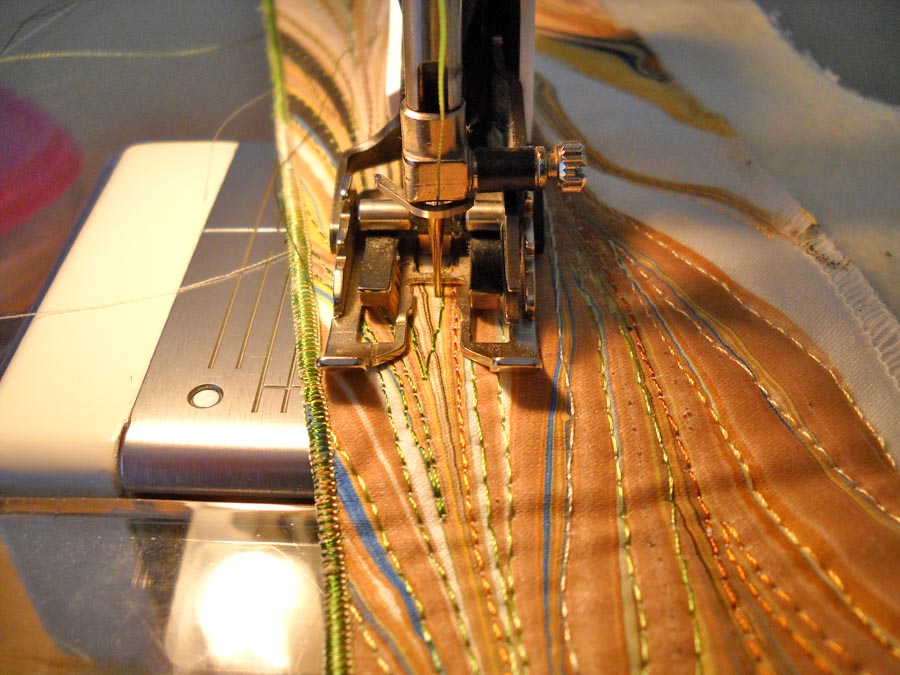
You can see the serged edge in this piece – which is how I usually finish these weaving pieces. I’ve learned over the years not to serge until I am finished with the machine quilting.
This is with my walking foot, but I’m not totally happy with the control with this foot. Because there are slight curves to these lines, I use my regular foot and am quite happy with it. I think this is probably a personal preference. I tried the free motion foot on this, but I didn’t have the control and even stitches I wanted for this design.
I have four and a half “strands” of bamboo finished at this point. I can quilt for a couple of hours, listening to some John Denver and just kinda zone…as I mentioned earlier this week, I am amazed at just how much I get done when I think a project will take forever. Now what probably will take forever will be the leaves. I’ve tried marbling some silk leaves – not happy with them. I am thinking some thread leaves, but they may not seem “sturdy” enough for this hardy plant. I do know thread leaves would be a great use of all my lousy threads I have hanging around. I haven’t broken any threads with some 6 hours of quilting – have I told you how much I love my Superior Threads?
If you would be interested in a tutorial on quilting marbled fabric, please leave me a comment and let me know. If you’ve got pictures of some marbled fabric that you have quilted, I would LOVE to see it.
Quilt is FINISHED!!!
It is so interesting to me that we can think in our minds that projects will take so much longer, and then we actually never get around to them, because we “don’t have the time.” That was the case with my Salmon Run entry and with Desert Heat. I kept thinking I was going to need more time than it actually took to complete the work the way I wanted it.
I made the commitment last night to finish Desert Heat – and I did! Binding and all, it’s now on our wall in our bedroom. What I particularly like about this quilt is a bunch of things:
* I used some of my first hand dyes, and you can’t really tell mine from the commercial ones.
* I experimented with a pattern and everything about it worked. I just started out sewing triangles because I wanted something mindless to do last summer.
* I learned that when sewing bunches of triangles like this, it is best to press the seams open for less bulk. That is probably the only thing I would do differently in remaking this quilt (I can see a “winter” quilt to change for the seasons…).
* I pulled colors based on how “hot” they seemed – turns out in the final analysis I did have a light, a medium, and a dark value without really thinking about it.
* The quilting worked perfectly – I only took out about 8 inches until I had the tension where I wanted it. I am getting much better with that – checking first before I sew a whole side….
* I love my new threads! I bought New Brytes in orange and yellow when I was at the School of Threadology with Superior Threads. I knew I wanted heat and bright – much like the desert in summer. I was given in my goodie bag a wonderful Rainbow of oranges, yellows, and greens that worked PERFECTLY in my border.
* Not once did I break any threads. I love the #90 titanium needles. And I LOVE Superior Threads!
* Perhaps the best thing abut quilting yesterday is that I think I am finally getting my quilting stitch length consistent. I have been going quite slowly with the machine quilting, so my stitches have been pretty large. I hesitated about going faster, as I can get clumps of thread if I move too slowly. Well, this time everything worked. I went faster and the stitches seemed to keep up with my movement of the quilt sandwich. So generally very pleased.
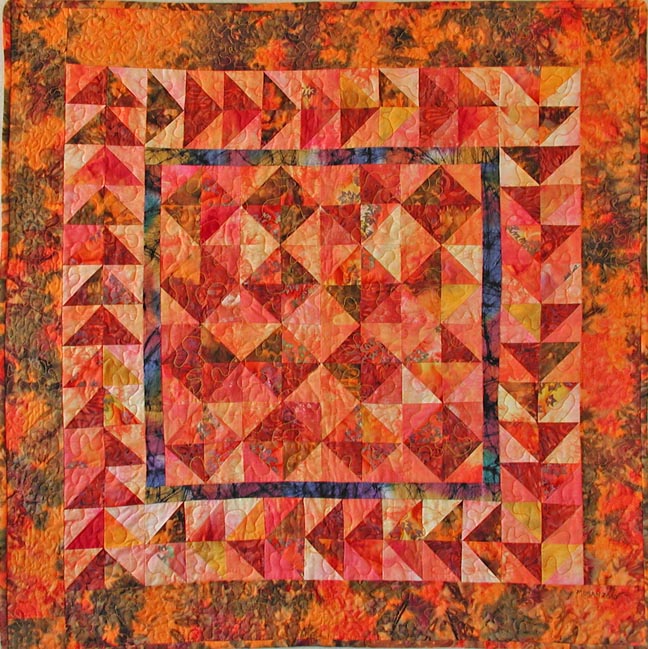
Here’s a close-up of the quilting. The center and first border have a very large stipple, as I wanted to try and get “the heat waves off the pavement” effect. It also helped to flatten all the triangle points. The quilting in the last border is a much tighter stipple, which seemed to make the quilt even “hotter.”
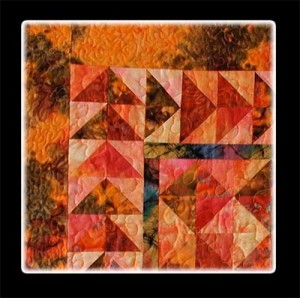 And now, the reveal (yup, too much HGTV….) –
So – anyone interested in a pattern? I am thinking of writing this up if there is interest.
I would love to hear thoughts about what you learn as you finish up quilts! We’re always learning – that’s what makes this so much fun.
Process, Process, Process
“I pledge to talk more about my processes, even when I can’t quite put them in the in words or be sure I’m being totally clear. I’m going to put my thinking and my gut feelings out there.” Check the Process box on the right side of the blog – this is a great idea – while I talk about process a lot, this should really help to keep me focused in the blog.
My Photoshop Fridays are always about process – how I came to what I’m doing with a particular picture. I haven’t talked that much about the process in my quilts, except occasionally on Work-in-Progress Wednesdays. I spent time today on a couple of projects, so I expect to be able to do some show and tell in the next few days. I am particularly happy with my Desert Heat quilt, done now except for the last 12 inches of free-motion quilting and the binding. I am very pleased with how this worked out. You can see its beginnings:
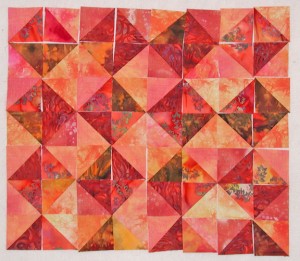 This is where I started last summer when I did my first hand-dyes. Then I started just pulling some stash fabrics to try and create a “hot” quilt to represent the desert. I am pleased to say it is certainly a hot quilt – the quilting lines remind you of the waves of heat off the cement and tarmac.
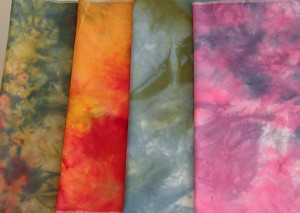 My first attempt at dyeing – in Desert Heat I used the orange-red fat quarter.
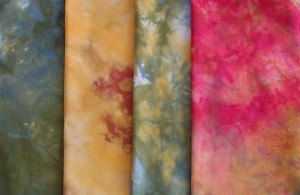 These are a little more pale than in actuality. I used the yellow and reddish one. In fact, I’m going to cut this short and go finish the machine quilting and cut the bias so I can show it tomorrow.
Then I have my lava quilt to finish – I gotta tell ya, sewing on little pieces of lava is tedious and tough! And then I want to get the straps on my purse, becasue after that it is back to the bamboo quilt – I want to enter that into a show whose deadline in September 3. I should have plenty of time…before schools tarts again….and marketing….Linda – go quilt!
Works-in-Progress
I pulled out an old quilt to work on – not that I don’t have plenty of new projects going. This is my “deer quilt,” so called because of the pieced deer at the bottom of the quilt. I found this pattern about 12 years ago when I was learning a lot about piecing. It looked like it would be fun to do – and was, until I got to the deer, which was quite the challenge. The pattern was, I believe, from Pam Bono Designs, in an old book called Rotary Cutter Quilts. I looked on her site and the book seems to be out of print. I got the top pieced in about a month, sandwiched with what I know now to be REALLY cheap batting, and I started quilting it…with invisible nylon thread.
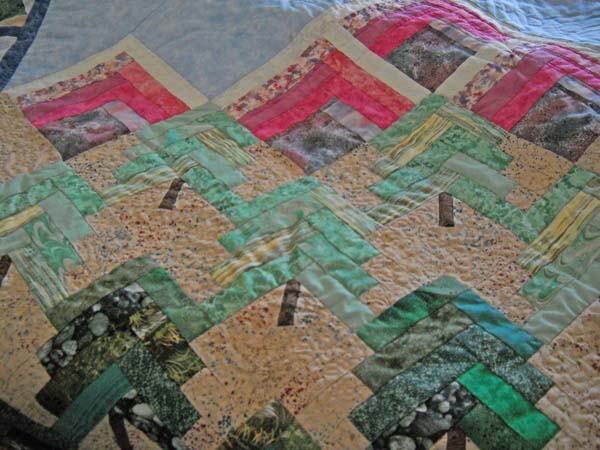
Needless to say, I have learned my lesson with invisible thread – use the poly thread from Superior Threads. I could see the brittleness and yellowing, so I have spent several hours pulling out a lot of old quilting. I had done a lot of free motion quilting in the background, which is literally ground. I loved the fabric choice, and it still looks great 12 years later. This is just a portion of the mountains, and two layers of trees.
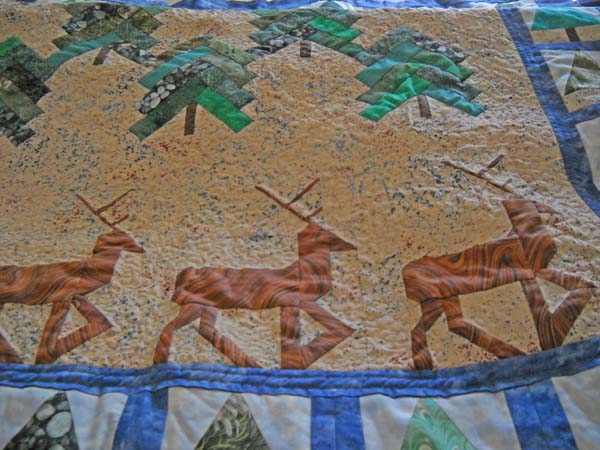
One thing I am noticing is that I am MUCH better at machine quilting, even though I think I have a long way to go. This quilt shows me where I started, and just how I have improved. Here’s the deer:
They are done in a commercial marbled fabric because I loved the texture of the fabric. I am thinking of doing some thread painting on the deer to accent the design. We’ll see….I know I’ll add a little bit of cotton for the tails when I am done….
This second piece was in response to a group of us a couple of years ago (like 5) trying to do a group art piece. I had this in mind for a lava piece, and it was so-so. I serged some edging of black fabric, with the idea of tacking it into place to represent hardened lava. Didn’t really work. Here’s the piece without it:
The left side of this is my new approach – using So Fine black from Superior Threads – another new thread I haven’t tried – and I love it! No broken needles, and just some gentle tension adjustments. This looks more like lava than the earlier version. Here’s another shot:
Color is truer in the top one. I’ll be curious to see when I finally consider it “done,” only five years later….
Geometry and Quilts
I work with a really wonderful geometry teacher, who is trying a new project with her students. Now those of us who quilt are well aware that quilting is just lots and lots of geometry. I wish when I was struggling many years ago (Ms. Foglio….I do not have fond thoughts of you….) that I had been able to do something beyond proofs to see all the cool things that shapes do – and how you can work with them. This is what Lisette brings to her students.
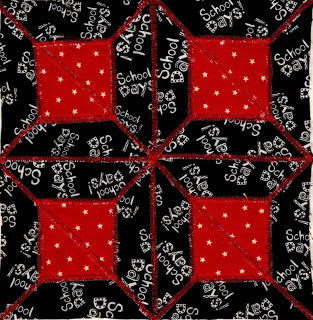
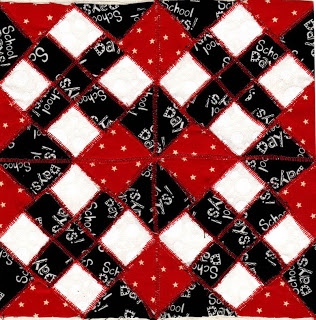
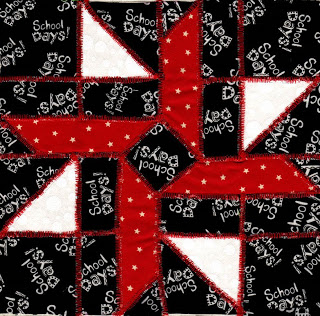
This project is to make a quilt block, but there are a whole bunch of steps needed before the blocks get assembled. First, students had to design a 4-inch block with squares, triangles, rectangles, and trapezoids. Then, with a trip to the computer lab and the help of a wonderful piece of software called Geometer’s Sketchpad, students recreated their block and then had to rotate it and reflect it to look at additional designs. Once they saw how the design would look in its new forms, they were to choose one they liked and print out their now-8-inch block.
This is where color selection now comes in. Lisette bought red, white, and black fabrics, plus some muslin for the base. Our school colors are red and white, and students could now look at color placement for their block. They had to carefully (which with teenagers means a lot of things…) cut out all their pieces and use a glue stick to adhere them to the muslin sheet. At which point several of us with sewing machines would then begin to satin stitch everything into place.
I completed three blocks this evening, and I think the students will be pleased. There are a lot of secondary patterns that show up once everything is stitched into place. Now I discovered, as I fixed my bobbin, that I had absolutely no regular white thread in the house, so I did all the blocks with red. Kinda like them!
And forthwith – here they are…
Dontcha just love all those trapezoids? One of life’s truly unappreciated shapes…..
