Garden Fantasy, continued
I really want to work again on Photoshop and increase my skills. To this end I want to work on a series of actual images from the Tucson Botanical Gardens, and create a kind of fantasy garden. I looked at a show hung in one of their galleries, and the images were beautiful colors, all taken at the Gardens, but nothing really spectacular. I’m hoping to take the Garden a step in another direction.
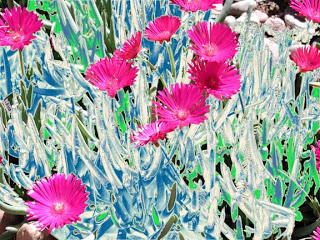
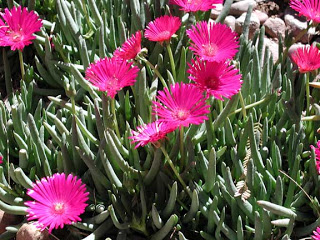
The original photo at the left is of an ice plant, a succulent in this area. We had lots of them on our yard in Phoenix many years ago, but none as healthy as these. Dean did an amazing photo of these. I tried cropping, but I still like it just the way it is. I started playing with some of the adjustments, especially gradients (I really love gradients, and they do so many cool effects). I have learned how to get certain sections (based on color) onto different layers and then adjust them that way. There are about 5 gradient layers to this one, and I really like the “ice” effect to go with the “ice plant.”
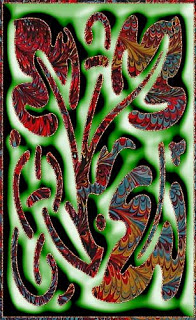
Marbling with Galen
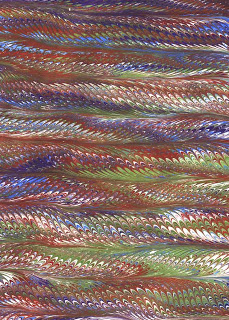
After all these years of being self-taught marblers, we were able to take a workshop with Galen Berry, from whom we get some of our supplies, and who also happens to be self-taught. What a great 6 hours last Saturday!! Even though this was primarily a workshop on marbling paper (and did we ever learn a lot), everything was applicable to us as fabric marblers. We came away with lots of ideas for new patterns, better quality paints, more vibrant colors – and we discovered a number of reasons why some of our sessions aren’t working.
This top piece is what we call our horse feather pattern, and we were able to get good vibrant colors on the paper – in cookie trays, no less. The reds are some of the best that we have tried. We stocked up on a bunch of his paints (especially since we didn’t have to pay shipping), as well as materials for new brushes, some ox gall (which we’ve never used before), and a few other goodies. I’m glad we both did the workshop – there were lots of glances between us as we would have an ah-ha moment, and we couldn’t stop talking about trying new methods.
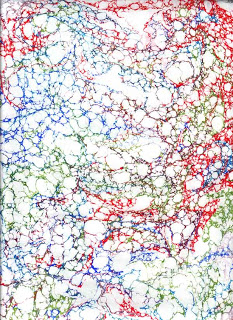
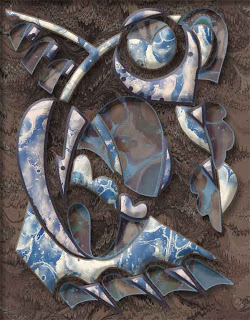
This last is the “Italian vein” pattern, and I used to wonder when I went through marbling patterns, how it was ever done. Well, lay some light layers of paint, and then use a small water sprayer with a little ox gall in it, and it causes the paint to move together into very fine lines. Who knew?
Transforming…
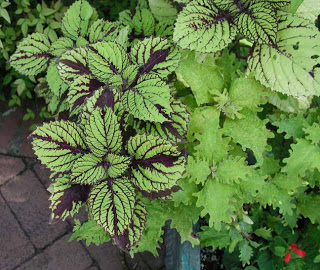
Last fall when we went walking in the Botanical Gardens, there was an absolutely beautiful coleus plant in a pot. I sat and sketched for a bit, trying to get the wonderful purples within the veining, without much luck. That was the picture I pulled up to work on this evening (before I head to bed to nurse this cough). I’ve tried a few different croppings and realized what I don’t like about them. I settled for this one to play with.
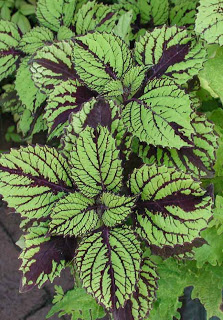
Since I’ve learned about layers and all the effects, I can try new things and “turn them off” when I want to try something else. It certainly frees the creativity. Then I can also combine some of the layers for even more effects. All of this in preparation for a page on the website of garden photos.
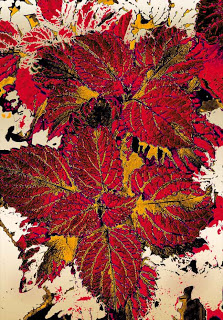
This is a couple of filters combined – ink and accented edges. This is on top of various gradients that I’v already tried. I’m partial to this – I can see it made into fabric – check out spoonflower.com. They’ll print custom fabric, and it’s pretty reasonable. I’ve actually seen (and grown) coleus in these colors.
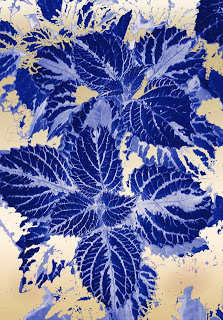
This one reminds me of some of the older fabrics used in Hawaiian shirts. I got quite a few of those effects with the gradients. Also – great possible fabrics. With the bottom one, again very Hawaiian – I can see it in a typical Hawaiian applique. I tried a film grain and cutout filter combined for the effect.
More Playing Around with Focal Point
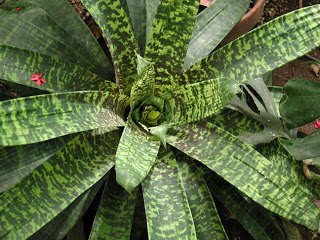
Agaves, aloes, bromiliads – there are so many wonderful plants at the Botanical Gardens. My favorite is the Cape Aloe, but I haven’t worked on those pictures yet. This bromiliad is in the rainforest area that hosts the Butterfly Magic each year. I didn’t make many changes to the composition of the plant, as I like how it spirals in to the center of the plant. What I did do was crop the right a bit, to put the center of the plant just a little off-center itself.What I did do was play with a couple of filters and enhance the texture of the leaves.
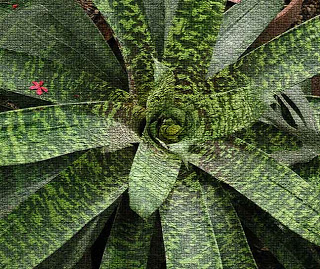 This is the mosaic filter, and I like the roughness it adds to the plant. I still want to play around with this, but I think I’m on to something. I’m intrigued with the little pink blossom just laying on that one leaf.
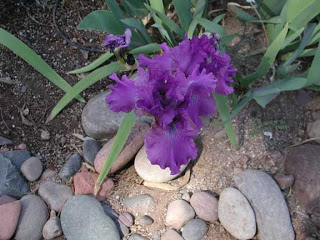
I love irises. I would have a whole garden if I could. At our house on Nastar, we had “desert irises,” which were small delicate blossoms. I love all the colors! The Gardens have a nice area kept by the Tucson Iris Society, and I thought, given the number of plants, that there would be loads of flowers. Evidently most of the plants are new and not ready to bloom. But there was one cluster with HUGE blooms. This is the original.
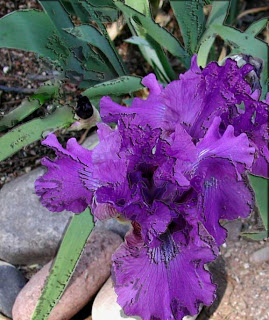
I did quite a bit of cropping, and I think it worked. The new pic really shows the size of the flower, as well as the incredible purples. I had some fun with the filters, as I think it increased the magic of the flower by roughing the texture a little more. Overall I am pleased with the effort with these two.
What’s New – Again….

I started playing with the image again. It feels good to be back working with Photoshop and staying at a task until I am satisfied with it. Here’s the original again:
There are 2 revisions – can’t decide which I like better – and of course, have to take into consideration the way the monitor shows colors….
I am partial to this second one. The contrasts seem stronger, whereas in the first one, too much seems to blend to one color of gray. I don’t know that I’m willing to leave it alone, but for now I am pleased with what I’ve learned.
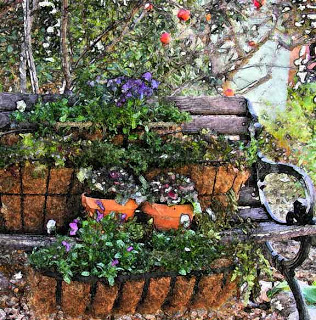
And since Photoshop has such cool effects, here’s one more, using the fresco filter. I love the effect of the “water colors” – certainly in the “fantasy” mode that I am working toward!
What’s New….

So after a rather long hiatus of moving (the 7th time in nearly 15 years), studying (actually teaching myself calculus) in order to pass the secondary school math test, and trying to stay healthy, I am back to hopefully thinking more about art. In November Jane Dunnewold started a blog called Daily Visuals. She committed to taking daily pictures for inspiration, as well as teaching, and I have learned quite a bit.
I have always had a problem with focal points in my quilting. I have been so linear and always tried to work for symmetry (almost to a fault), that it has been very difficult to consciously work at creating a focal point. A few nights ago I was looking through my iPhoto gallery at some of the pics for the Tucson Botanical Gardens, a new favorite haunt. I started with some pics to see what I could do. I think they are good pictures to begin with, but I am looking to develop a great series called Garden Fantasy to offer to the Gardens for a show. Herewith my attempts….
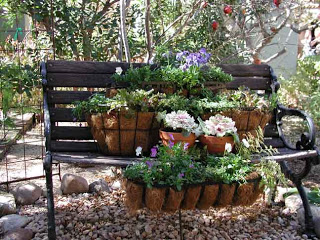
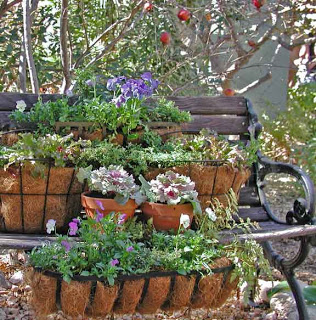
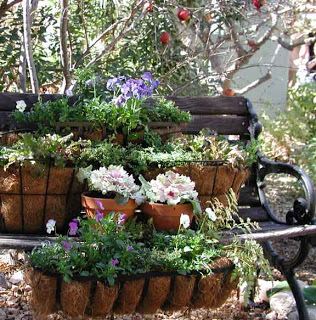
In one of the smaller gardens, there is this wonderful bench. I’m fascinated with the wood grain, as well as the color. Dean tries to frame the pictures as I tell him (suggest, actually), but there wasn’t anything to really grab you in this photo. So I tried cropping to change the basic elements. Here’s the resulting image:
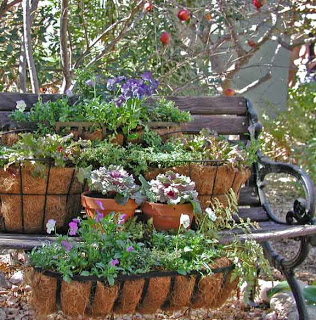
One end of the bench is spotlighted, with the wonderful curved arm. You can make out the red pomegrantes (sp?) in the upper right, and the eye tends to creep there and then come back to the center colors. The bench is more prominent this way, even though you don’t see the whole thing. I tried enhancing the greens of the leaves as well as the rusty-brown of the pots. Now that I can look at them together, while I am pleased with the overall composition, I think I lightened things too much. I like the darkness of the greens and browns in the first image, so I think I have more laying around to do.
Lots to learn….comments welcome!
History of Marbling, Part 2

The article has long been submitted – but here’s the rest of it!
Turning fabric into art was a long time coming. Dean and Linda worked initially to perfect their marbling skills on fabric, experimenting with tools to create patterns, as well as refining the pretreating process. Like the Middle Ages guilds that would keep marbling techniques secret, it was very difficult to get accurate information about tools, combs, and patterns. They learned the basic patterns of nonpareil, bouquet, stone, and chevron and experimented with free-flowing patterns and swirls. They started selling to crafters, quilters, and sewers interested in wearable art.
Marketing was originally limited to local groups, but after hearing the price to set up a website of their own, Linda undertook the steep learning curve of html in order to get their product out to the world. After 10-plus years on line, they worked with a web designer who also was a quilter and digital artist. Linda discovered the need for a more professional online portfolio that emphasized the artistic end of marbling, as opposed to the more commercial one of just selling fabric.
Linda stumbled into “fabric as art” at a meeting of a local critique group. She felt there was more that could be done with a piece of marbling. She and Dean loved creating new fabric, but they wanted a way to enjoy the truly great pieces. One new friend bought some fat quarters and came back to brunch the following week with a quilted and embellished wall-hanging – exactly what had been in the back of Linda’s mind but unable to exactly see. She started cutting and quilting strips and weaving them into unusual forms, leading to their first trunk show at Textures Gallery in Scottsdale, Arizona.
EBay provided an unexpected outlet of getting fabric out into the hands of fabric artists over the last three years. Blogging became a way of recording progress on art pieces, as well as musing about the artistic process. The realization that they wanted to do more than just create fabric to sell to others was no longer what they wanted to do. Dean joked that no fabric was safe from marbling – they would try to marble just about anything to see what would happen. Forget lace, velvet, nylon in favor of linen, velveteen, organza, brocades – and, yes, polyesters.
Now Dean and Linda have a dedicated studio space where potential half-yard pieces hang on the design wall, waiting for discussions about the stories they will tell. One of the most wonderful moments in learning marbling was realizing that a piece of fabric could tell an amazing story through simple lines and spaces of paint and color. One series is called Gaia, and the weavings focus on the abstract beauty of the planet, told through color, line, and shape, accented with quilting and embellishment. Another series explores the power of the mandala, the circle of life. Yet a third takes on the small beauties of everyday nature: the simple rock garden, the quiet pond, the rough water. Then there are other pieces that just have to be: a detailed rock, a comfort quilt for a friend, a stream for a geologist, a tide pool for an environmentalist. Using environmentally safe products and processes, it was a natural leap to develop series based on nature.
This art form has become a major part of their lives. It’s not only a chance to share their creativity with each other, but the two are able to bring different styles to the marbling. Dean is more studied in the dropping of paint, working very methodically. Linda likes the randomness of the paint globs and the unexpectedness of new designs. They love the study of a good piece of fabric to decide just what the finished story will be. They spend weekends when they are not marbling scouring galleries to breathe in art and look for interesting subjects and techniques that could carry over into the marbling process.
They experienced a two-year period where nothing about the marbling process worked. Fabrics from overseas were treated differently and it was harder to remove chemicals. Paint formulas changed, and certain colors were no longer bright and distinct. The local water wasn’t conducive to the marbling process. The worse part was feeling like they would never be able to marble large pieces of fabric again. They would take out special pieces and moon over them, wishing they could create again. One by one they eliminated problems and were finally able to marble once more.
There was no question that this was what they were meant to do together. Facing the two years without their marbling sessions was very difficult. For Dean especially, coming to marbling after years in wholesale/retail, this art form brought out hidden skills. For Linda, this was recognition that she could be an artist in a medium of her own, without criticism from others.
Sharing their art pieces with others still brings a thrill, especially when visitors watch the marbling process. The oohs and ahs as the patterns develop are like notes of joy from others as they see new beauty. One gallery owner, in jurying some pieces, said the work was amazing, gorgeous, and too high-end for her gallery. Feedback is important, and the list of accepted jury shows continues to grow. But for Dean and Linda Moran, and Marble-T Design, it will always be about the creative process.
History of Marbling – Ours, that is….
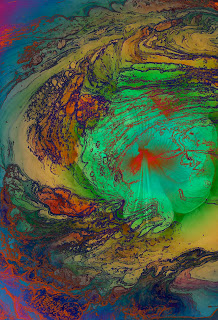
I’m crafting an article for publicity purposes and thought to post it here. Comments are welcome!
The Art of Marbling
Take a 1950’s cool cat with rolled-up t-shirt sleeves and mix with a nerdy, glasses-wearing wallflower. Mix in an untapped artistic ability in both with a centuries-old guild craft that would put practitioners to death for sharing its secrets. Ferment well with all kinds of fabrics and you have the husband and wife marbling team of Dean and Linda Moran.
Marble-T Design began some 15 years ago when Linda saw a book on marbling and wanted to do some for a quilt. This is typical of Linda – find a book, read it, and then do it. Husband Dean looked for months for supplies to humor her, finally ordering them from the back of one of the marbling books – turns out you can only get carrageenan wholesale if you buy in bulk – like at least a ton….
Dean fixed up the first marbling bath for fabric and was hooked – both exclaimed over the original designs coming out on the fabric, and after practice realized just how bad those first attempts were! Linda would come home from school to find that Dean had spent seven hours marbling fabric and hadn’t even realized where the day had gone.
First attempts at quilts were interesting. Linda went into quilting after a fire that destroyed all her needlework and cross-stitch. Within a year she was developing a fabric stash, typical of devoted quilters. She taught herself through books and television shows (thank you, Sewing With Nancy), and created an original quilt using the marbled pieces.
Linda realized color was an issue for her. For the first four or five years, she only put marbled fabrics with black, thinking that was the only way to show off the colors and patterns. Dean, however, was a natural with color, grabbing paint bottles at random and cropping paint circles with abandon. To her amazement, everything he turned out worked; crazy color arrangements she would never have thought of looked like wild Asian patterns. She slowly started to expand her own color sense, finally mixing marbled fabrics of all textures with all kinds of background fabrics.
Once the two moved to Tucson, Arizona for Dean’s health, their marbling got really serious. Linda taught Dean basic sewing terminology, that a yard is 36 inches by 45 inches, based on a fabric bolt. He learned rotary cutting and adapted to a sewer’s vocabulary. Along the way they had some good mentors: Mary Sue and Bruce, the local Bernina dealers, who financed their machines and gave them their first commercial outlet; Janis and Debby, who let them buy anything wholesale at their fabric store and sold their original pattern kits and designs. Janis was forever saying, what about this fabric? And the two would pretreat it, try it, and be ecstatic with the results. Who knew polyester would have a new life and be a great marbling fabric, after so many quilting purists said it would never work.
To be continued….
The Joys of Math – and a Big What-if….
I know, you’re thinking, there she goes again with her oxymorons. How can math be joyful? I used to agree with you, until I started teaching algebra, and especially now that I am preparing for a rather important – and long – math test. The more I study, the more I am amazed at how I can teach myself all this new stuff. I will work on something new, and low and behold I can trace parts of it back to beginning algebra, and then build from there.
The joy is two-fold: I can actually teach myself this math, and I am ENJOYING it! This is fun – I can lose myself for hours in trying to make sense of how the math works. I still want to know why it works, and I also find myself in the position of the kids with the question “When are we ever going to use this?”
Were I to continue with more advanced math, I’m sure I’d see when we use it. For now, I’m having a very different kind of fun and creative work. The big what-if came over the weekend, as I said to hubby that I still amazed myself at being able to do this. My next comment was, “How would life have been different had I been able to ‘do math’?”
That’s a pretty big question. I kind of stunned myself. What would have been available to me? I am always talking to the kids about having options for their futures. At my time, it was nursing, secretarial, or teaching. I didn’t want any of them. Women in mathematics would have been quite a stretch for the early 70s, and I didn’t have the support. I remember how hard it was for me when I was the only female in a political science trip off campus to a county system to look at the day-to-day workings of government. I knew that all the males with me were trying to behave because of a “lady” present, and consequently I felt all the more uneasy.
Maybe all really does work out for the best. I love what I am doing, and with teaching algebra I know I am providing valuable options for children’s futures. Go and be whatever you want – revel in that ability.
That said, I want the test over so I can get back to making some art!
Ahhh, The Weekend!
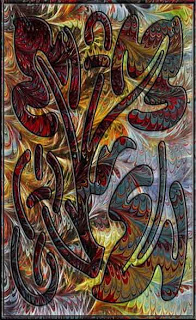
Ann wrote “Can you describe how you made the part of the image that rests on top of the marbled fabric – are they all layers in Photoshop?”
First, it’s really cool to get comments!
Second, I’m trying to remember all the steps. If any of you are interested in working in detail with Photoshop, look seriously into becoming a member of NAPP – National Association of Photoshop Professionals. There are loads of tutorials on just about anything you can think of, and they are very easy to understand.
This particular piece used marbled fabric for the background from a photo we took. Then I looked for an image in the Photoshop custom shapes. This one appealed – it just seemed like it would work with this particular piece of fabric. The custom shape was on a separate layer. One of the first things you learn in Photoshop is to make sure you do things on different layers, and then you can delete the layers, turn them off, and add more filters and “stuff” to different layers.
I adjusted the photo of the fabric to increase colors, and then I added a gradient layer (I LOVE gradients!). Then the custom image, and I started embossing, adding shadows, and just generally playing around until I had something that really appealed.
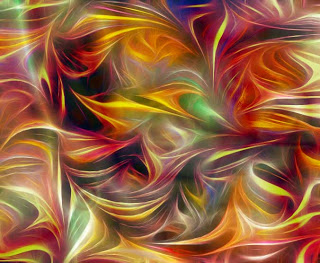
One of the things I have discovered is that the lines of the marbling pattern do some very interesting things as they are manipulated. Here’s a piece our foster son called “Ribbon Candy on Crack” – lots of playing around with color and pattern.
Auto-Pilot 2
Just because I am doing math for the next 18 days, I can still look at work and enjoy it and think about what I will do next….
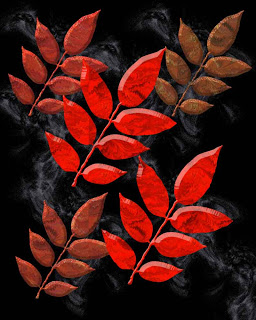
This is as a result of playing around with a couple of new brushes downloaded from NAPP. It’s still not a wow, but I can keep thinking about it….I love trying to work with autumn colors and trying to get the brilliance of a New England September. I’m learning how to paste marbled fabrics into areas, and then manipulate them from there – something I have been wanting to do for YEARS!
From a Dover book of public domain art deco images – am having a lot of fun with these. I can use some of the images and then totally turn them into something else entirely. I am thinking that these will be a great line of prints and cards on down the road….
This is learning how to use the pen tool – something that has been very difficult for me. I wanted to see if I could get some good “fish” images to work with for some upcoming shows.
Playing around with some stock images, just to see what I could do. This gives me a great chance to try out filters and brushes and all the various adjustments that can be done – and deleting or saving whatever I want – better than an eraser!
I am quite partial to the work Suzan and I did on this one – getting ready for Fish Follies next year! I already have one fiber piece ready to go, another in the works, and some plans for digital entries.
On Auto-Pilot
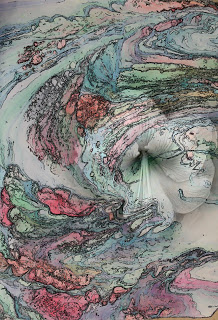
This is one of my favorite digital images, created from our marbled fabric. Hubby did the photography of the flower, which just seemed to want to jump into the background. I have several iterations of this, but there’s something about the whiteness that really appeals.
But all I can do right now is just look and think about what I could do. I am on auto-pilot until January 24 when I take a major math test. I am spending several hours each night (as well as a huge chunk of winter vacation) reviewing and learning more math. I want to pass this test the first time around, for several reasons: I want to keep my current position for next uear, as I really love it, and I want to be done with studying so I can get back to more art-making!
I’ve created a couple of new digital pieces that I really like, and I bought a couple of the Dover books with free clip art images. I played around with a couple and was quite pleased with them. In fact, after nearly 14 years, I finally figured out how to do a particular thing in Photoshop! It just happened…which is pretty serendipitous. I want to do more!!!!
But it is auto-pilot for another 18 days….that’s a lotta math……
Art with Abandon

We were getting ready last week to do some marbling. We hadn’t done any in a bunch of weeks, and we hadn’t put anything up on ebay. We were really missing the actual making of fabric. During our New Year’s trip to Scottsdale, we both said we need to stop being so careful with the fabrics and designs. We always plan colors, patterns, and critique every piece.
We need to go back to the abandon and passion we had when we were first learning our craft. Stop worrying about perfect pieces – just have fun with creating.
I was reading an entry about how to be more creative and noticed this quote:
“Some of my best days producing creative material is when I stopped caring if I would produce something which was incorrect. Don’t worry about being right or wrong – just go for it. Your natural output uninhibited by concern for creating something correct or incorrect will always produce creative results.”
So bring on the paints, the different types of fabrics, grab a comb, start dropping paint, and stop worrying! Looking forward to using the big tray again!
The Beauty of Mathematics
The more I work with mathematics, the more entranced I am by how everything works together. I’m trying to decipher and understand conic sections, only to find a little bit of the quadratic hiding amidst all the formulas. I had no idea this stuff could be so beautiful.
I know, I know, many of you are thinking oxymoron, and at one time I would have so agreed with you. Geometry was a killer in high school, and I still fear proofs….even though I tend to be a pretty linear person, very concrete – I have grown so over the years in being able to use more parts of my brain! Yet now I look at the geometry and am amazed at how little information you actually need to make sense of so many practical problems. 90, 180, 360 – basic degree measurements needed, knowing what happens with angles and parallel lines – you can now do so many different computations.
In one day less than three weeks, I face my biggest math challenge ever – I am taking the high school math qualifying test, because according to the Bushies, I am not highly qualified to teach algebra without proving it through this test. Here’s the kicker – all my math knowledge now is pretty much self-taught. I never had any of those required courses. So I am teaching myself yet again all I hopefully will need to be able to do. And….
…I’m loving it! I look at something that seems so foreign, find a little piece that looks familiar to what I already know, and work from there. I have “ah-ha” moments all the time…so that’s why that works, and so on.
“Course, I still dream that the first thing Obama does on January 20th is repeal all the testing we have to do to be highly qualified and make it effective immediately. The $130 I would lose would be so worth it!
I’m Baaack…..
So school is back, and I actually accomplished some fiber before the year started. I am now teaching high school algebra, much to the amusement, I’m sure, of my family. I love being back at the high school level, seeing kids from middle school, and working with competent people. A FAR cry from the incompetence of last year.
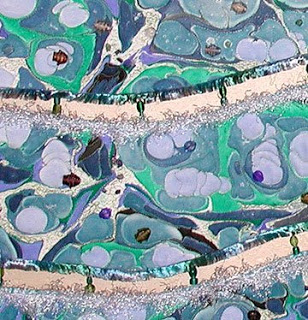
I finished a piece I started nearly three years ago, but the fabric had been made for close to 7 years. I quilted two of the three strips before I ran out of backing. I ordered a special hand-dye for the back, but that was it. This summer, after the move, I finished the third strip (12 hours’ worth of trying to find everything I needed after three years!). Then I played with the beading and all the fish Ali bought me from Hawaii. I had yarns I wove for various parts of the strips I had been collecting over two years – they look fabulous with the piece. So here goes:
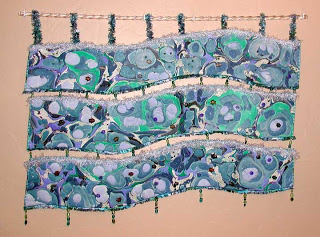
And here’s a close-up:
