Work in Progress – More FMQ
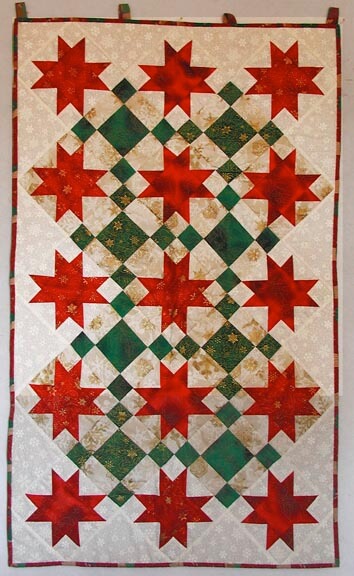
Sewing sewing sewing…lots of thinking and planning and actual sewing. Loose ends galore, but I am slowly working through them. I don’t have enough projects, so I took apart a second Christmas quilt I made when I was practicing rotary cutting and piecing from either Better Homes and Gardens or American Quilting. I pulled it how for the decorations, but the quilting is appalling, given what I know now, so I took it all apart one night. This time I was smart enough to take a “before” picture. The lighting is off, as the top portion is as white as the bottom part.
One of the things I learned in doing this quilt is that we have borders for a reason. When I did the layout, I was surprised to see that I had unwittingly planned the stars on a white and a beige, and everything went together perfectly. It looked fine to me, I didn’t think I needed a border. Once I got the binding on, the quilt just looked so unfinished. Since all the Christmas fabrics are out again, I know I can get some more of the red and green that will be the same tones. I also don’t like the backing – too “dull” in color, and doesn’t really work with the reds and greens. So this goes on the list.
I took advantage of the sales on classes at Craftsy, and I bought two of them: Cindy Needham and Jane Dunnewold. I am five lessons through Cindy’s already, and it has been more than worth the money – learned loads so farm, and as I progress, I will have several quilts that I can practice on.
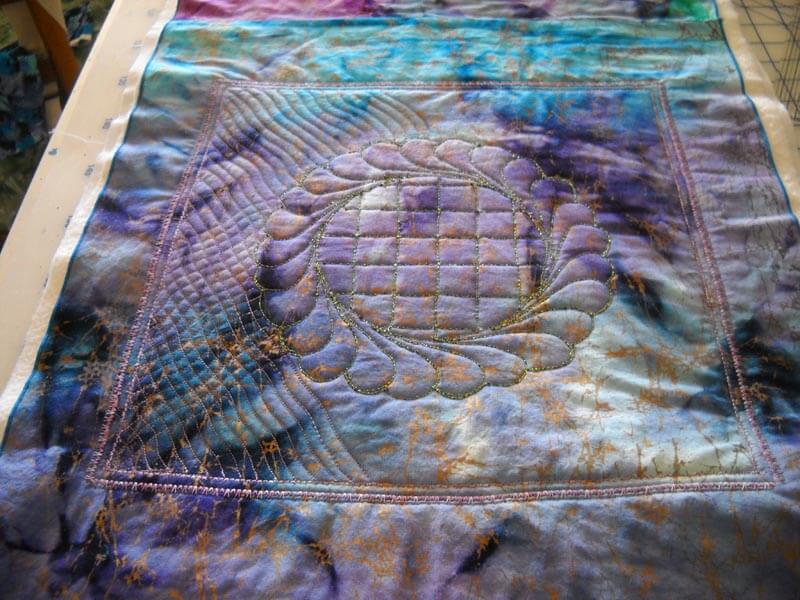
Including the two dresser scarves to complete the set in our bedroom. I started the long one on one end, planning to do a lot of experimentation. So I used some Razzle Dazzle thread in the bobbin and did a complete stencil in the middle of that fat quarter. Not bad. Then I was thinking about how to finish off this one-third. I squared off the stencil motif and did a small decorative stitch around the stencil. Wasn’t happy with it, so I made the decorative stitch larger and went around again. It certainly stabilized the quilt. The I decided to do a variation of a tangle, with curved criss-crosses. Biggest lesson? Space the lines further apart…..this is going to take a while to finish….Here’s progress so far.
It will be good to use these scarves to practice all the FMQ patterns that Cindy will be showing. And then I have this “portrait” project to work on….and the pattern….and the list goes on…..


I’m taking Cindy needham’s class on craftsy, too. My goal is to eventually do a wholecloth quilt and enter it in a show, it scares me just to think of that! What is Razzle Dazzle thread? it sounds fun to work with! You must be doing the sewcalgal challenges, too, I recognize some of the techniques you are using! I’ve learned not to make lines too close, too, because it tends to make whatever it is you’re making really stiff.
Hi Laura -sorry for the delay in responding…..it’s been a rough couple of weeks. First, Razzle Dazzle is a special bobbin thread from Superior Threads. They have lots of colors. I used it on the green in the circle of feathers. All of the Superior Threads are wonderful. Isn’t Cindy’s class amazing? I have one lesson still to look at, and I am going to try cathedral windows on the next part of my dresser scarf. I do think I could attack a whole cloth quilt with the right fabric – wish I had even 10 percent of Cindy’s stencils! I will miss the fmq challenges – I have learned so much, and now thinking about the quilting is becoming my favorite part of the quilt!Thanks again for reading!