5 Things I’ve Learned About Thread Play
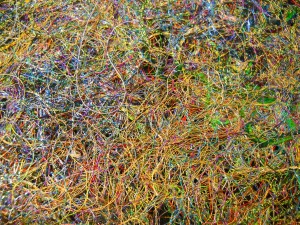
One of the things we got to do at our conference was look at samples of thread work, particularly creating “fabric” from just threads of all kinds. Heather, fondly known as Mother Superior, had two spectacular vests created just from threads. Cindy taught us how to use Dissolve to make a sandwich of threads and then stitch over them and run water over the Dissolve, which would do just that. She made it look so easy.
Well, mine wasn’t nearly as gorgeous as this top piece – part of one of Heather’s vests. Mine is about three inches square, with loose threads all over, and barely staying together. But I did learn a great deal:
1. Don’t do your first piece with nothing but shiny threads. Those shiny threads are incredibly slippery and ease out all over the place.
2. Don’t try to be so structured when you stitch on top of the Dissolve to hold everything together. I tend to be so linear sometimes, that when I was done, the grid holding everything together was way too noticeable.
3. Refer to your references when choosing your thread, bobbin, and tension. My lessons were not lost on me when I pulled out my reference sheet from Cindy’s class to check what to use in my bobbin (Bottom Line) with Glitter in the top, and to be sure to set my bobbin tension at a one to start.
4. Check the needle size. I can remember the very first time I worked with some metallics (not Superior’s) – I had no idea a) the thread had to come off the spool a certain way, and b) I had to use a larger needle. I do now, and it was flawless.
5. I need to let my inner artist loose. Try something with lots of different threads on top of the Dissolve – like trying some bobbin work – which I’ve only done twice, and I do plan on doing lots more.
